Organisk WordPress Documentation
The Documentation
- Created: 04/27/2017
- Latest Update: 04/27/2017
- By: YoloTheme
BESTRUCT GENERAL
Organisk Instruction
Firstly, we would love to send our great thanks to you for purchasing Organisk. This documentation covers almost everything to guide you step by step from the start to have your site on air. We encourage you to read thoroughly all sections before you go on.
WordPress Information
Before installing this theme, please make sure that you have a working WordPress version already installed. For further guides to install WordPress, please find in below useful links:
- WordPress Codex: General info about WordPress and how to install your server.
- Instructional Video: How to create video by Woo Themes
- First Steps With WordPress: Multiple topics about WordPress.Follow this video tutorial on how to install Organisk theme & plugins
- FAQ New To WordPress:Popular FAQs about WordPress.
Download Theme Package
When our theme is purchased successfully from ThemeForest, you will need to download theme package to use. To download the package, please login to your ThemeForest account, navigate to “Downloads”, click the “Download” button in the left side of the theme, choose “All files & documentation” to download our theme package to your computer. The theme package includes:
- Yolo_Theme: Includes yolo-organisk.zip and yolo-organisk-child.zip file that consists of everything you need to install the theme.
- Document Folder: Includes Organisk Documentation file that helps you get to know about Organisk and guides you to build your site with our theme.
- Release_logs file: Includes the licensing files of ThemeForest purchase.
- Demo Content Folder: Includes the .xml file and Revolution Slider sample data which you will need to import our demo data.
Requirements for Organisk
To use Organisk theme, you must be running WordPress 3.6 or higher, PHP5 or higher, and MySQL 5 or higher. Follow the checklist below to ensure that your host can work well with Organisk theme:
- Your web host has the minimum requirements to run WordPress.
- They are running on the latest version of WordPress.
- You can download the latest release of WordPress from official WordPress website.
- You do create best secure passwords for FTP and Database.
Recommend PHP Configuration Limits
When you are installing Organisk theme, you can meet many issues such as: demo content fails when you are importing and other issues. They are related PHP Configuration limits. The best solution is that you need to increase the PHP limits. You can do this on your own or contact your hosting provider learn more about this:
- upload_max_filesize = 256M
- post_max_size = 256M
- max_execution_time = 3000
Please follow THIS BLOG learn more about this.
Video Tutorial
Install Organisk Theme
Import Organisk Sample Data
Configure Header Style Layout
INSTALLATION
There are two ways to install theme. It belongs to the way you choose your preference.
Install Theme via WordPress
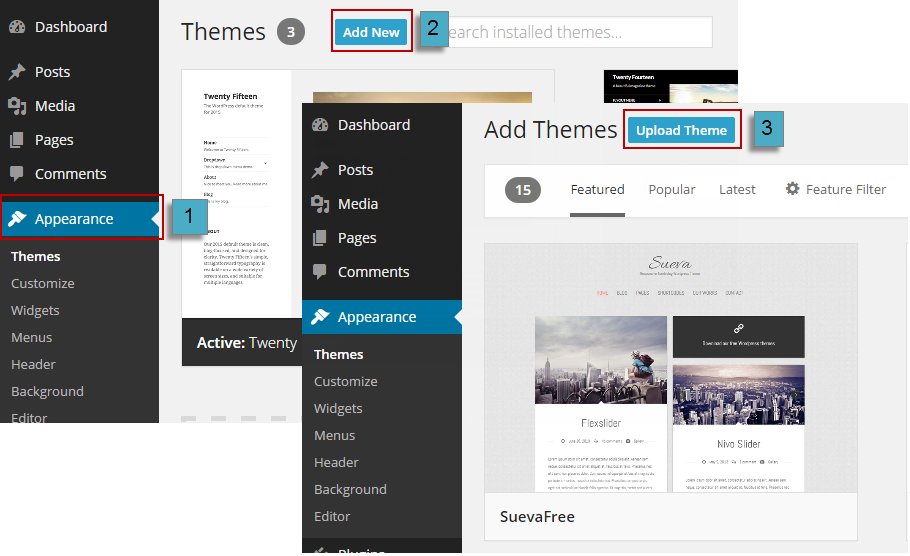
- Step 1: Login to your WordPress Admin Panel, navigate to Appearance > Themes
- Step 2: Click Install Themes on the top > hit Upload button.
- Step 3: Find yolo-organisk.zip file on your computer and click Install Now
- Step 4: Once uploaded, activate the theme. Go to Appearance > Themes and activate it.
- Step 5: Organisk > Purchase Code Verify: Enter the code in ThemeForest Purchase Code.
- Step 6: Then you will see a notification message to activate the required & recommended plugins: Contact Form 7, Revolution Slider, WPBakery Visual Composer, etc. Follow the steps to install and activate each plugin.
Note: If you see this message “Are You Sure You Want To Do This” when installing yolo-organisk.zip file via WordPress, it means that you have an upload max file size limit. Please try to read this blog to find a solution for your website.
Install Theme via FTP
- Step 1: Login to your hosting space via an FTP software.
- Step 2: Unzip the yolo-organisk.zip file and ONLY use the extracted yolo-organisk theme folder.
- Step 3: Upload the extracted Organisk Theme folder into wp-content/ themes folder.
- Step 4: Activate the newly installed theme by going to Appearance > Themes and clicking the Activate button.
- Step 5: Then you will see a notification message to activate the required & recommended plugins Contact Form 7, Revolution Slider, WPBakery Visual Compose, etc. Follow the steps to install and activate each plugin.
Follow this video tutorial on how to install Organisk theme & plugins
Plugin Installation
Here is the list of plugins that will come together with our theme when it is activated. It is recommended to install and activate these plugins based on your own need:
- Contact Form 7: Just another contact form plugin. Simple but flexible.
- Duplicate Page: Duplicate Posts, Pages and Custom Posts using single click.
- Meta Box: Create custom meta boxes and custom fields for any post type in WordPress.
- Recent Tweets Widget: Recent Tweets Widget plugin for Twitter API v1.1 with Cache. It uses the new Twitter API v1.1 and stores tweets in the cache. It means that it will read status messages from your database and it doesn't query Twitter.com for every page load so you won't be rate limited. You can set how often you want to update the cache.
- Redux Framework: Redux is a simple, truly extensible options framework for WordPress themes and plugins.
- Slider Revolution: Slider Revolution - Premium responsive slider.
- WooCommerce: An e-commerce toolkit that helps you sell anything. Beautifully.
- WP Instagram Widget: A WordPress widget for showing your latest Instagram photos.
- WP Modal Login: A highly configurable and versatile modal (pop-up) login form.
- WPBakery Visual Composer: Drag and drop page builder for WordPress. Take full control over your WordPress site, build any layout you can imagine – no programming knowledge required.
- YITH WooCommerce Compare: YITH WooCommerce Compare allows you to compare more products with WooCommerce plugin, through product attributes.
- YITH WooCommerce Wishlist:YITH WooCommerce Wishlist allows you to add Wishlist functionality to your e-commerce.
- YL WooCommerce Products Layouts: A plugin that helps you style options for product display in Woocommerce.
- Yolo Organisk Framework:The Yolo Organisk Framework plugin.
Import Demo Content
The easiest way to import our demo content is to use our Demo Content Importer. Our importer will give you all pages and posts, several sample sliders, widgets, and more.
Import All Content Demo
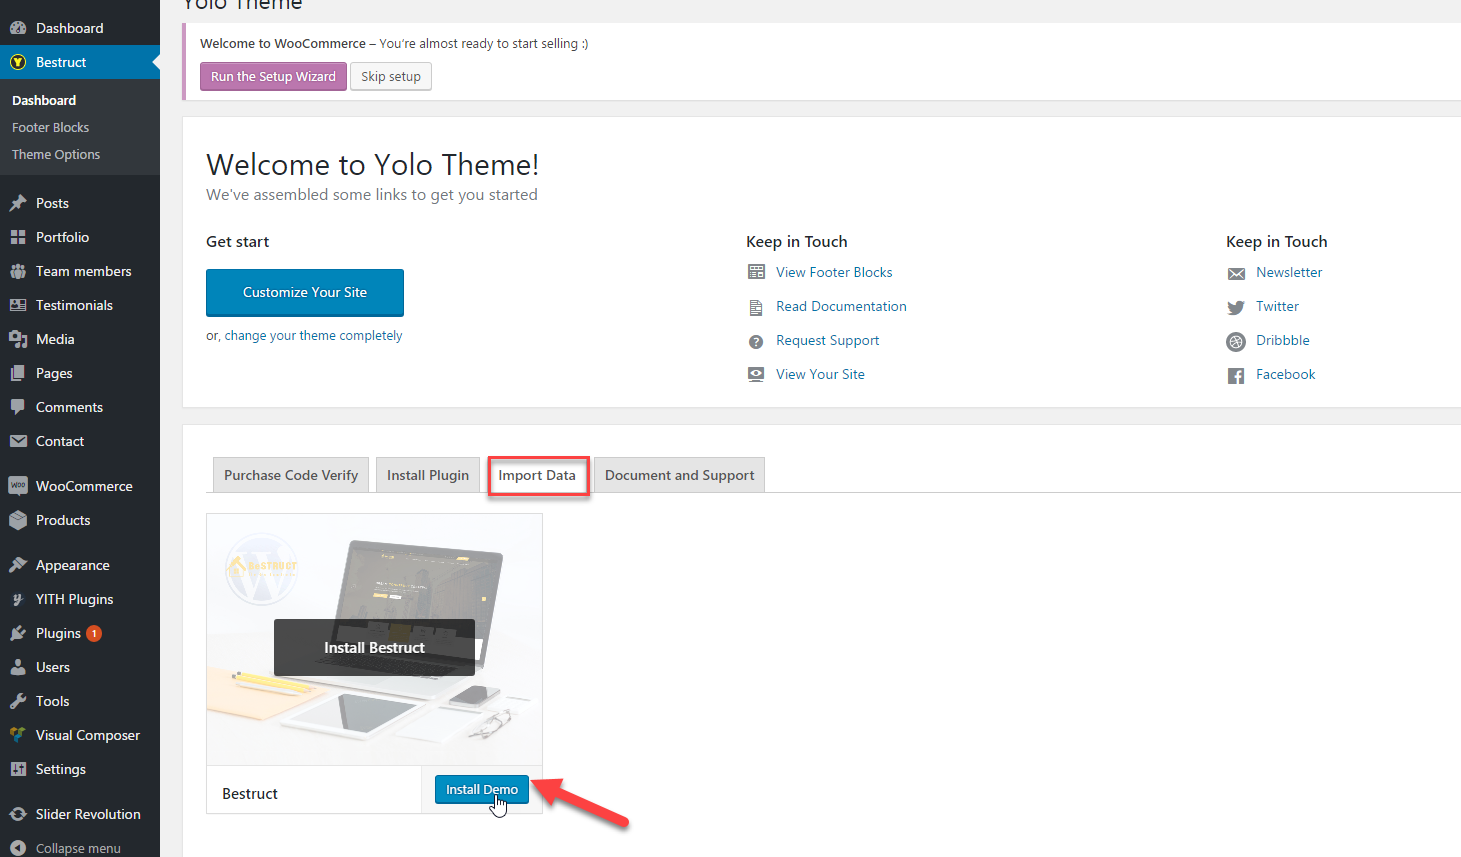
- Step 1: Make sure that you have installed and activated our theme & all plugins before importing.
- Step 2: Navigate to Organisk > Import Demo > Click Install Demo
- Step 3: It can take a few minutes to import everything. Please be patient and wait to complete. Once it loads, you will see a Success message below the tabs.
- Step 4:All are done, you will have a website like our demo site.
Follow this video tutorial to import sample data of Organisk theme
Update Theme
Auto Update
Please follow these steps to update this theme automatically:
- Step 1: Navigate to Plugins > Add News > Upload, find and install envato-wordpress-toolkit.zip file. You can go to this LINK to download the plugin.
- Step 2: To establish an Envato Marketplace API connection, navigate to the Envato Toolkit page and insert your Marketplace username and secret API key in the designated input fields. To obtain your API Key, visit your "My Settings" page on any of the Envato Marketplaces.
- Step 3: Once the API connection has been established, you will see a list of themes that can be auto installed. If you don't see any themes and are certain you've done everything correctly, there is a good chance the theme's author has not updated their theme to be available for auto install and update. If that's this case, please contact the theme's author and ask them to update their theme's information.
Manual Update
You can also update the new version in traditional way:
- Step 1: Backup all custom files (files which you have edited some code). Or you can use Child Theme to save all custom files
- Step 2: Deactivate current theme by going to Appearance > Themes and activate any other themes such as the Default WordPress 4.x Twenty Fourteen.
- Step 3: Update and re-install new version.
Basic Setting
If you’re new to WordPress, you’ll probably see that your site after importing data is completely different from our demo
It’s because some basic settings are needed on WordPress site. If you know where the issue is and how to fix it, please skip this section.
Setup Home Page & Blog Page
To assign Homepage and Blog page, please follow these steps:
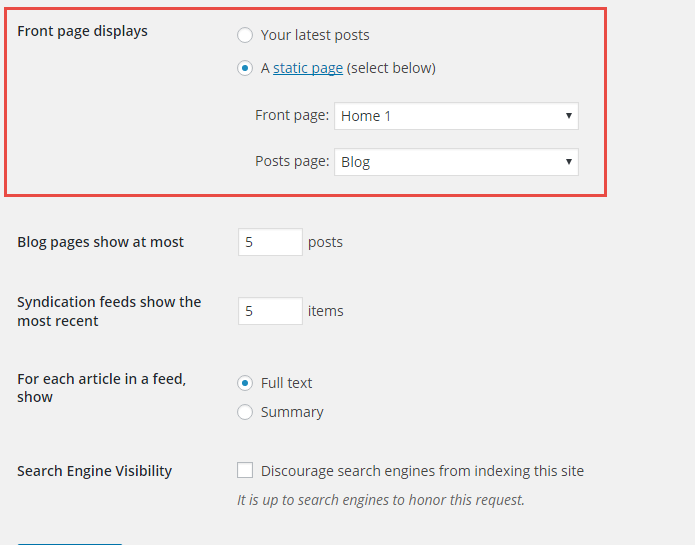
- Step 1: Navigate to Settings > Reading
- Step 2: Select Front page displays: A static page, then choose Front page and Posts page from dropdown list
- Step 3: In addition, you can choose the number of posts on Blog pages show at most option.
- Step 4: Click Save to save configuration.
Assign Menu
Please go to Appearance > Menus, then find Menu Settings > Theme Locations at the bottom.
Check the Primary Menu, then save it. This action will assign the menu “Main Menu” to the location Primary (the main menu) on our theme.
You can see more details at: http://codex.wordpress.org/Appearance_Menus_Screen
Change Permalink
Please go to Permalinks setting: Settings >Permalinks, then change the Common settings to Post name.
You can see more details at:http://codex.wordpress.org/Using_Permalinks. After these steps are done, your site will look like our demo, you can move on to process to build your content.
THEME OPTIONS
Based on Redux Framework, Organisk provides Theme Options helping users easily to control WordPress theme. There are many options in Theme Options, each option has a mission to make your website nicer and more eye-catching. You absolutely go to Organisk> Theme Options to see all options. And do not forget to follow this section to see description of each option in Theme Options.
General Setting
General Setting section allows you to configure general pages such as select page preloader or configure enhancement or 404 page.

General Setting
- Page Preloader: Select Page Preloader from drop down list for your website. Leave empty if you don't want to use. When selecting one page preloader type, you need to select Preloader background color and Preloader spinner color for your website.
- Preloader background color: Set Preload background color from color table.
- Preloader spinner color: Pick a preloader spinner color for the Top Bar.
- Smooth Scroll: Turn On/Off smooth scroll.
- Back To Top: Turn On/Offback to top button.
- Layout Style: Select layout style for your website including Boxed, Wide and Float style. If selecting Boxed style, you need to configure Site Width(%), Site Max Width(px), Body Background Mode and Body Background for your website.
Enhancement
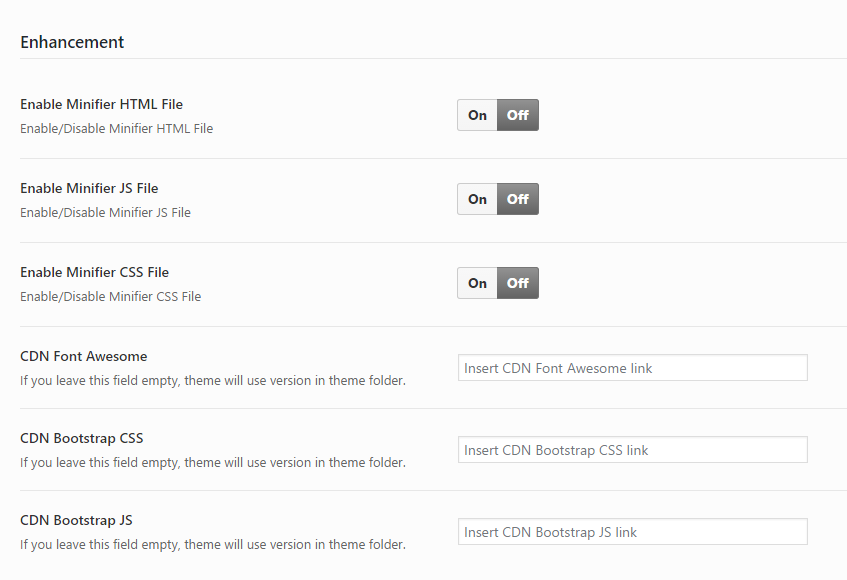
Enhancement section will help you to enable the maintenance mode and enable JS, CSS file for your website.
- Enable Minifier JS File: Turn On/Off Minifier JS file.
- Enable Minifier CSS File: Enable Minifier CSS File.
- CDN Font Awesome: Insert CDN Font Awesome link. If you leave this field empty, theme will use version in theme folder.
- CDN Bootstrap CSS: Insert CDN Bootstrap link. If you leave this field empty, theme will use version in theme folder.
- CDN Bootstrap JS: Insert CDN Bootstrap JS link. If you leave this field empty, theme will use version in theme folder.
404 Setting
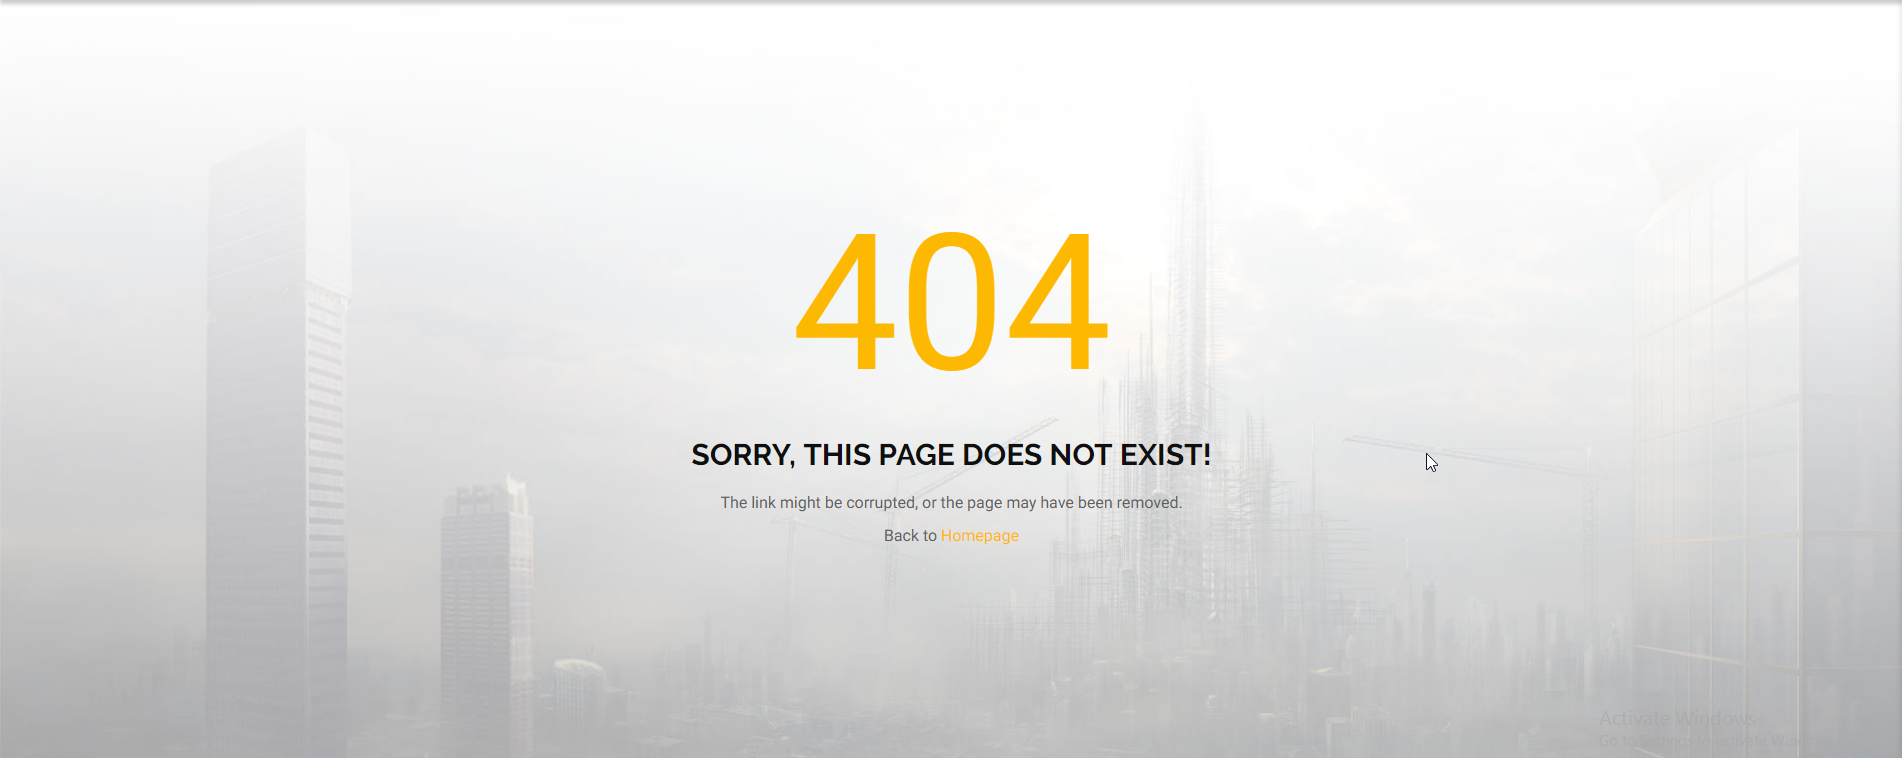
404 section allows to configure 404 page by adding title, background image for 404 page.
- Page Title 404: Enter the page title for 404 page.
- SubPage Title 404: Enter sub page title for 404 page.
- Background 404 page: Upload your background image for 404 page.
- 404 Heading : Enter 404 heading.
- Go back label: Enter the name of button to go back page you want.
- Go back link: Enter the link URL which will be redirected if user click "go back label".
Page Setting
Page Setting section will help you to configure main page on your WordPress site. There are 3 sections you need to configure on Page Setting including Archive page, Search Page and Single Blog section.
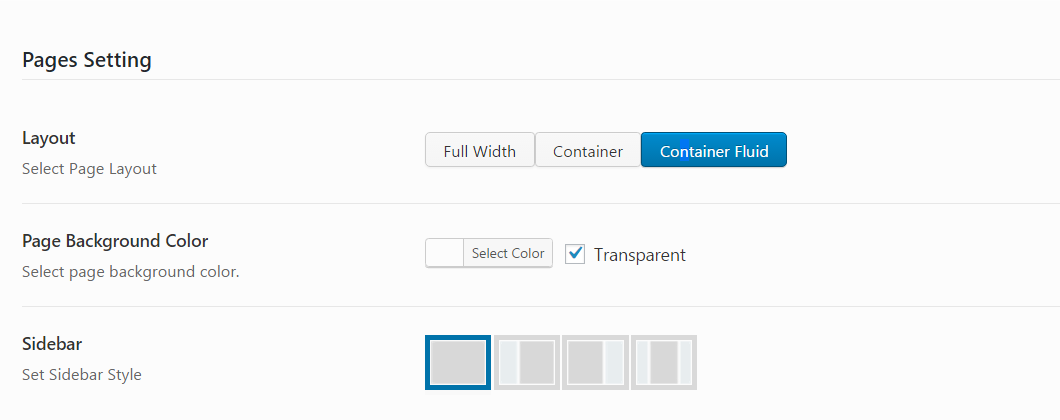
Pages Setting
Pages Setting
- Layout: Select page layout for your page including FullWidth, Container and Container Fluid.
- Page Background Color: Select background color for your page by choosing color from color table.
- Sidebar: Select sidebar style for your page including Left, Right, No-Sidebar, Left and Right sidebar.
Archive Page
Archive page section provides many options which will help you configure archive page for your WordPress Website.
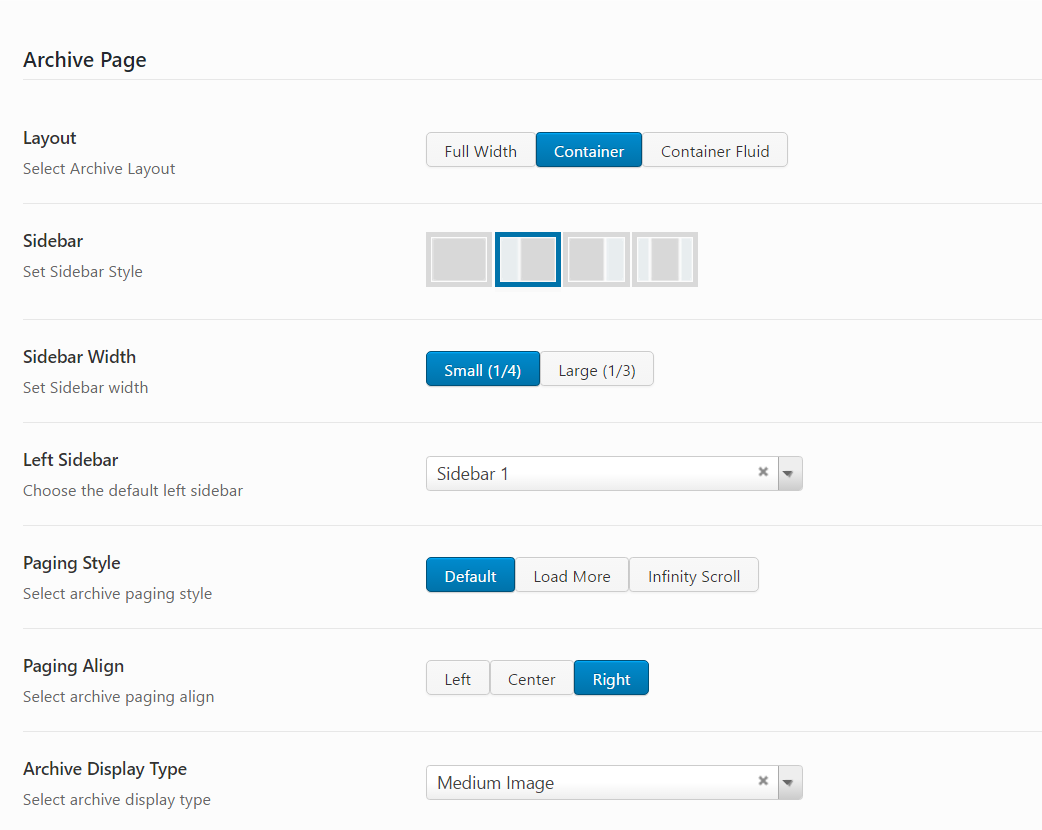
Archive Page
- Layout: Select page layout for your archive page including FullWidth, Container and Container Fluid.
- Sidebar: Select sidebar style for archive page including Left, Right, No-Sidebar, Left and Right sidebar.
- Sidebar Width: Select the width of sidebar for archive page. You can choose Small(1/4) or Large(1/3) for your archive page.
- Left Sidebar: Choose the default of left sidebar from drop down sidebar list.
- Paging Style: Select archive paging style including Default, Load More and Infinity Scroll style.
- Paging Align: Select archive paging align including Left, Center and Right style.
- Archive Display Type: Choose Archive Display Type for your archive page including Large Image, Medium Image, Grid and Masonry.
Search Page
Search Page section allows you to configure all options of Search Page.
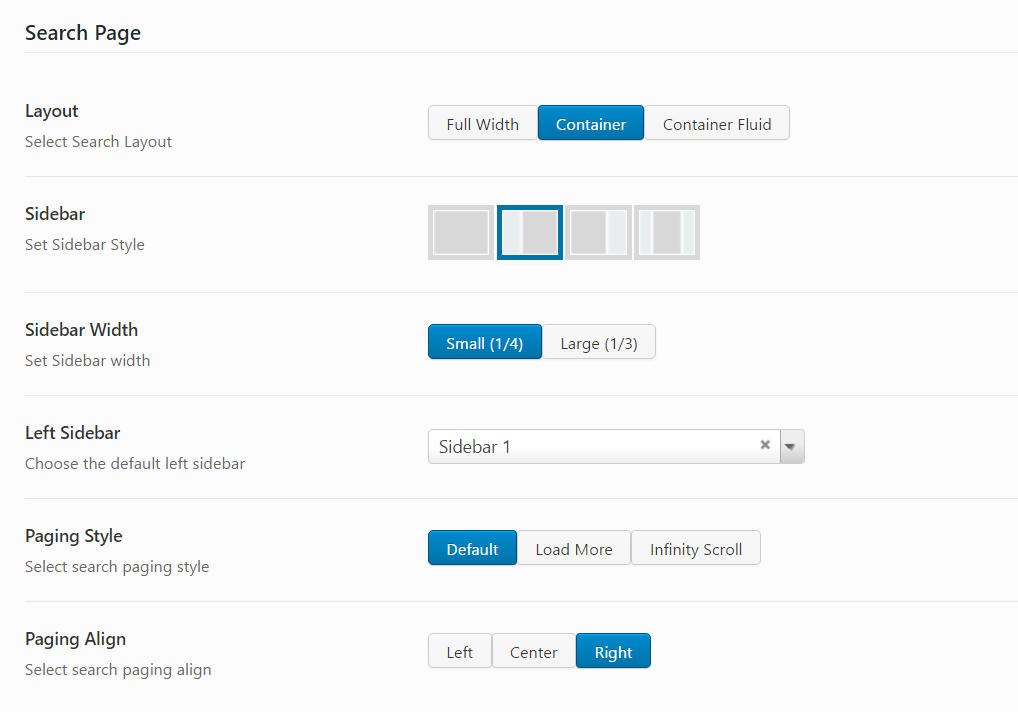
- Layout: Select page layout for search page including FullWidth, Container and Container Fluid.
- Sidebar: Select sidebar style for search page including Left, Right, No-Sidebar, Left and Right sidebar.
- Sidebar Width: Select the width of sidebar for search page. You can choose Small(1/4) or Large(1/3) for your search page.
- Left Sidebar: Choose the default of left sidebar from drop down sidebar list.
- Paging Style: Select search paging style including Default, Load More and Infinity Scroll style.
- Paging Align: Select search paging align including Left, Center and Right style.
Single Blog
Single Blog section allows you to configure single blog page. For example: layout, sidebar, etc.
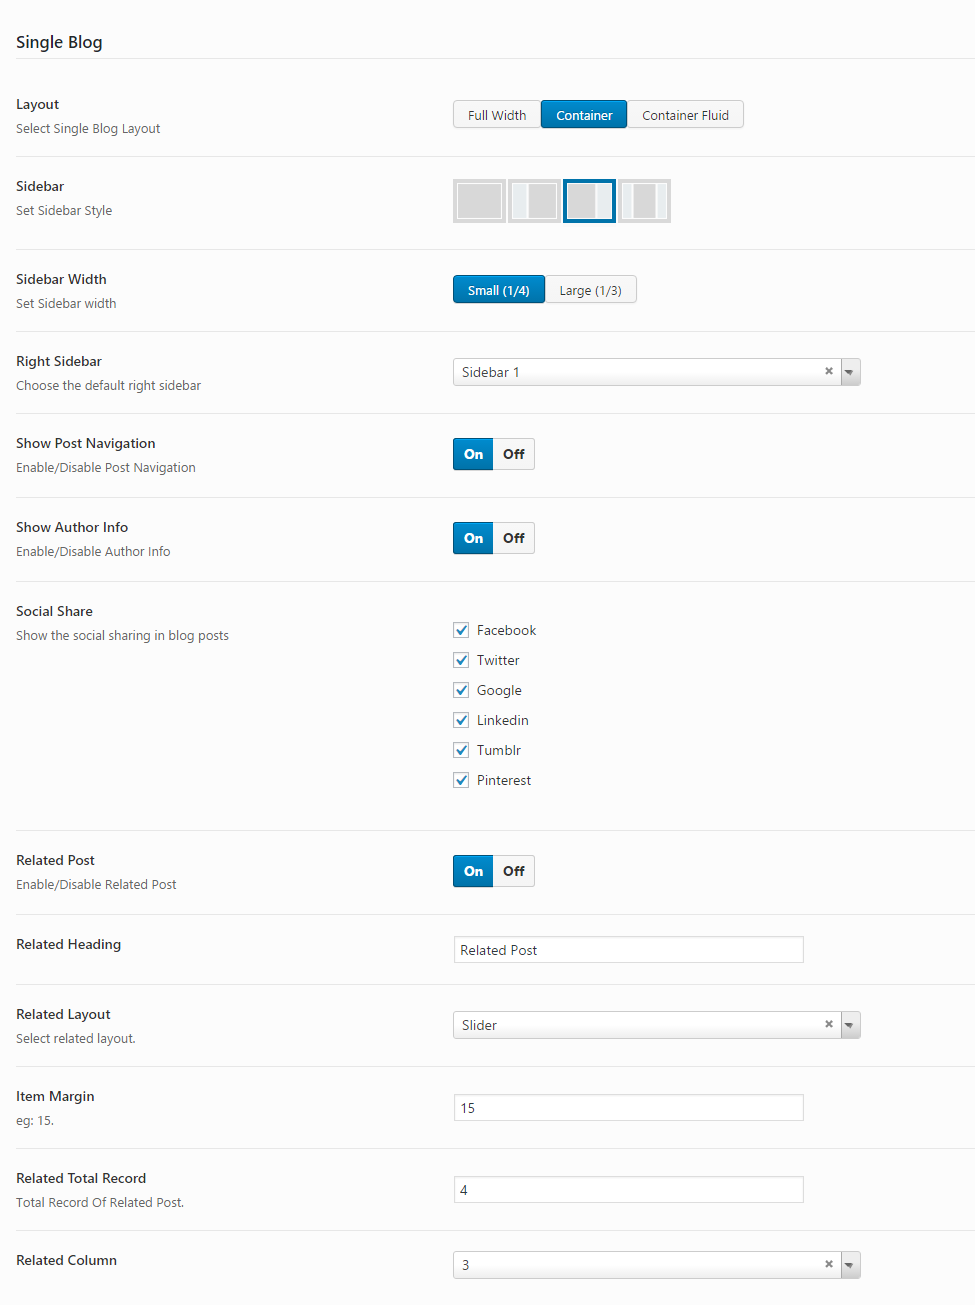
Single Blog
- Layout: Select page layout for single blog including FullWidth, Container and Container Fluid.
- Sidebar: Select sidebar style for single blog page including Left, Right, No-Sidebar, Left and Right sidebar.
- Sidebar Width: Select the width of sidebar for single blog page. You can choose Small(1/4) or Large(1/3) for your single blog page.
- Left Sidebar: Choose the default of left sidebar from drop down sidebar list.
- Right Sidebar: Choose the default of right sidebar from drop down sidebar list.
- Show Post Navigation: Turn On/Off post navigation for your single blog post.
- Show Author Info: Turn On/Off author for single blog page.
- Social Share: Show the social sharing in blog posts.
- Related Post: Enable/Disable Related Post
- Related Heading: Enter the name for Related Heading
- Related Layout: Select related layout.
- Item Margin: Enter item Margin example: 15
- Related Total Record: Total Record Of Related Post.
- Related Column: Select column for the Related
Page Title Setting
Page Titel Setting section will help you to configure main page on your WordPress site. There are 3 sections you need to configure on Page Title Setting including Archive page, Search Page, Single Blog, Woo Single product and Single Portfolio section.
Page Title Setting
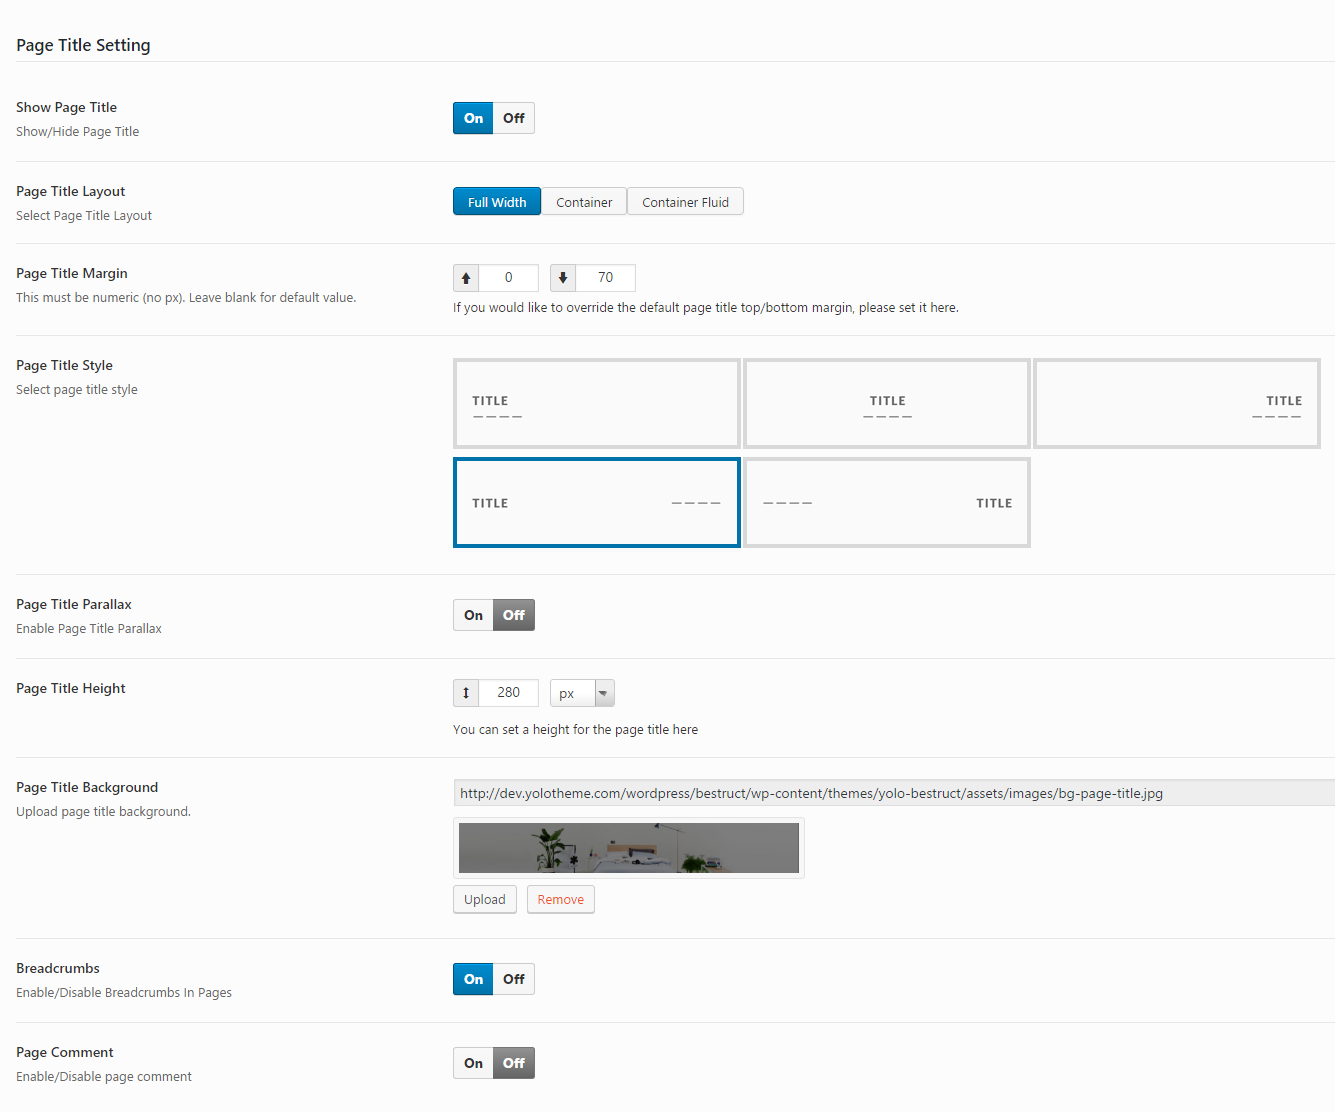
- Show Page Title: Turn On/Off page title.
- Page Title Layout: Select page title layout for your page. There are 3 layout styles: FullWidth, Container and Container Fluid.
- Page Title Margin: Enter margin-top and margin-bottom for your page title.
- Page Title Style: Select page title style.
- Page Title Parallax: Turn On/Off page title parallax for your page.
- Page Title Height: Enter the number of height for your page title.
- Page Title Background: Select a background image for page title section.
- Breadcrumbs: Turn On/Off breadcrumbs here.
- Page Comment: STurn On/Off page comment here.
Archive Page
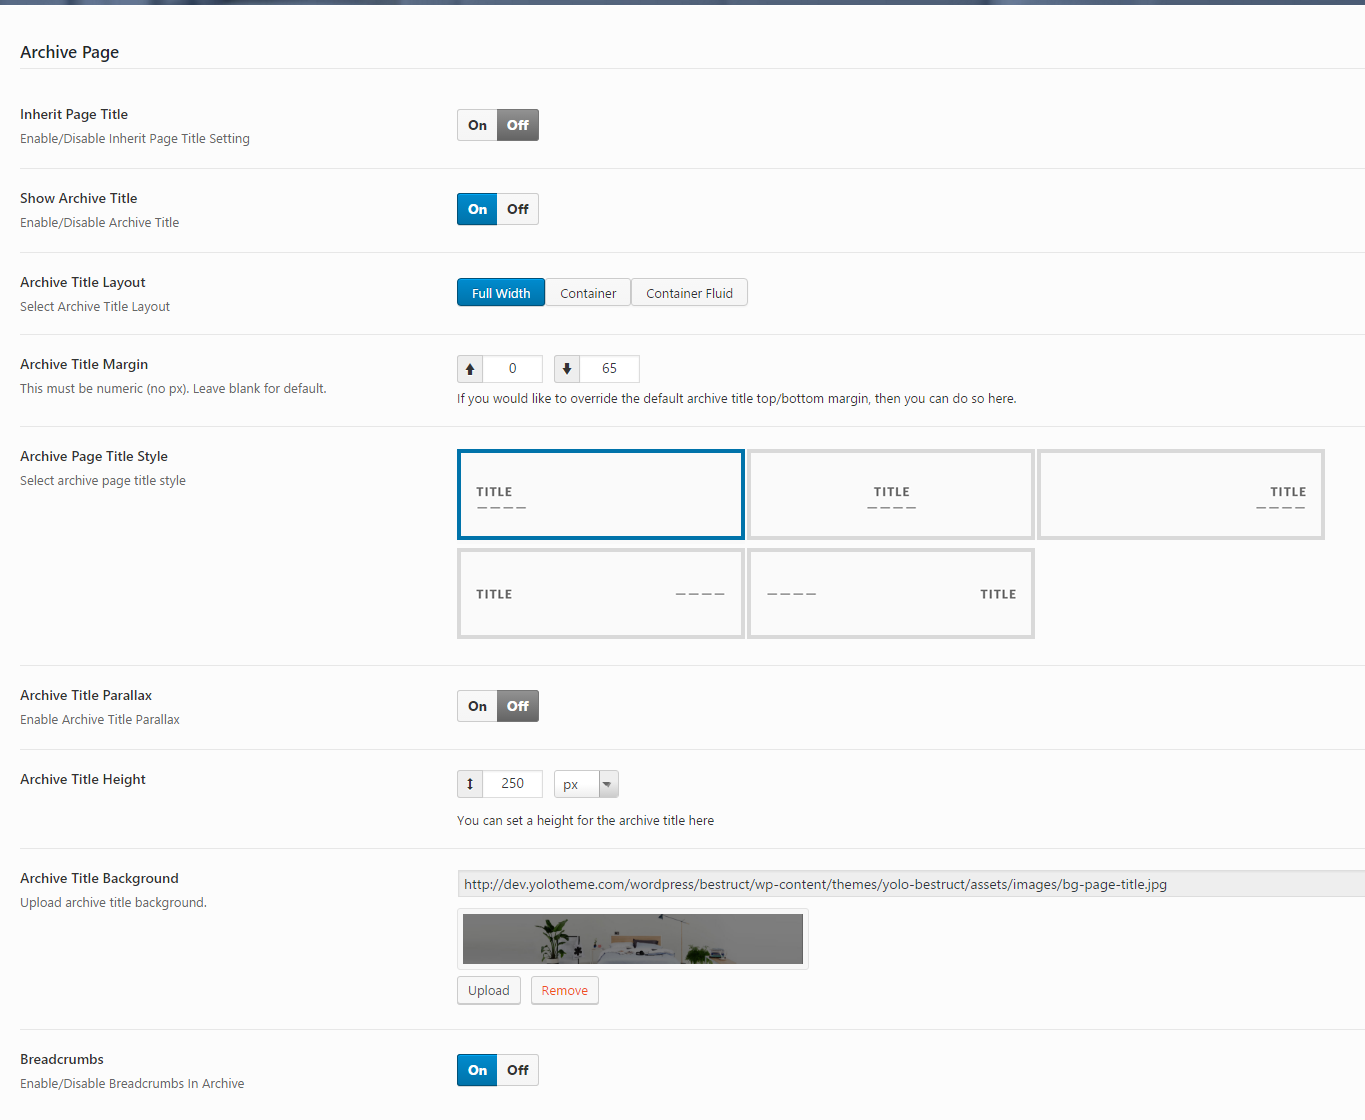
- Show Archive Title: Turn On/Off archive title.
- Archive Title Layout: Select page title layout for archive page. There are 3 layout styles: FullWidth, Container and Container Fluid.
- Archive Title Margin: Enter margin-top and margin-bottom for archive page.
- Archive Page Title Style: Select archive page title style.
- Archive Title Parallax: Turn On/Off page title parallax for archive page.
- Archive Title Height: Enter the number of height for archive page title.
- Archive Title Background: Select a background image for archive title section.
- Breadcrumbs: Turn On/Off breadcrumbs here.
Single Blog
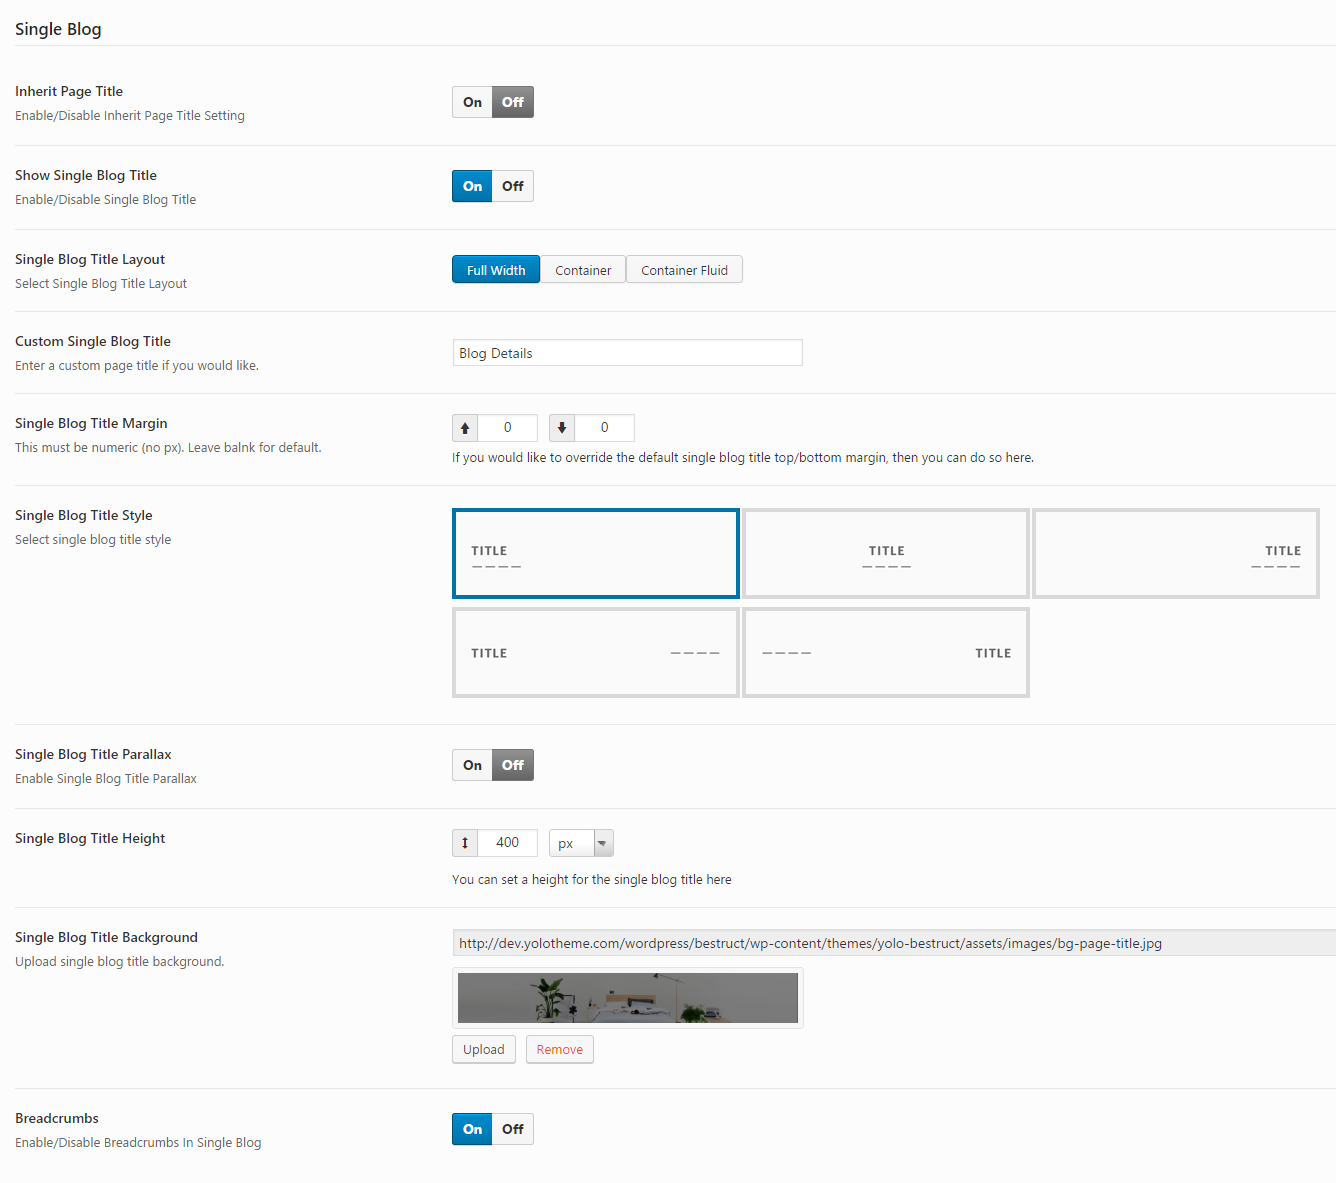
- Show Single Blog Title: Turn On/Off single blog title.
- Single Blog Title Layout: Select single blog title title layout for single blog page. There are 3 layout styles: FullWidth, Container and Container Fluid.
- Custom Single Blog Title: Enter a custom page title if you would like.
- Single Blog Title Margin: Enter margin-top and margin-bottom for single blog title.
- Single Blog Title : Select single blog title style.
- Single Blog Title Parallax: Turn On/Off page title parallax for single blog title.
- Single Blog Title Height: Enter the number of height for single blog title.
- Single Blog Title Background: Upload single blog title background.
- Breadcrumbs: Turn On/Off breadcrumbs for single blog page.
Woo Archive Product
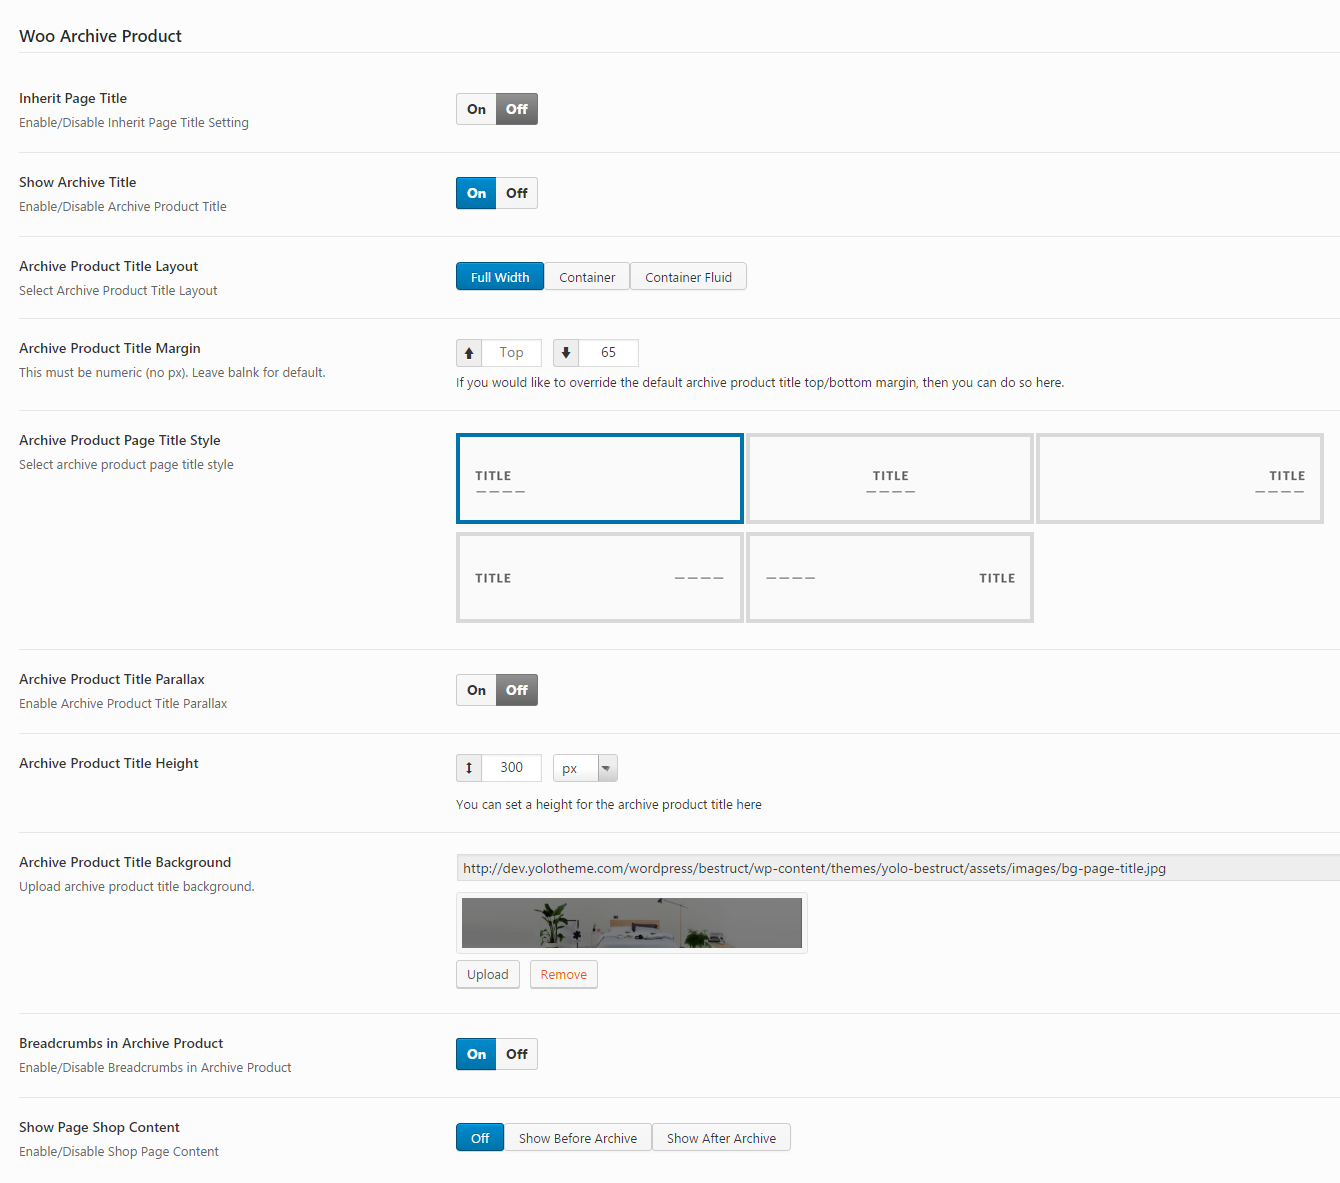
- Show Archive Title: Turn On/Off Archive Title.
- Archive Product Title Layout: Select Archive Product Title Layout for archive product page. There are 3 layout styles: FullWidth, Container and Container Fluid.
- Archive Product Title Margin: Enter margin-top and margin-bottom for archive product page.
- Archive Product Page Title Style: Select archive product page title style.
- Archive Product Title Parallax: Turn On/Off page title parallax for archive product page.
- Archive Title Height: Enter the number of height for archive product page title.
- Archive Title Background: Select a background image for archive product title section.
- Breadcrumbs in Archive Product: Turn On/Off breadcrumbs here.
- Show Page Shop Content: Enable/Disable Shop Page Content
Woo Single Product
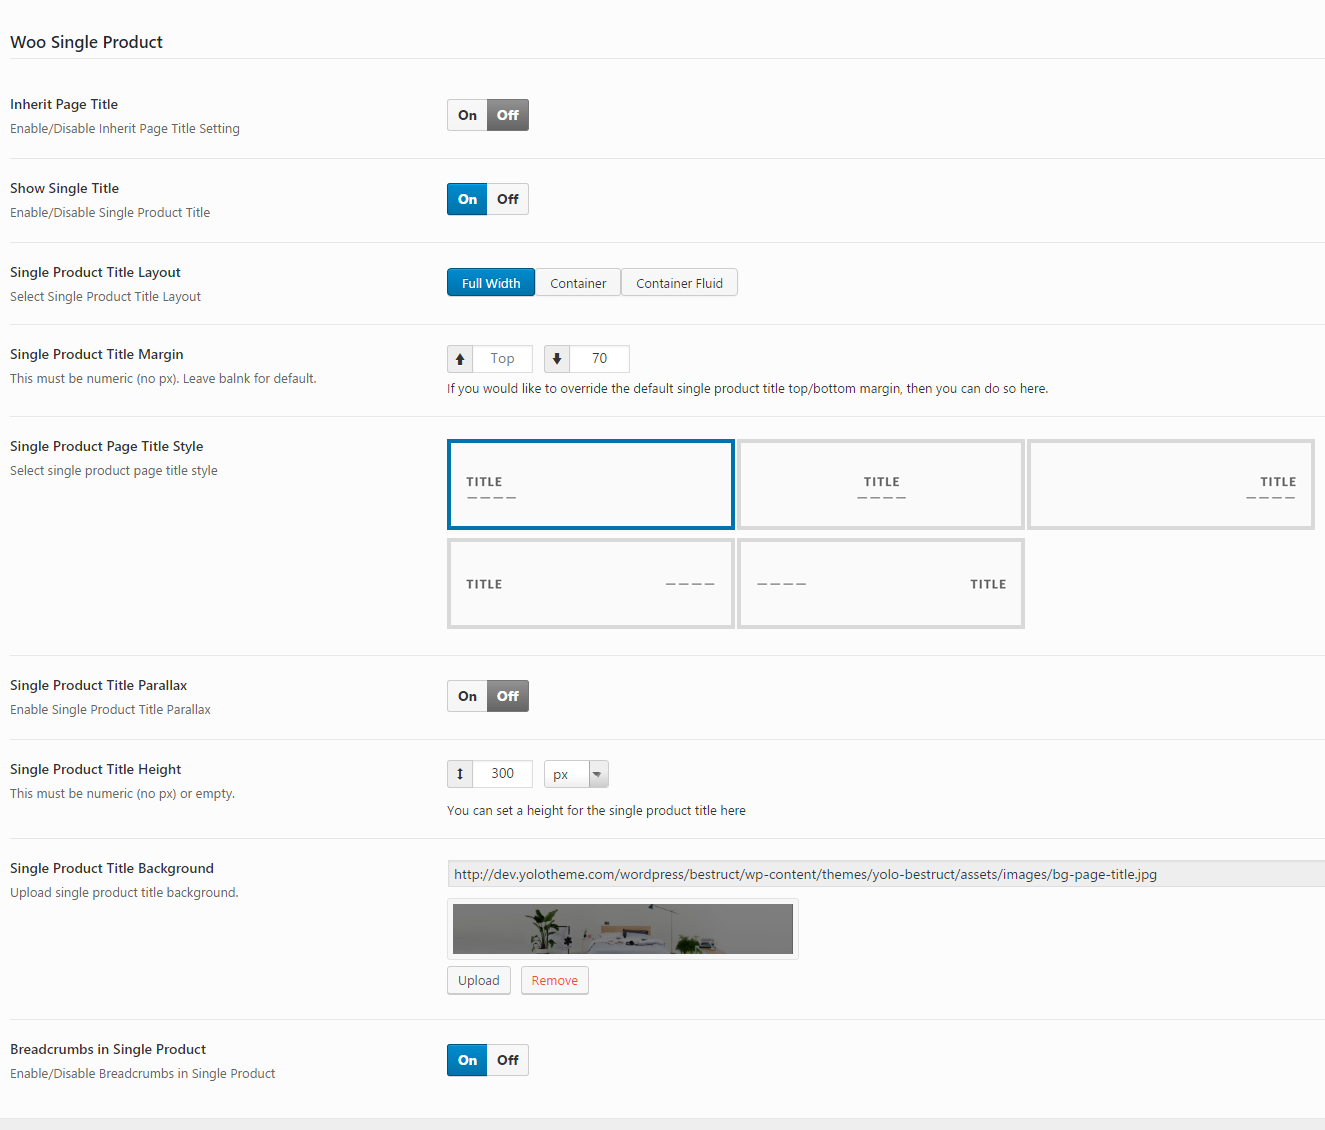
- Show Single Title: Turn On/Off Single Product Title.
- Single Product Title Layout: Select Single Product Title Layout for single product page. There are 3 layout styles: FullWidth, Container and Container Fluid.
- Single Product Title Margin: Enter margin-top and margin-bottom for single product page.
- Single Product Page Title Style: Select single product page title style.
- Single Product Title Parallax: Turn On/Off page title parallax for single product page.
- Single Product Title Height: Enter the number of height for single product page title.
- Single Product Title Background: Select a background image for single product title section.
- Breadcrumbs in Single Product: Turn On/Off breadcrumbs here.
Single Portfolio
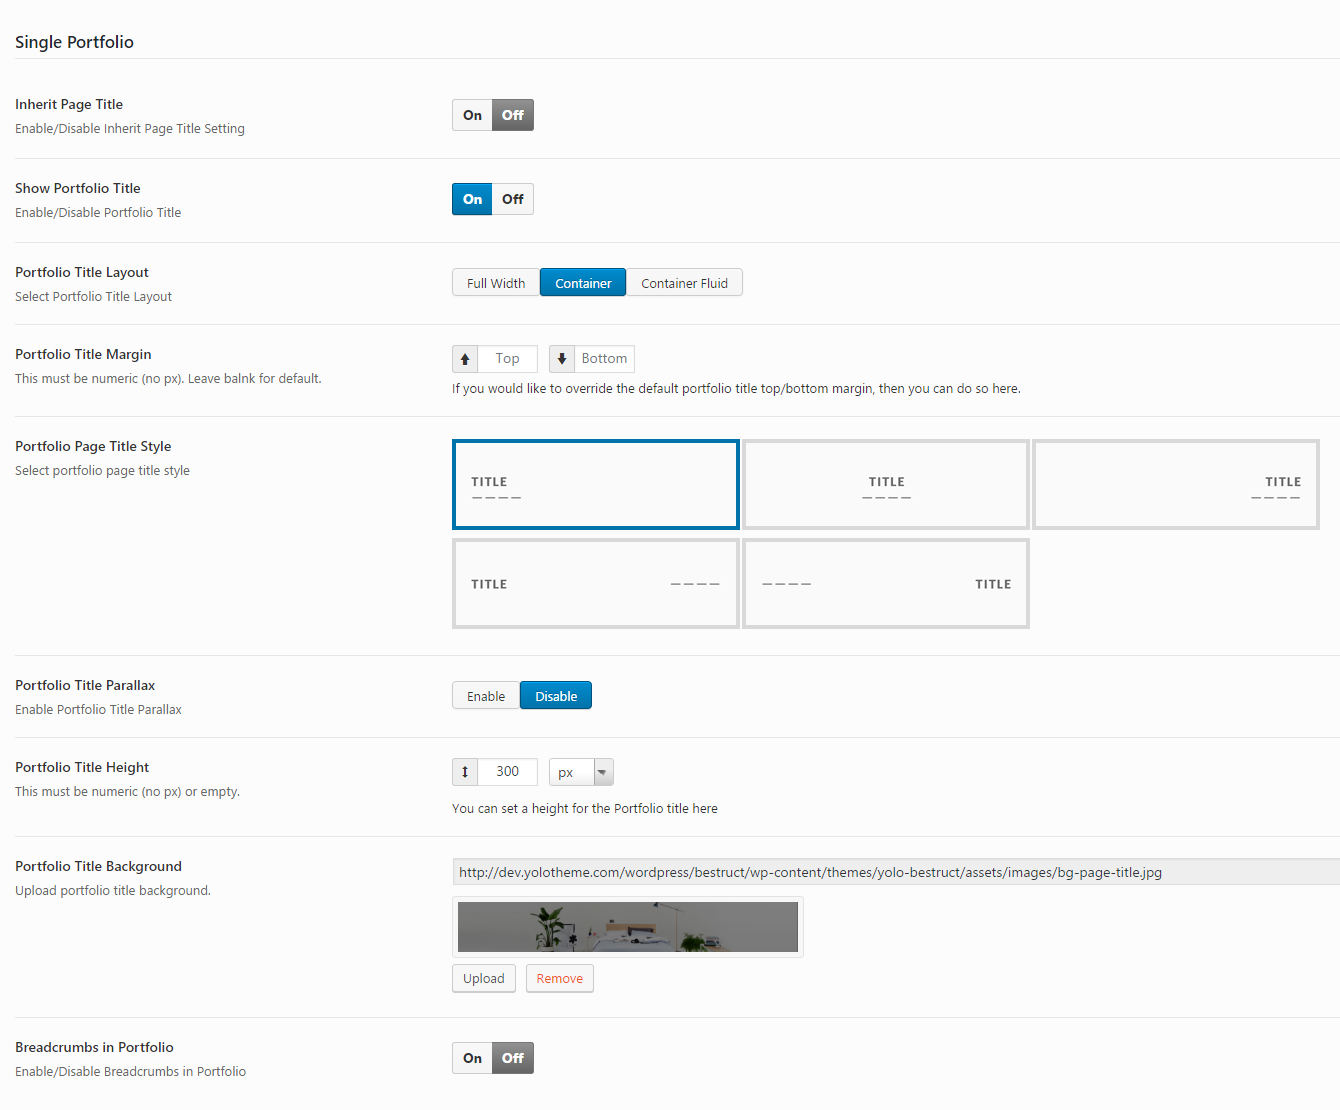
- Show Portfolio Title: Turn On/Off portfolio Title.
- Portfolio Title Layout: Select Portfolio Title Layout for single product page. There are 3 layout styles: FullWidth, Container and Container Fluid.
- Portfolio Title Margin: Enter margin-top and margin-bottom for portfolio page.
- Portfolio Page Title Style: Select portfolio page title style.
- Portfolio Title Parallax: Turn On/Off page title parallax for portfolio page.
- Portfolio Title Height: Enter the number of height for portfolio page title.
- Portfolio Title Background: Select a background image for portfolio title section.
- Breadcrumbs in Portfolio: Turn On/Off Breadcrumbs in Portfolio.
Logo & Favico
In this section, you can upload your logo, sticky logo and custom favico for your WordPress website.
- Logo: Upload your logo from your computer or select on Media Library.
- Retina Logo: Upload your retina logo from your computer or select on Media Library.
- Logo Height: You can set a height for logo here.
- Logo Max Height: You can set max-height for logo here.
- Logo Top/Bottom Padding: Enter the number of padding-top and padding-bottom for your logo.
- Sticky Logo: Upload sticky logo on this option.
- Sticky Retina Logo: Upload sticky retina logo on this option.
- Custom Favico: Upload custom favico for your website.
Header
There are many options on Header section helping you to configure Header for your WordPress website. Follow these descriptions to learn more about them:
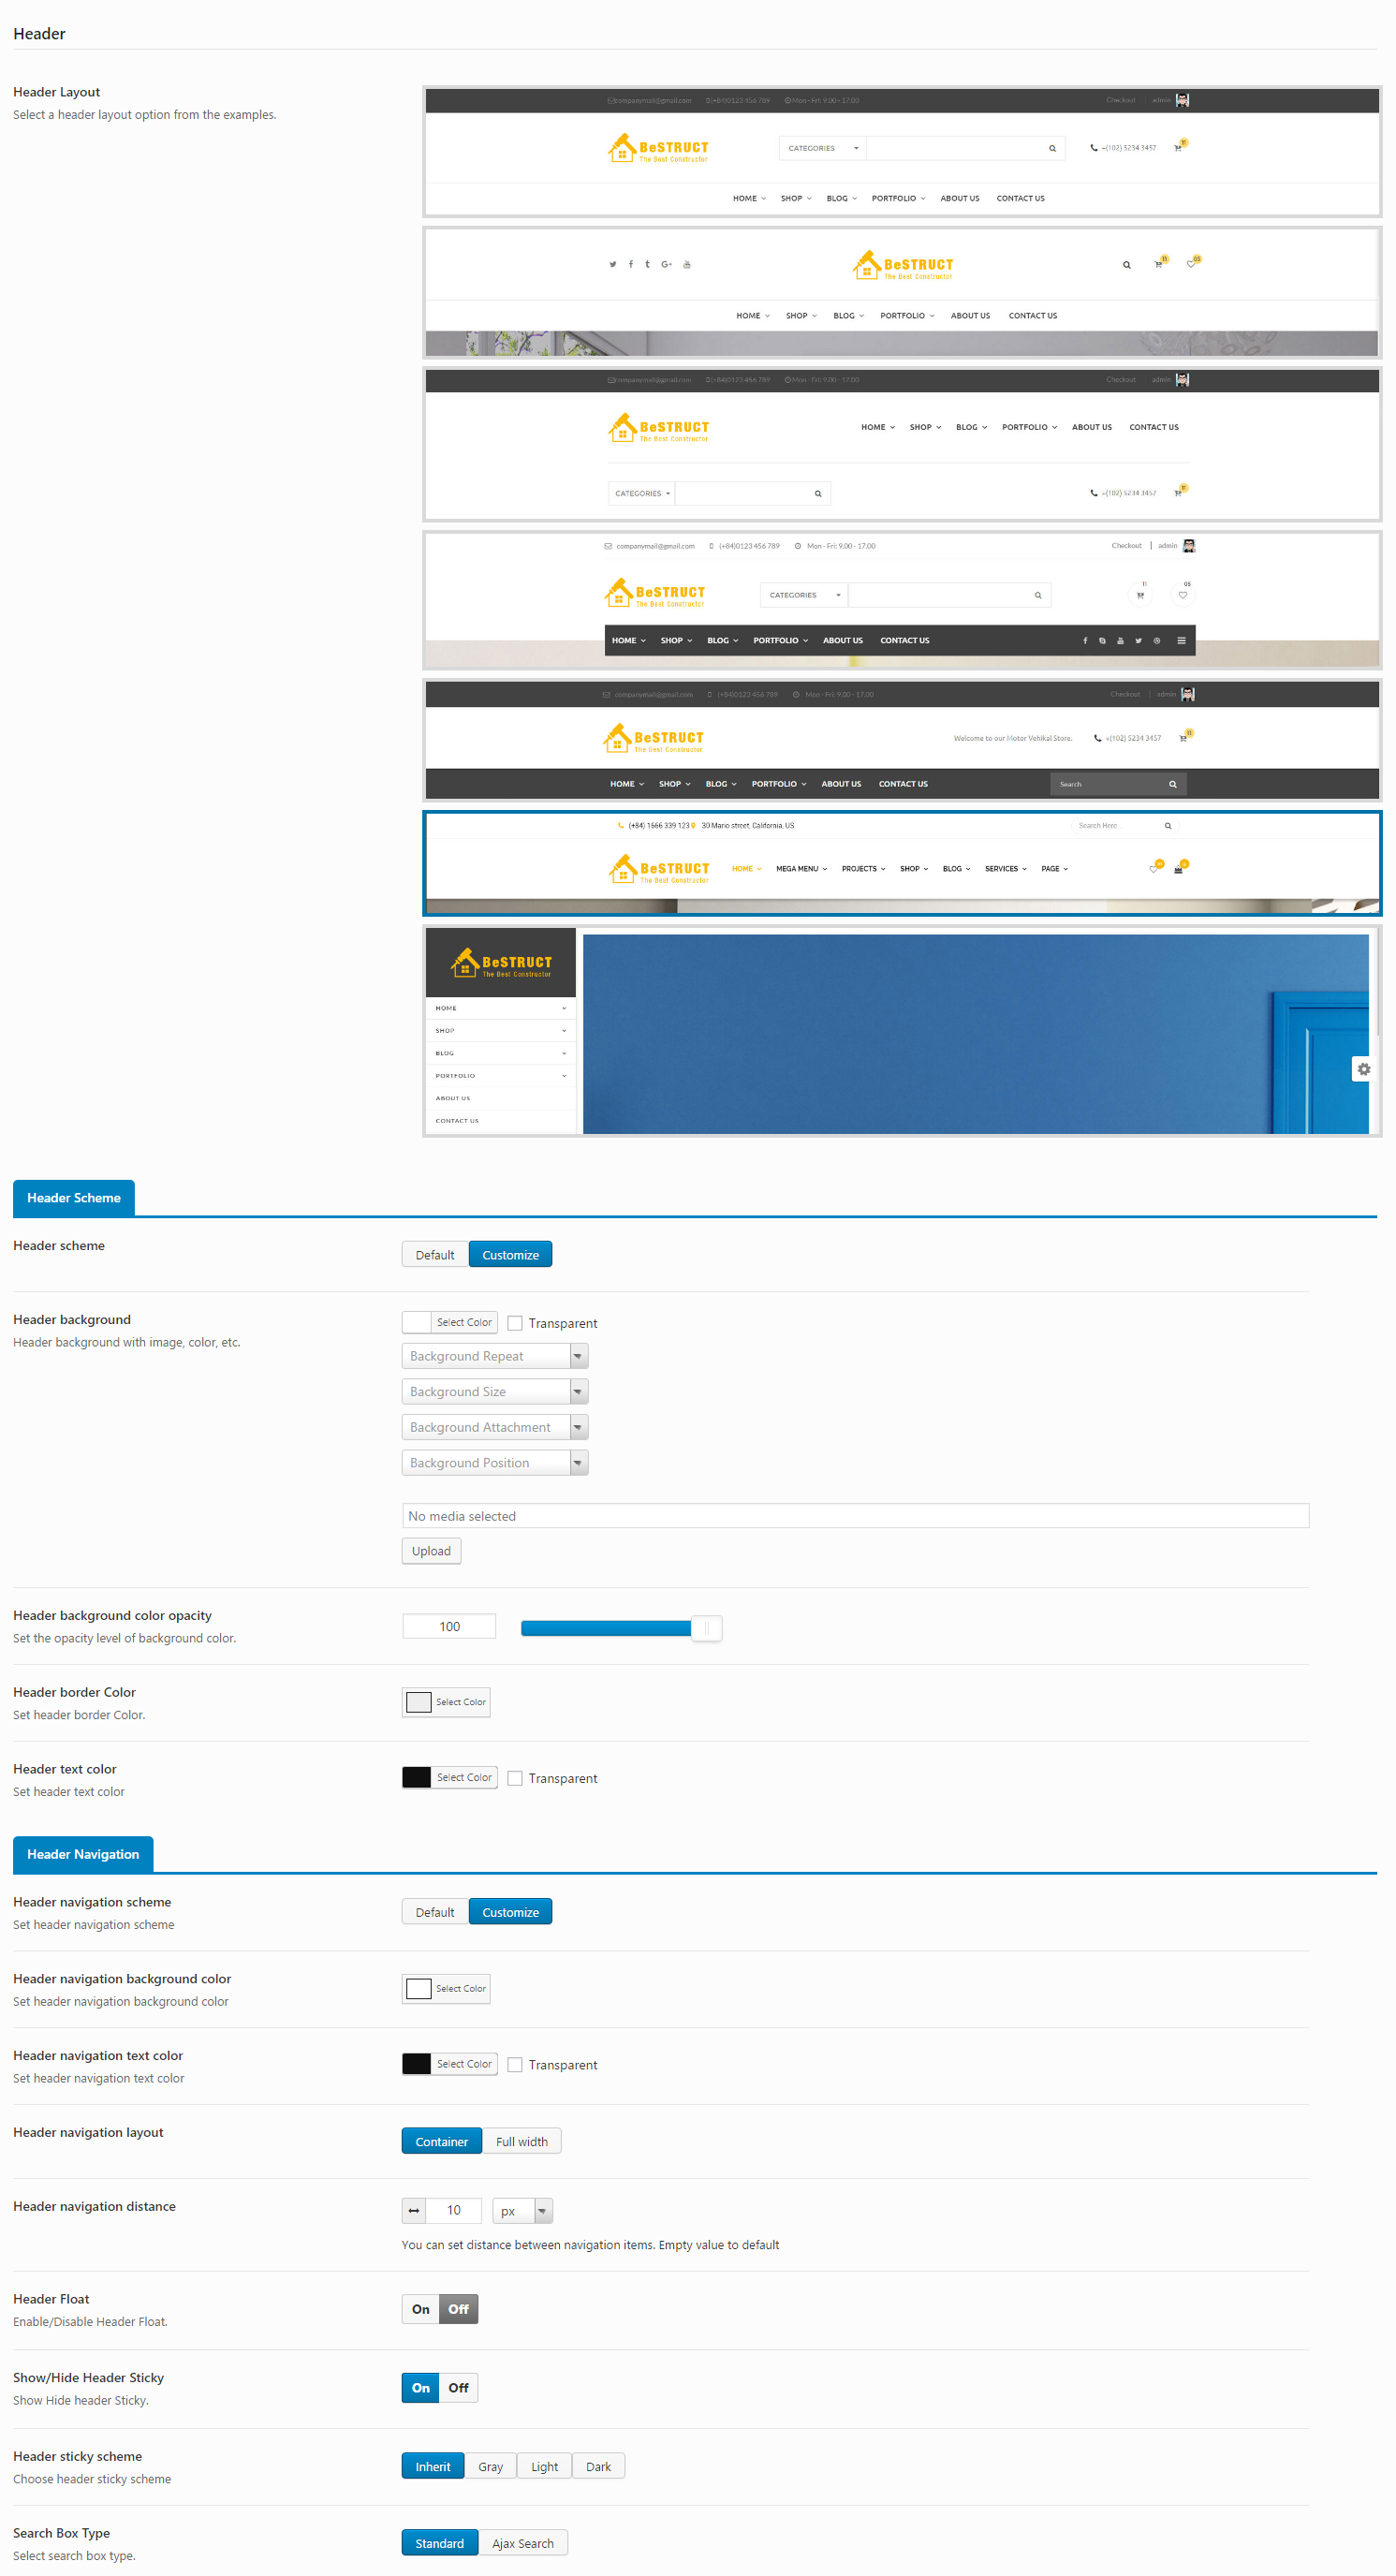
- Header layout: Select a header layout option from the examples.
Header Scheme
- Header Scheme: Select header scheme for your website including Default or Customize. If you choose Customize, you need to configure header background, header background color opacity, header border color and header text color for your header.
Header Navigation
- Header navigation scheme: Select header scheme for your website including Default or Customize. If choosing Customize, you need to configure Header navigation background color and Header navigation text color for your website.
- Header navigation Layout: Select layout style for Header navigation including Container and FullWidth. If FullWidth is selected, you need to configure padding-left/right for your header navigation.
- Header navigation hover: You can choose Primary Color or Base Primary Color for header navigation
- Header navigation distance: You can set the distance between navigation items. Leave blank for default.
- Header Float: Turn On/Off header float.
- Show/Hide Header Sticky: Turn On/Off header sticky for your header.
- Header Sticky Scheme: Select header sticky scheme for your header including Inherit, Gray, Light, Dark.
- Search Box Style: Select Search Box style including Standard and Ajax Search.
- Post type for Ajax Search: Select post type for ajax search.
- Amount of Seach Result: Set number of items for Search Result.
Top Bar
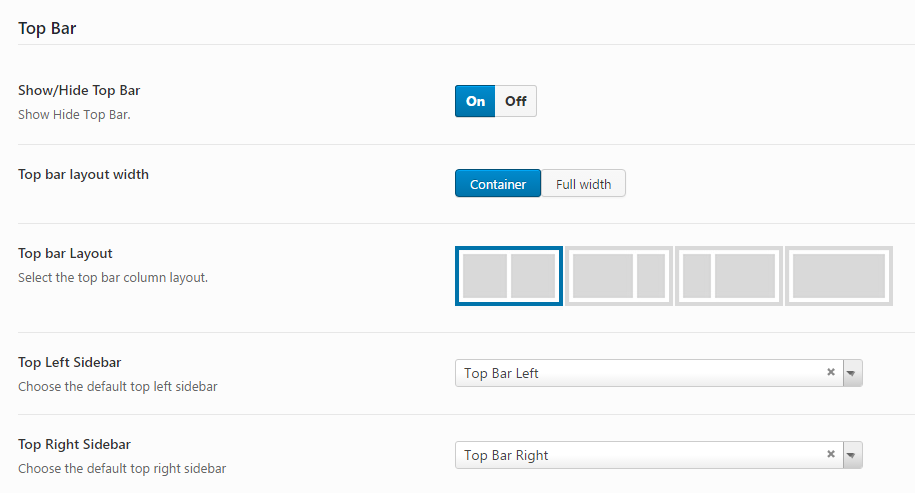
- Show/Hide Top Bar: Show Hide Top Bar on your website.
- Top bar layout width: Choose layout width: Container or Full width
- Top bar Layout: USelect the top bar column layout.
- Top Left Sidebar: Choose the default top left sidebar.
- Top Right Sidebar: Choose the default top right sidebar.
Header Customize
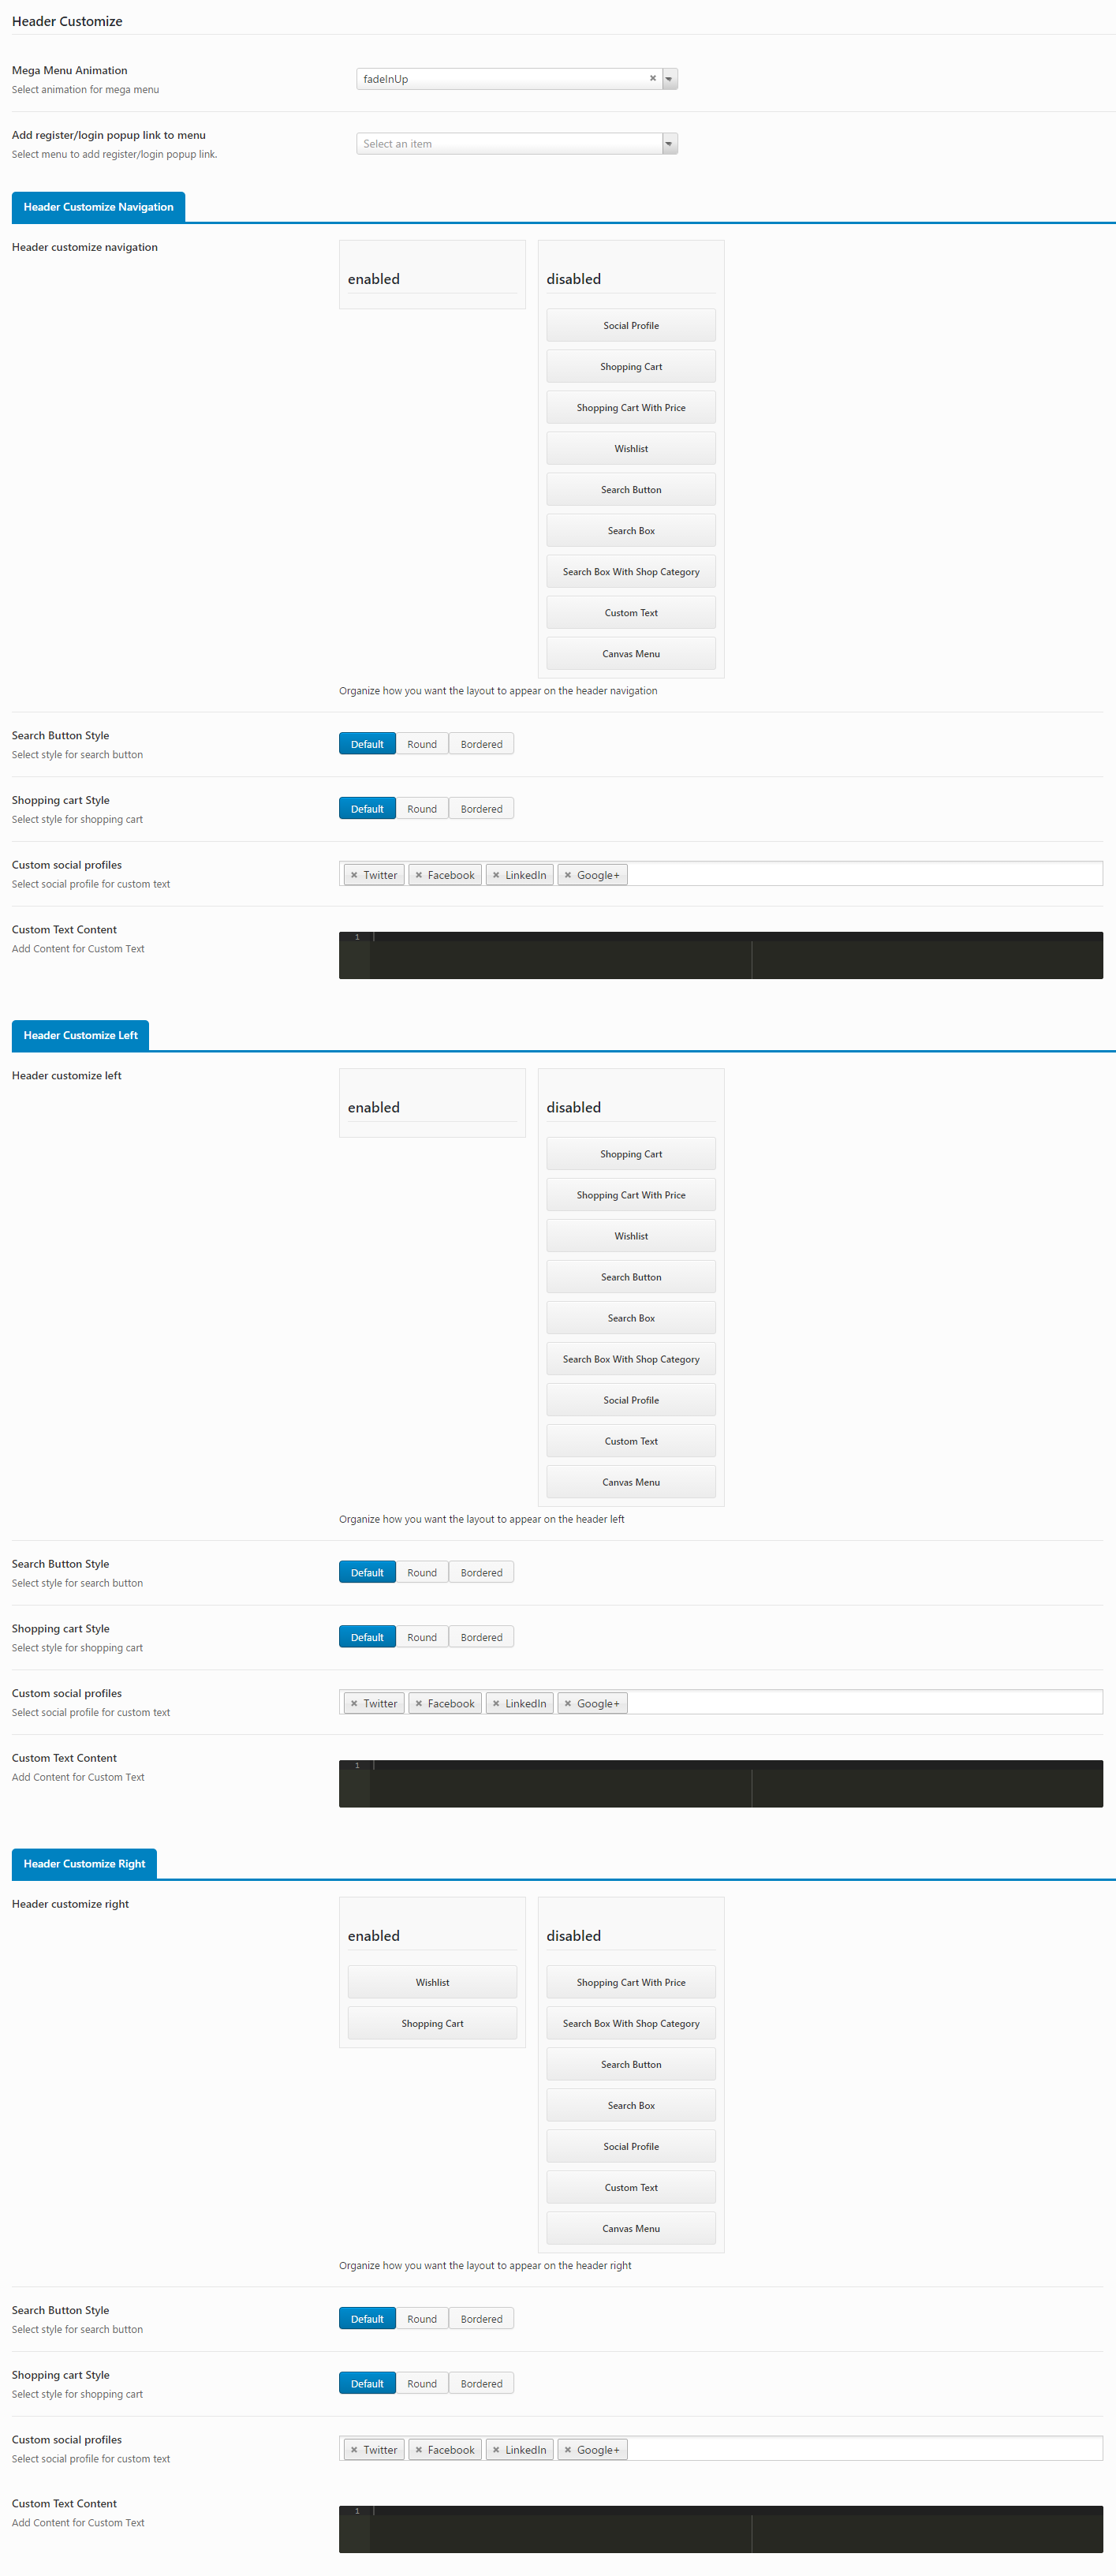
Header Customize
Header Customize section will help you to configure megamenu, select search button style, shopping cart style, etc.
- Mega menu Animation: Select animation for mega menu from drop down list.
- Add register/login popup link to menu: Select menu to add register/login popup link.
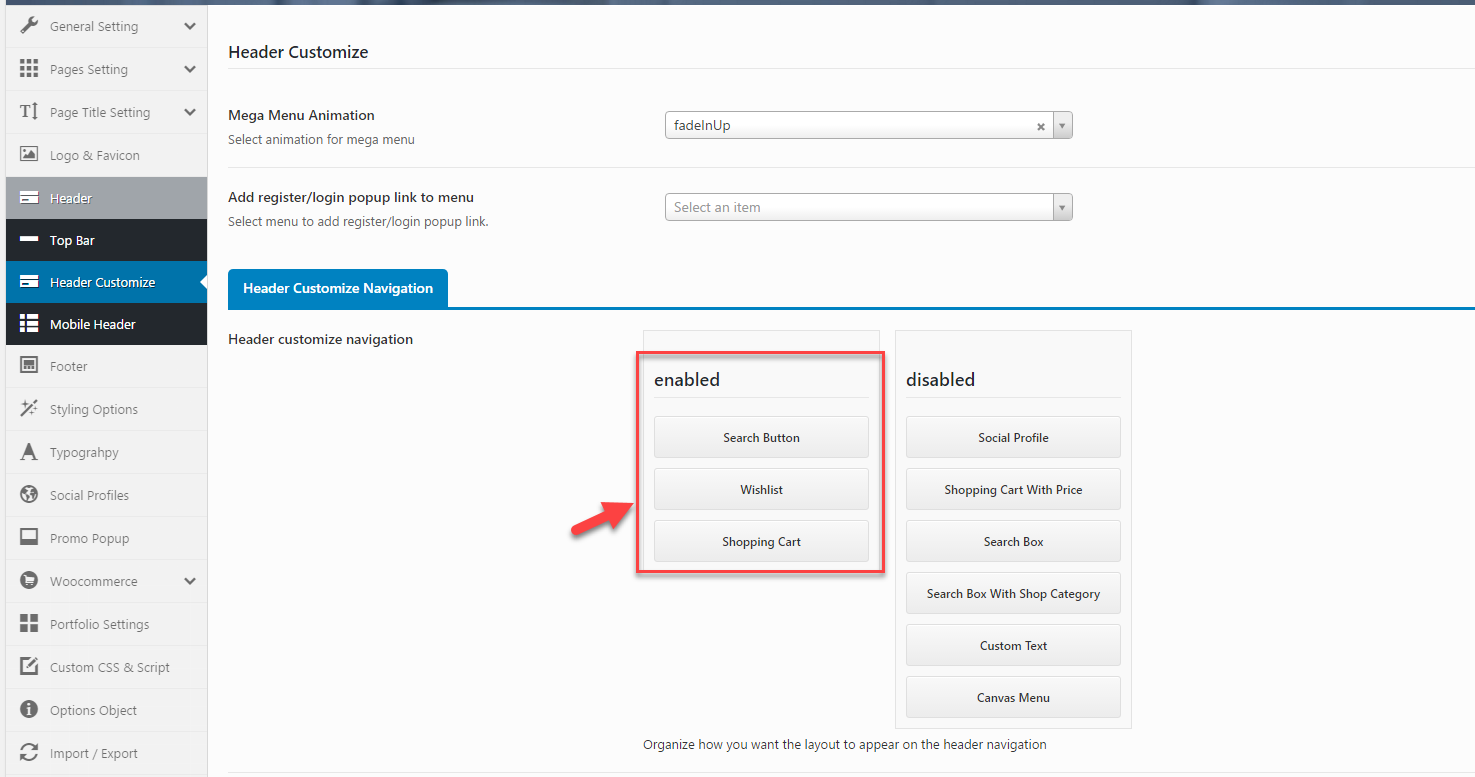
Header Customize Navigation
- Header Customize Navigation: Organize how you want the layout to appear on the header navigation.
- Search Button Style: Select style for search button including Default, Round and Bordered.
- Shopping cart Style: Select style for shopping cart including Default, Round and Bordered.
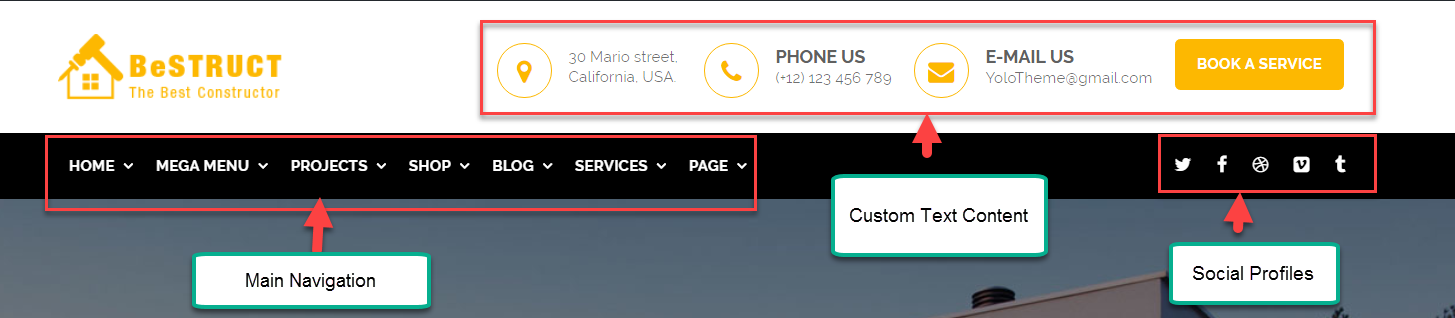
- Custom Social Profiles: Select custom social profile for custom text.
- Custom Text Content: Add content for custom text. You can use HTML code on this option.
Header Customize Left
- Header Customize Left: Organize how you want the layout to appear on the header left.
- Search Button Style: Select style for search button including Default, Round and Bordered.
- Shopping cart Style: Select style for shopping cart including Default, Round and Bordered.
- Custom Social Profiles: Select custom social profile for custom text.
- Custom Text Content: Add content for custom text. You can use HTML code on this option.
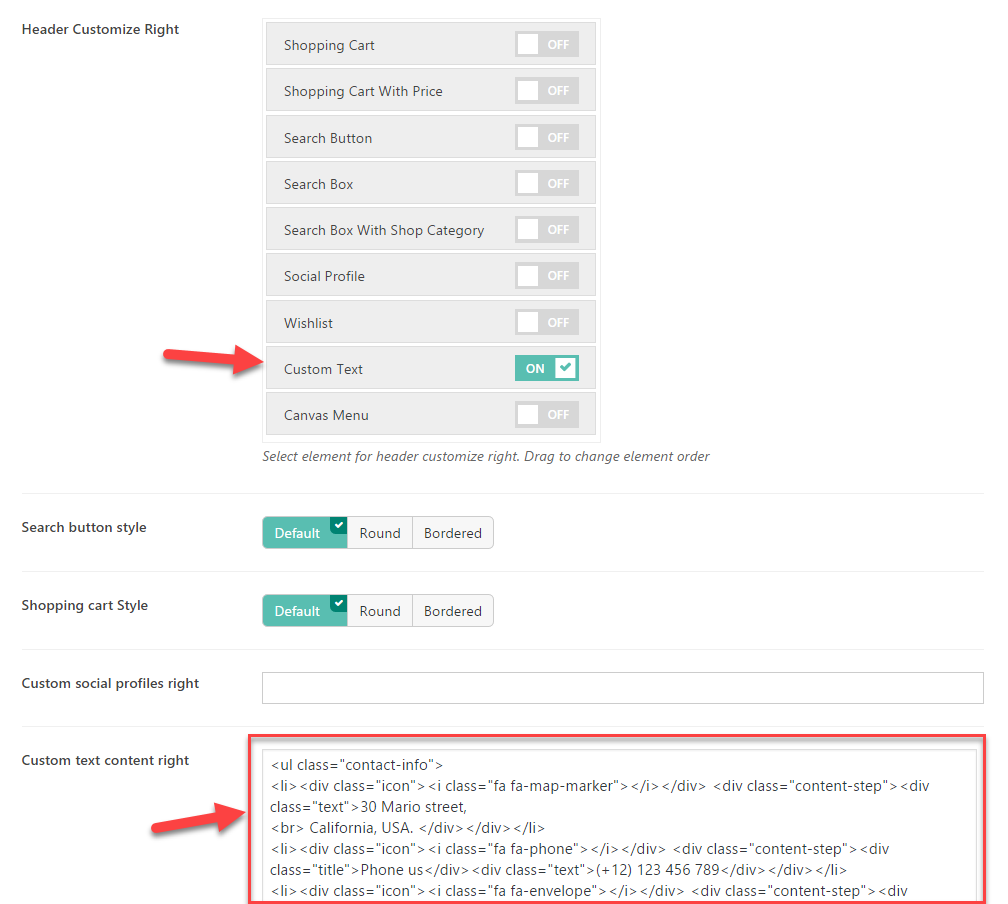
Header Customize Right
- Header Customize Right: Organize how you want the layout to appear on the header right.
- Search Button Style: Select style for search button including Default, Round and Bordered.
- Shopping cart Style: Select style for shopping cart including Default, Round and Bordered.
- Custom Social Profiles: Select custom social profile for custom text.
- Custom Text Content: Add content for custom text. You can use HTML code on this option.
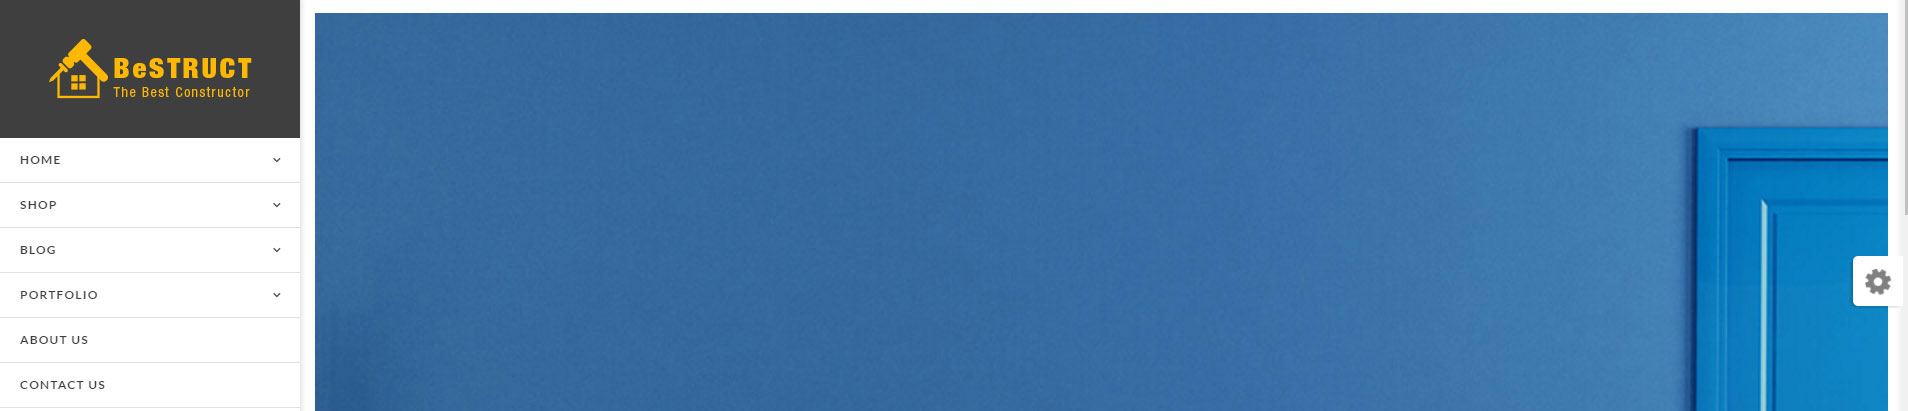
Mobile Header

- Header Layout: Select header mobile layout for your website.
- Menu Drop Type:Select menu drop type for your website including Dropdown Menu and Fly Menu.
- Mobile Logo: Upload a small logo which will be displayed on mobile device.
- Logo Height: Enter the height for logo here.
- Logo Mobile Max Height: Enter the number of max-height for your mobile logo.
- Logo Top/Bottom Padding: Enter Logo Top/Bottom padding for mobile logo.
- Top Bar: Turn On/Offf top bar.
- Sticky Mobile Header: Turn On/Offf sticky mobile menu.
- Search Box: Turn On/Offf search box for menu.
- Shopping cart: Turn On/Offf shopping cart for menu.
Footer
In this section, you can select Footer Block for your main page..
Styling Option
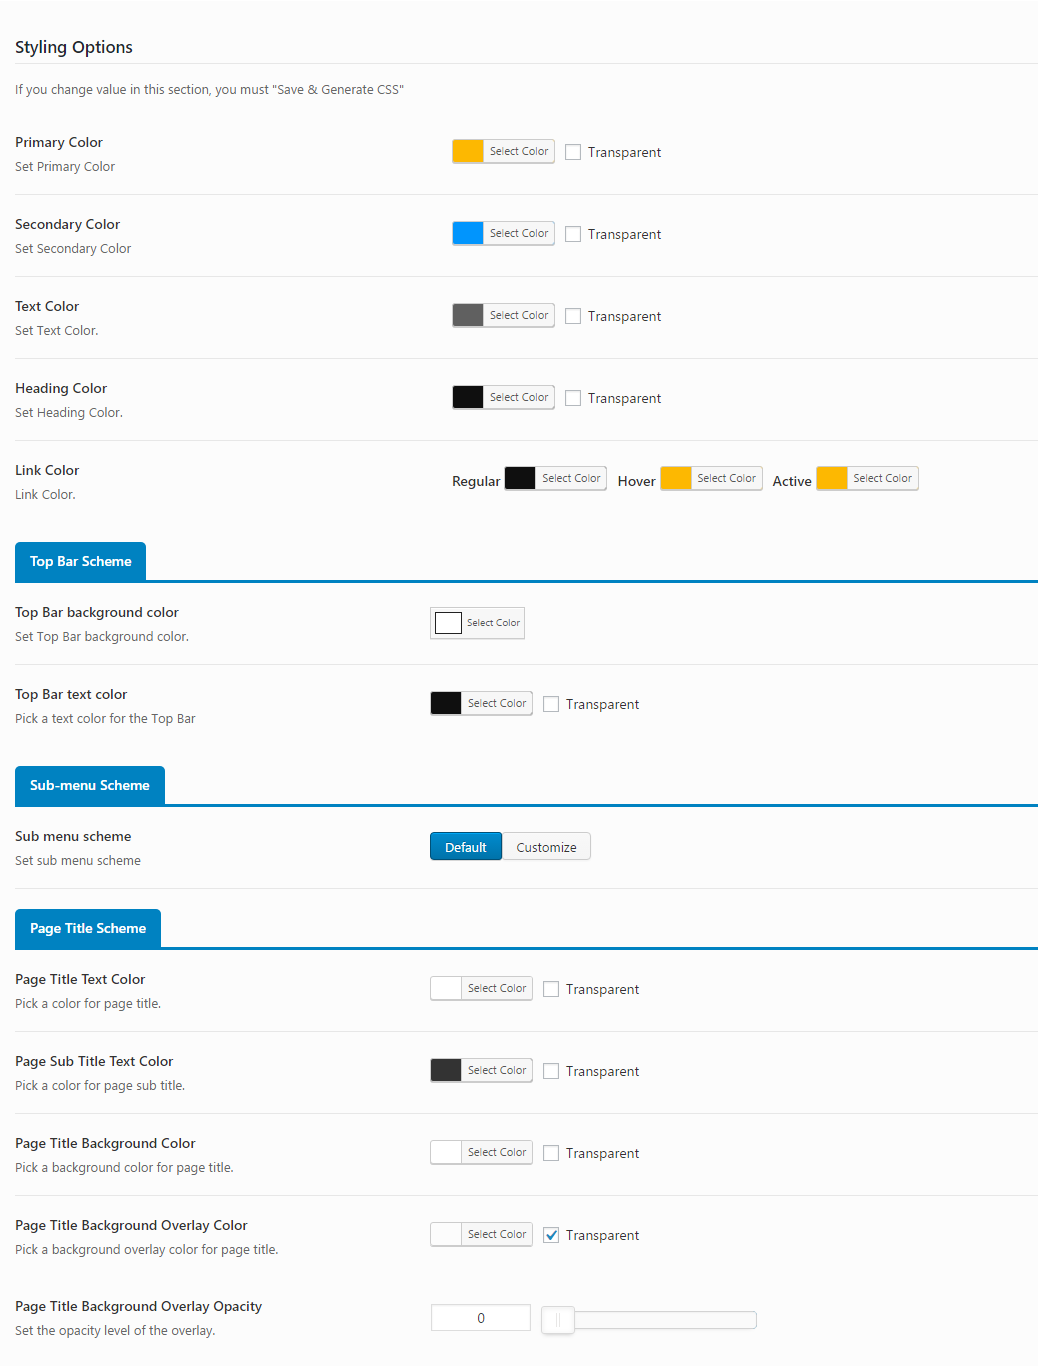
Styling option allows you to configure Primary color, text color, submenu color and page title color for your website.
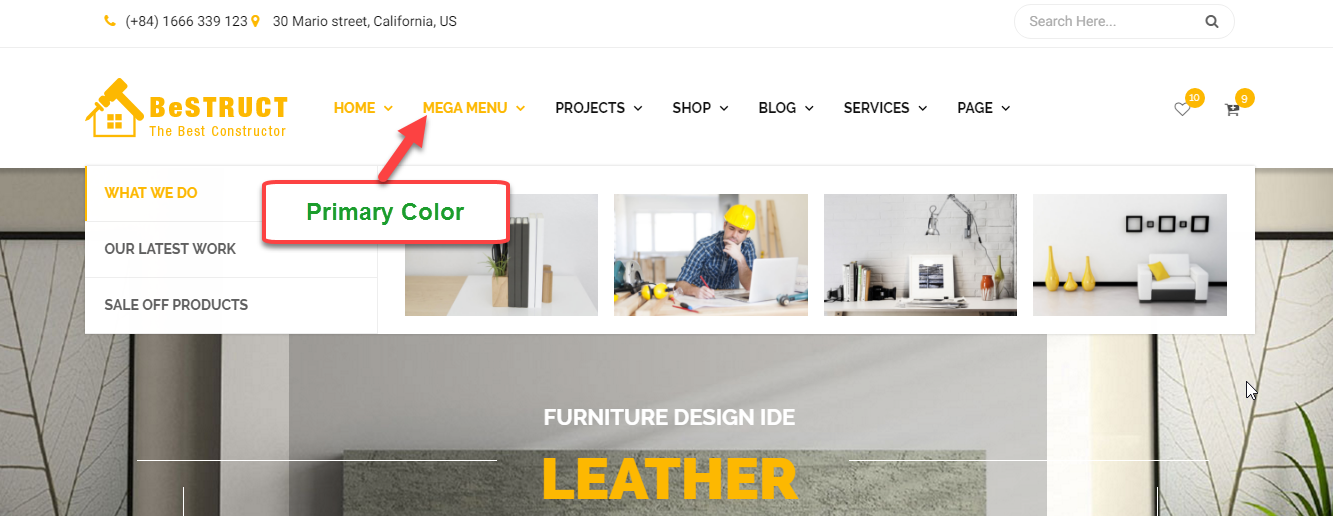
- Primary Color: Select Primary color from color table.
- Secondary Color: Select Secondary color from color table.
- Text Color: Select text color from color table.
- Heading Color: Select heading color from color table.
- Link Color: Select Heading color from color table.
Top Bar Scheme
- Top bar background Color: Select top bar background color from color table.
- Top bar text Color: Select top bar text color from color table.
Sub-menu Scheme
- Sub Menu Scheme: Select Submenu scheme for your website including Default or Customize.
- Sub Menu Background Color: Select Secondary color from color table.
- Sub Menu Text Color: Select submenu text color from table color.
Page Title Background Color
- Page Title Text Color: Select a color for page title.
- Page Sub Title Text Color: Select a color for page sub title.
- Page Title Background Color: Select page title background color from table color.
- Page Title Background Overlay Color: Select page title background overlay color from color table.
- Page Title Background Overlay opacity: Set opacity level for page title background .
Typography
In this section, you can select Fonts for body, menu, page title, page sub title from dropdown list font.
Social Profile
Social Profile section allows you to turn on social media and add the link your account to your website.
Promo Popup
Promo Popup allows you to create a Newsletter form which will be displayed when visitors begin getting access to your website
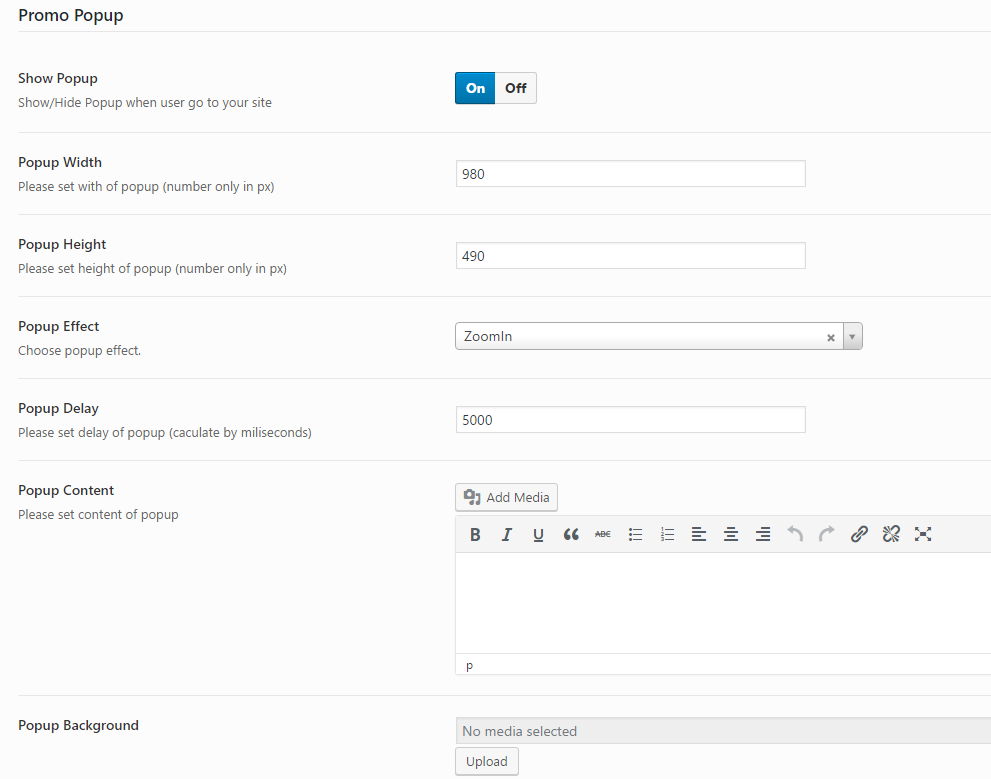
- Show Popup: Turn On/Off popup.
- Popup Width: You can set the width of popup.
- Popup Height: You can set the height of popup.
- Popup Effect: Choose popup effect for popup.
- Popup Delay: Set the delay of popup(caculate by miliseconds).
- Popup Content: Enter the content for popup.
- Popup Background: Select background image for popup.
WooCommerce
WooCommerce section provides many options helping you to configure shop page, archive product page and single product page.
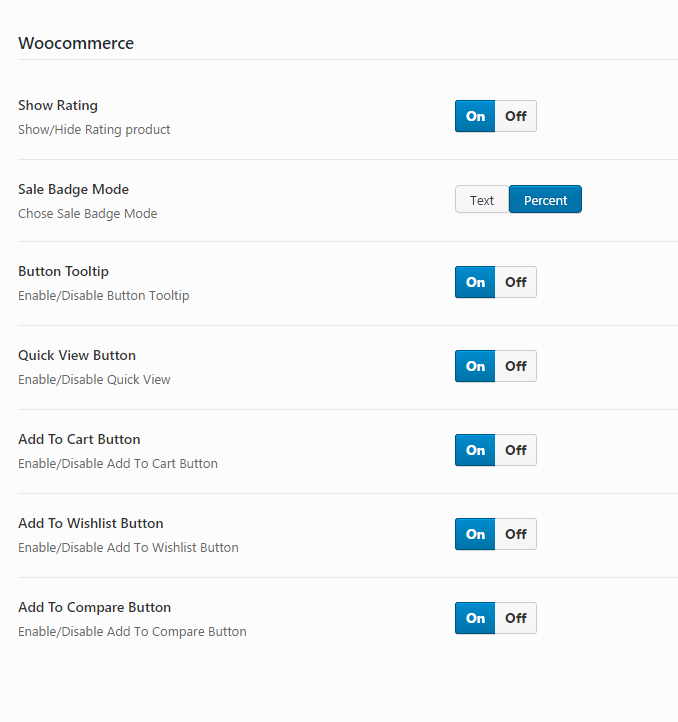
- Show Rating: Turn On/Off rating for product page.
- Sale Badge Mode: Select Sale Badge Mode tyle including Text and Percent.
- Show Result Count: Show/Hide Result Count In Archive Product.
- Button Tooltip: Turn On/Off button tooltip.
- Quick View Button: Turn On/Off quick view button for product.
- Add to cart button: Turn On/Off add to cart button for product.
- Add to Wishlist Button: Turn On/Off add to wishlist button.
- Add to Compare Button: Turn On/Off add to compare button.
Archive Product
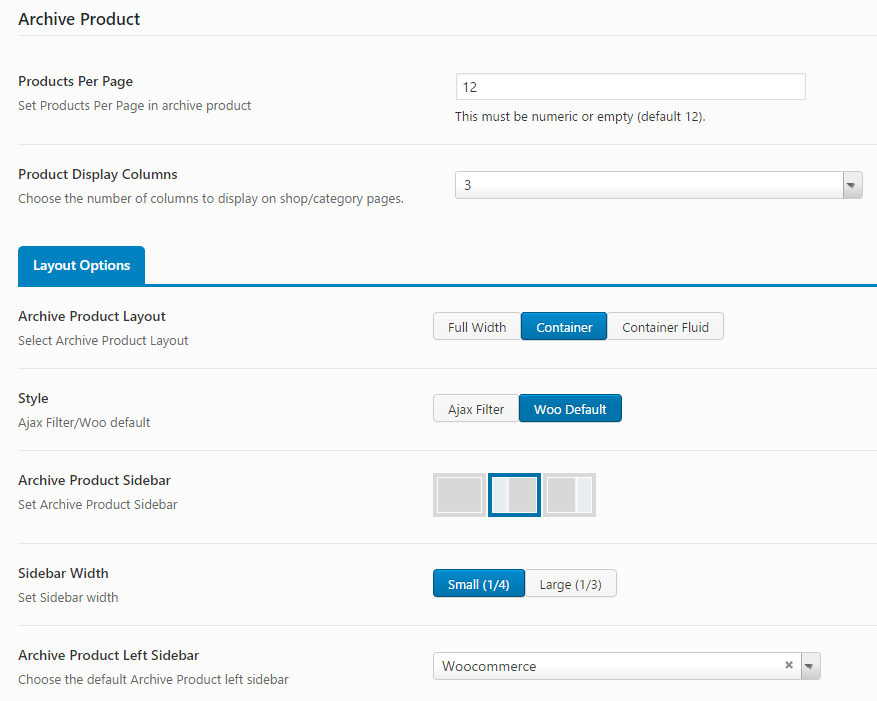
- Product Per Page: Select product per page for archive page.
- Product Display Columns: Choose the number of columns to display on shop/categories pages.
Layout Options
- Archive Page Product layout: Select Archive page layout including FullWidth, Container and Container Fluid.
- Style: Choose Ajax Filter/Woo default style
- Archive Product Sidebar: Select Archive Product Sidebar for archive product page.
- Sidebar Width: Set sidebar width.
- Archive Product Left Sidebar: Choose the default Product Left Sdebar.
Single Product
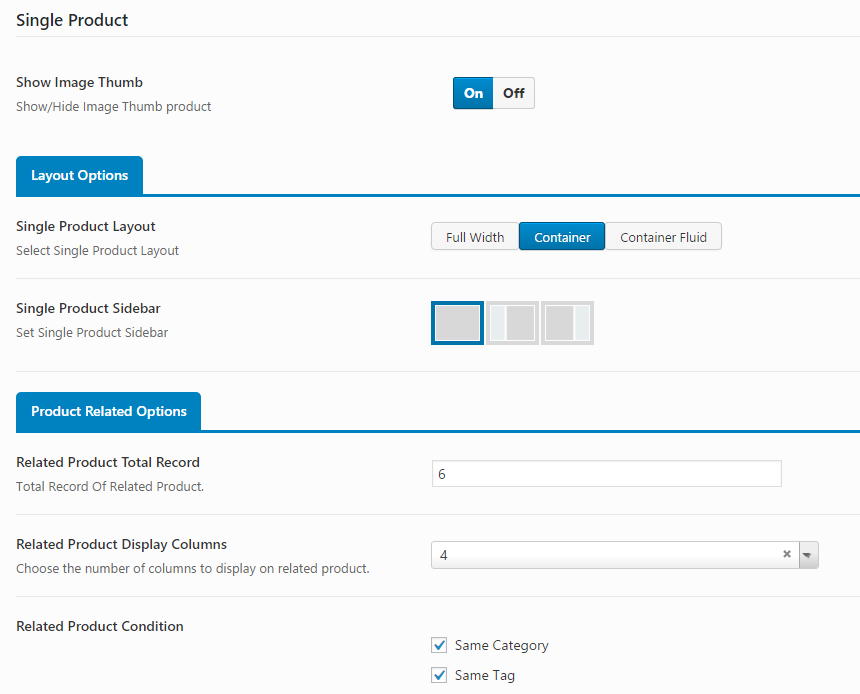
- Show Image Thumb: Turn On/Off Image Thumb product.
Layout Options
- Single Product layout: Select Single product layout including FullWidth, Container and Container Fluid.
- Single Product Sidebar: Set single product sidebar for single product page.
Product Related Options
- Related Product Total Record: Enter the number of related product for your single product page.
- Related Product Display Columns: Choose the number of columns to display on related product.
- Related Product Condition: Check to enable related product condition.
Portfolio
Portfolio section wil help you to configure options of portfolio page.
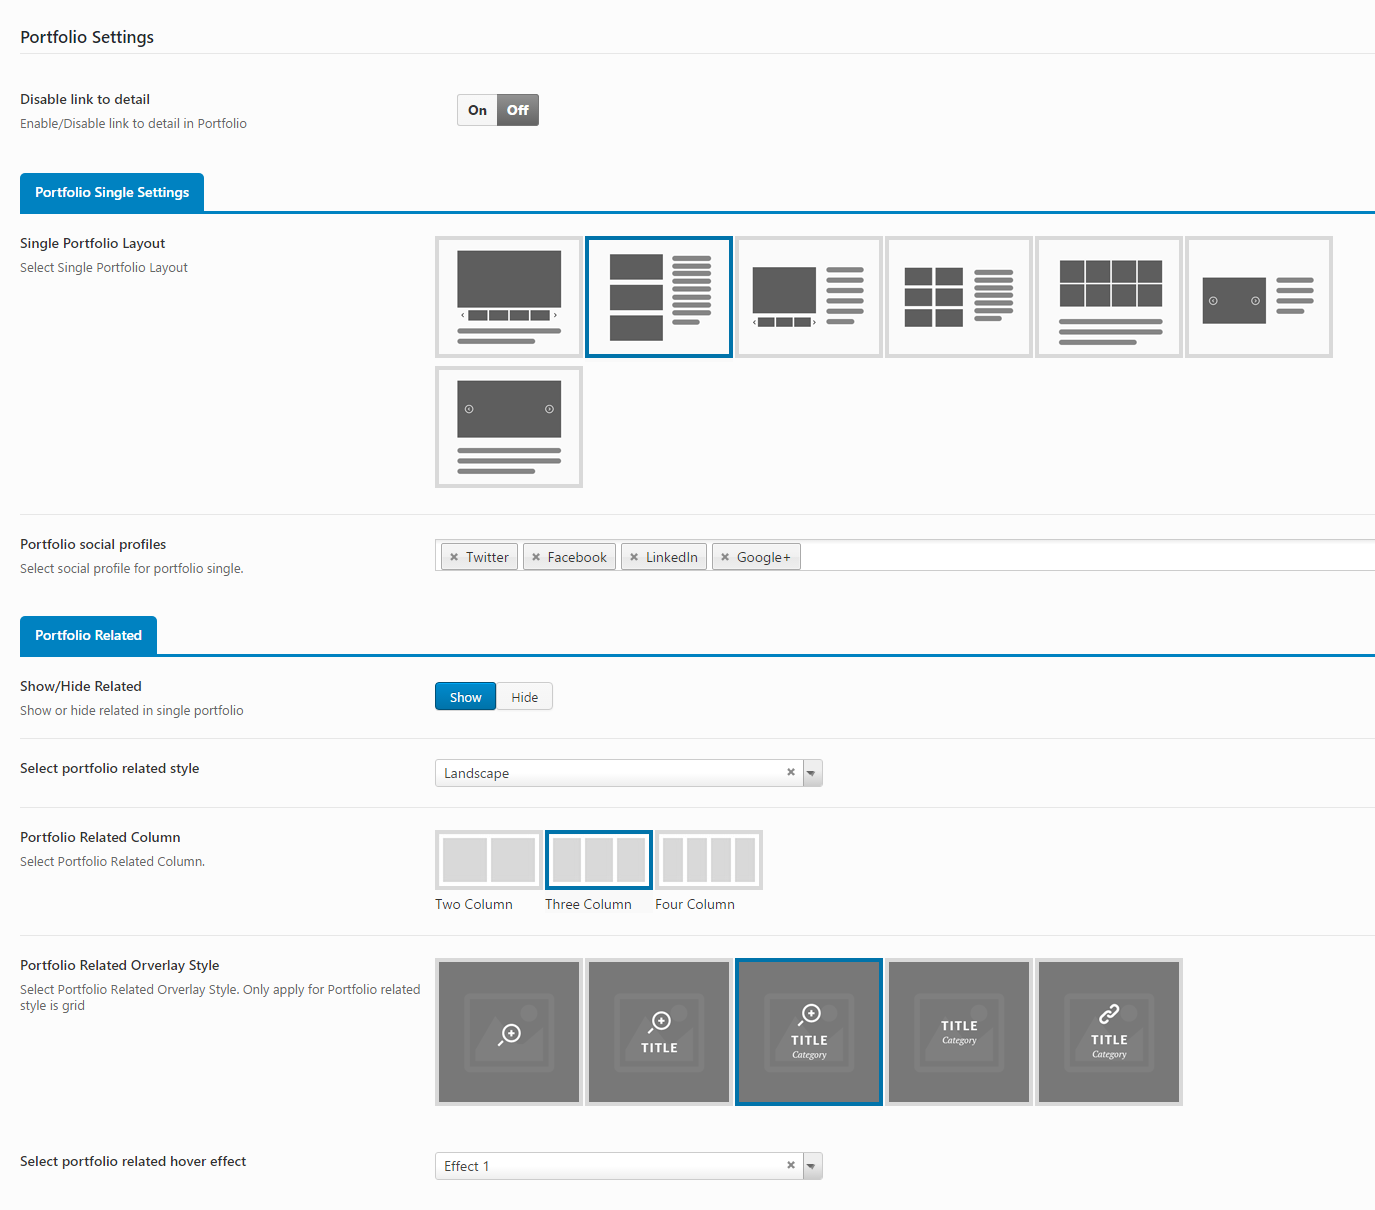
- Disable link to detail: Turn On/Off link to detail.
Portfolio Single Settings
- Single Portfolio Layout: Select Single Portfolio Layout.
- Portfolio social profiles: Select social profile for portfolio single.
Portfolio Related
- Show/Hide Related: Show/Hide related in single portfolio.
- Select portfolio related style: Select portfolio related style from drop down styles .
- Portfolio Related Column:Select Portfolio Related Column.
- Portfolio Related Orverlay Style: Select Portfolio Related Overlay style. Only apply for Portfolio related style is grid.
- Select portfolio related hover effect: Select portfolio related hover effect.
- Select portfolio related hover effect: Select a hover effect for the Portfolio Related.
Custom CSS & Script
In this section, you absolutely add your Custom CSS and Custom JS segments for your website.
Import /Export
In this section, you can import or export date from your website.
HEADER
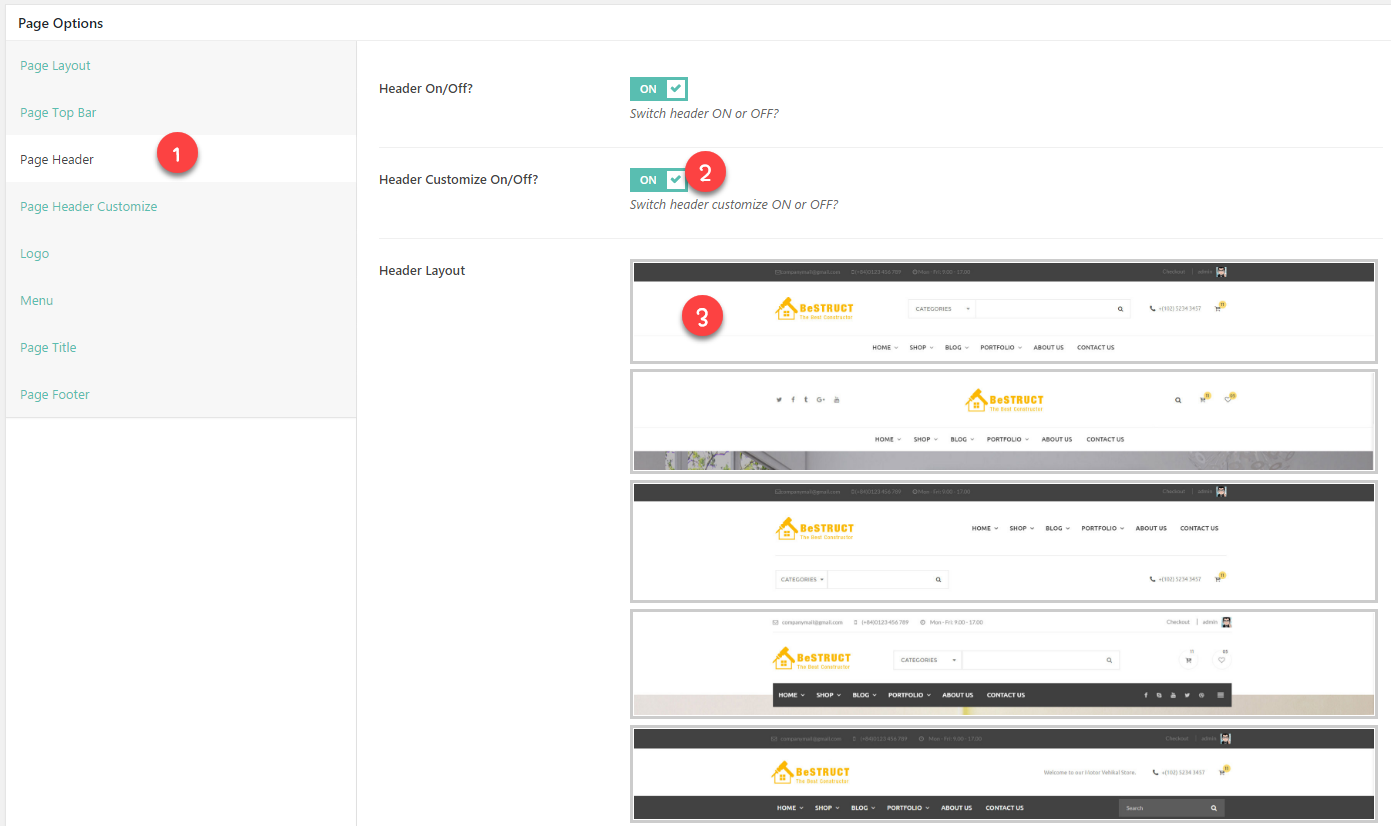
Add Header To Page
There are two ways which you can use to add header style to page:
- 1 - If you want to add a header style to all pages of your website: Please go to Theme Options > Header > Header Layout > Select a header style layout from all header styles. After that, navigate to Theme Options > Header > Header Customize to configure the elements of Header. This header style will be displayed on all pages.
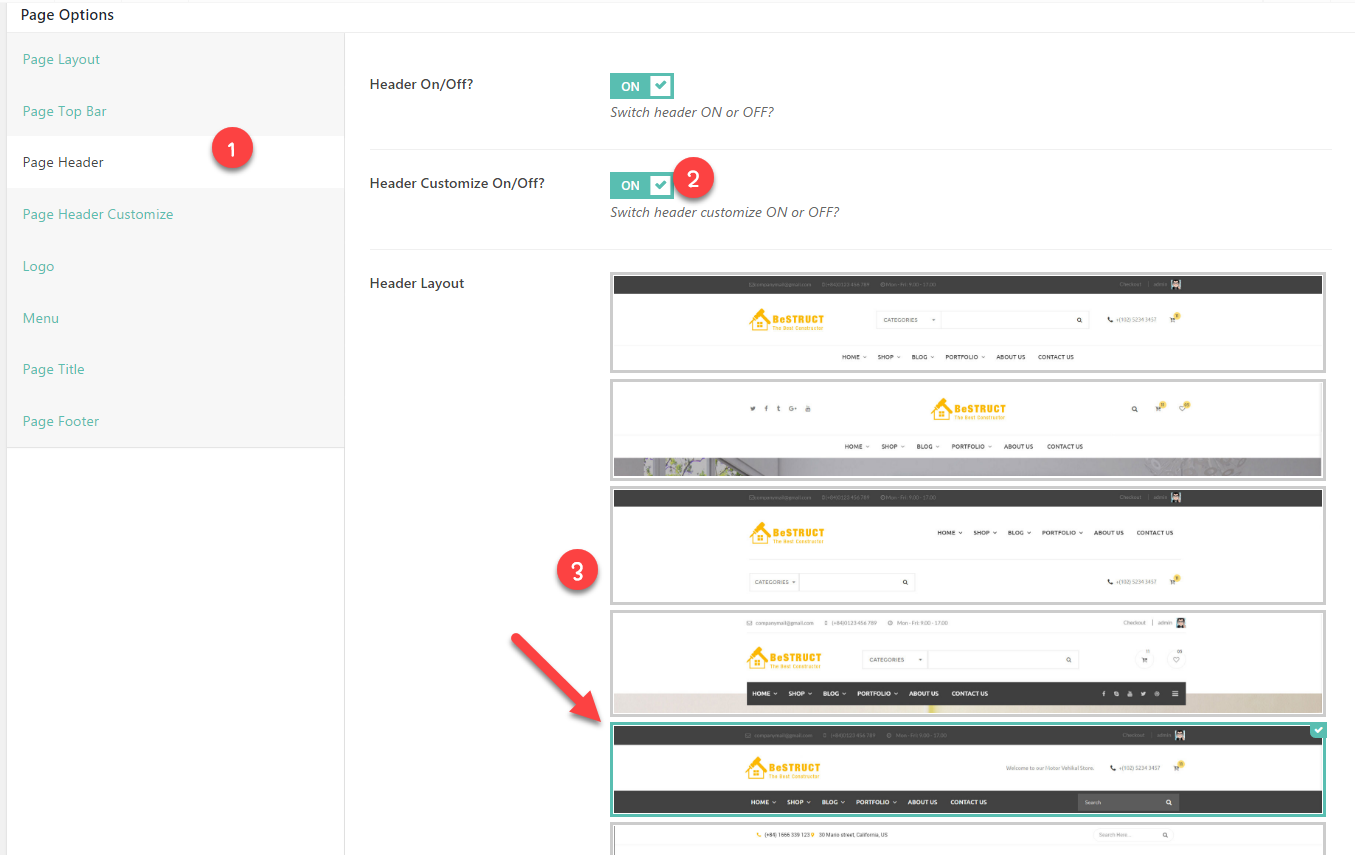
- 2- If you want to add a header style to a separate page on your website: Please go to your page > Open page > Scroll down you will see Page Options > Page Header > Header Customize On/Off?: On > Header Layout > Select a header style layout from all header styles. After that, navigate to Page Options > Page Header Customize to configure the elements of Header. This header style will be displayed a separate page.
- NOTE: After a header style is selected, navigate to Header Customize/Page Header Customize turn on Search button, Shopping cart or Social icon, etc for Header Left Side and Header Right Side as you want.
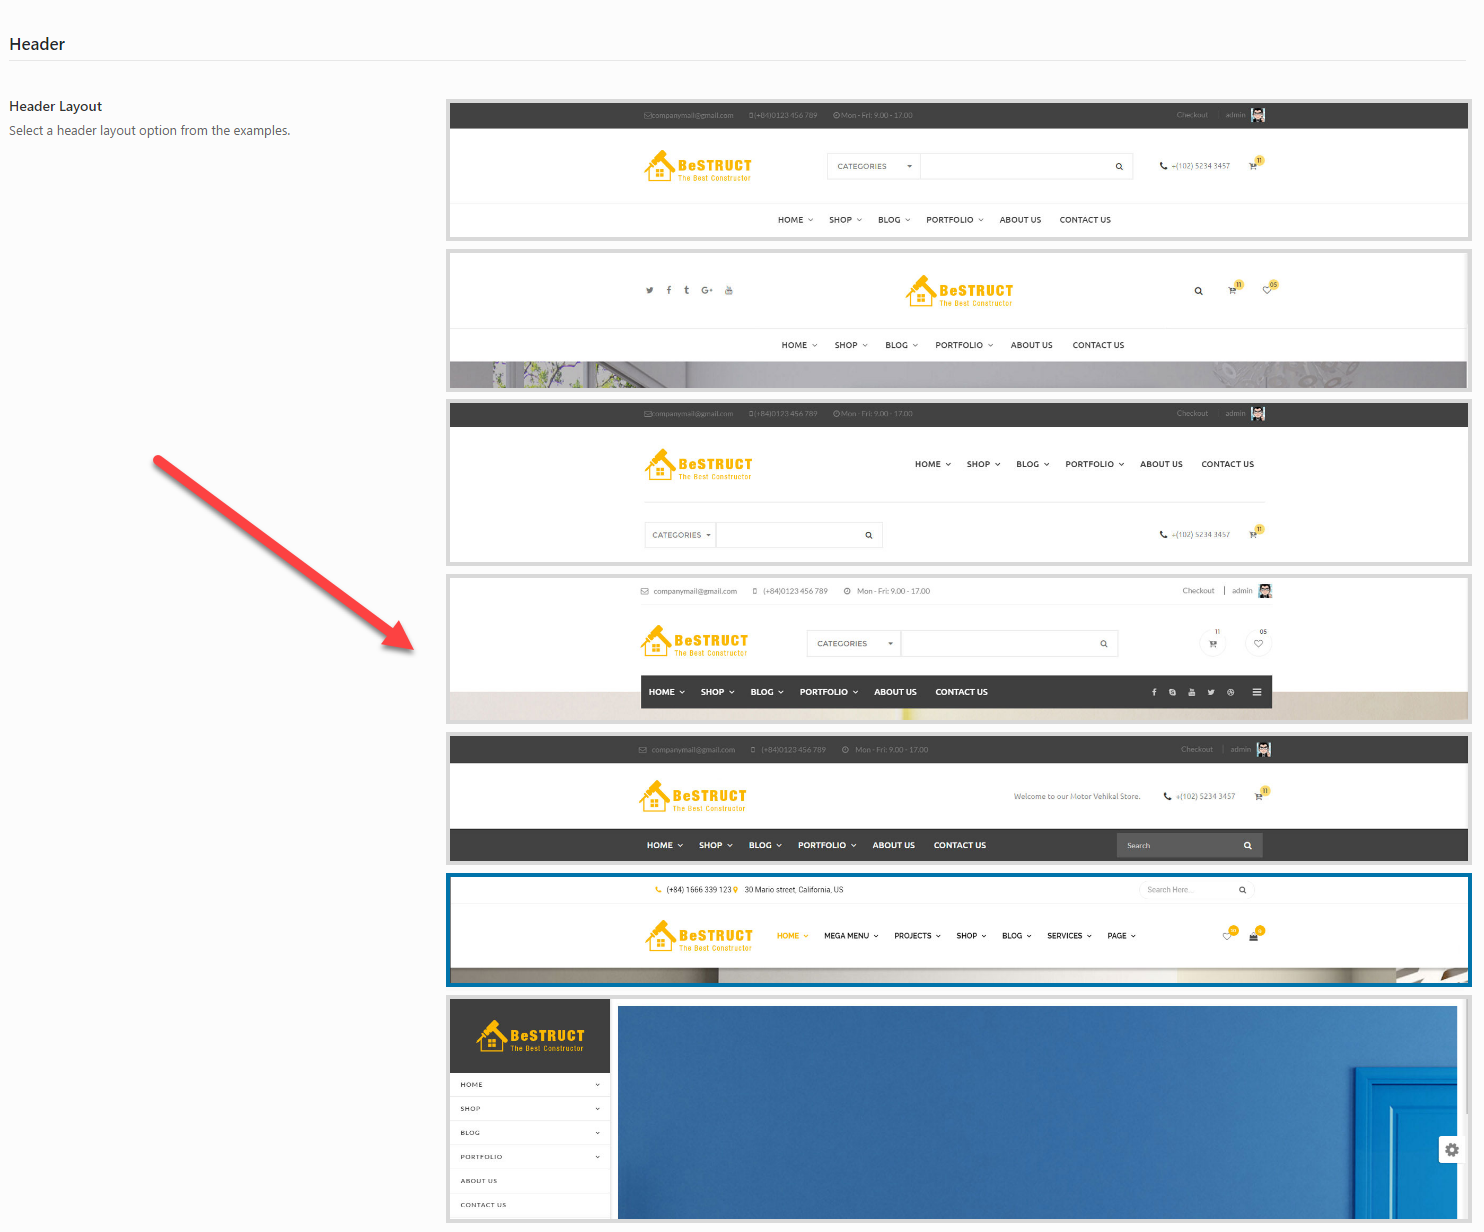
Header Styles
Organisk supports 7 header style layouts. Follow these images below learn more about them:
- Header Layout Style 1:
- Header Layout Style 2:
- Header Layout Style 3:
- Header Layout Style 4:
- Header Layout Style 5:
- Header Layout Style 6:
- Header Layout Style 7:


Header Style of Each Homepage
In this section, we will guide you how to build Header Style for each Homepage of Organisk. Follow these steps below learn more for details:
Construction Home

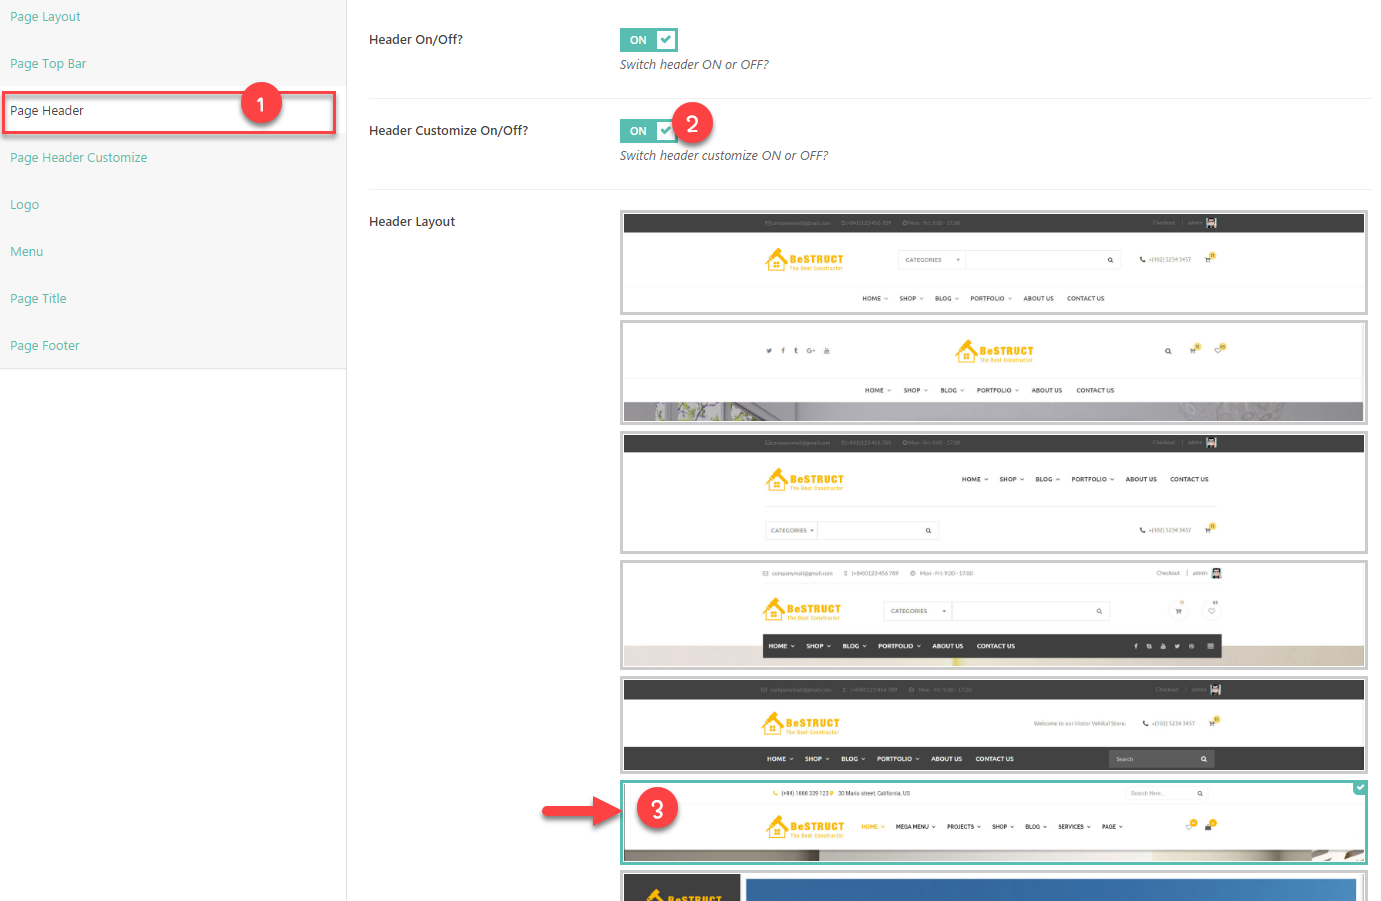
- Step 1: Navigate to Page > Create a new page > Scroll dow you will see Page Options > Page Header > Choose page header style as this image:
- Step 3: In Page Header Customize section > Set header customize right?: On > Header Customize Right > Turn on Search Button/Wishlist/Shopping Cart With Price.
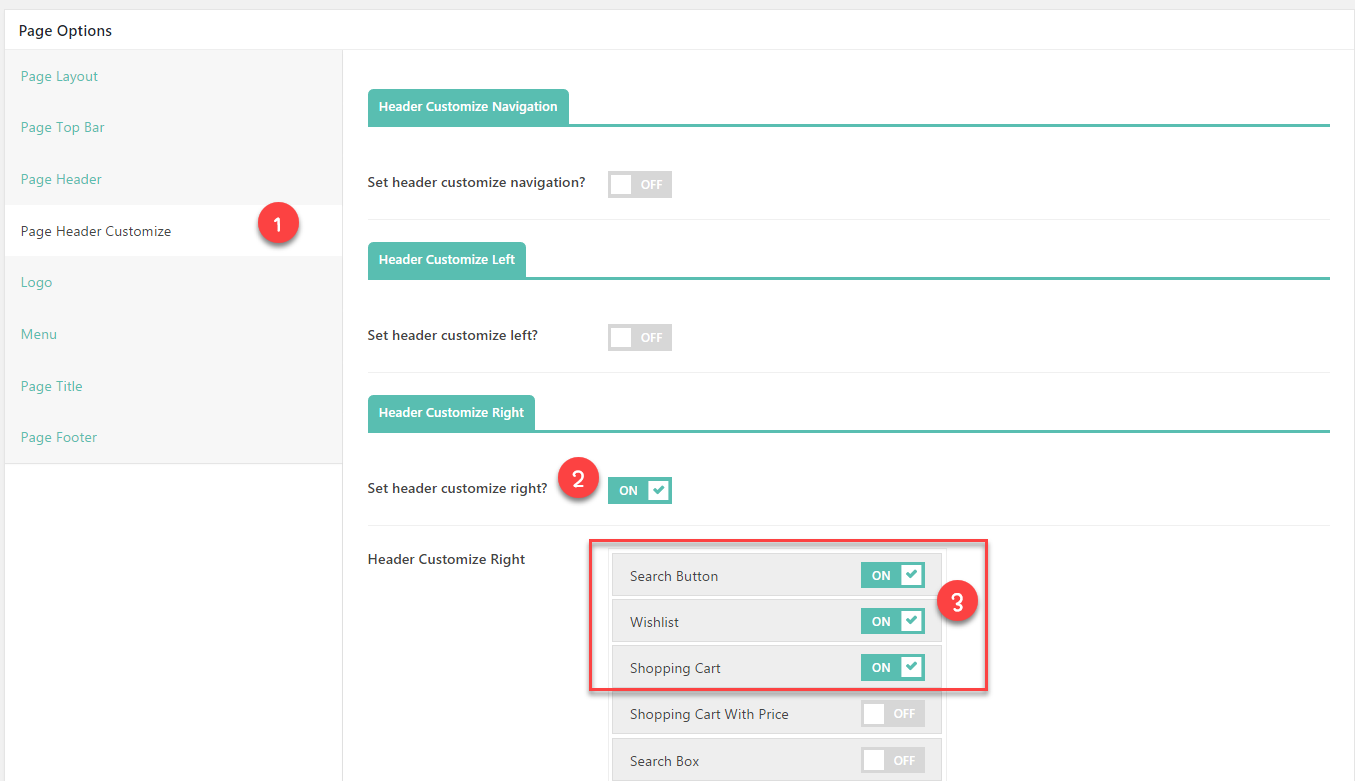
Or you can setup them in Organisk > Theme Options > Header > Header customize navohation: Select Search Button/Wishlist/Shopping Cart With Price.
Architecture Home
- Step 1: Navigate to Page > Create a new page > Scroll dow you will see Page Options > Page Header > Choose page header style as this image:
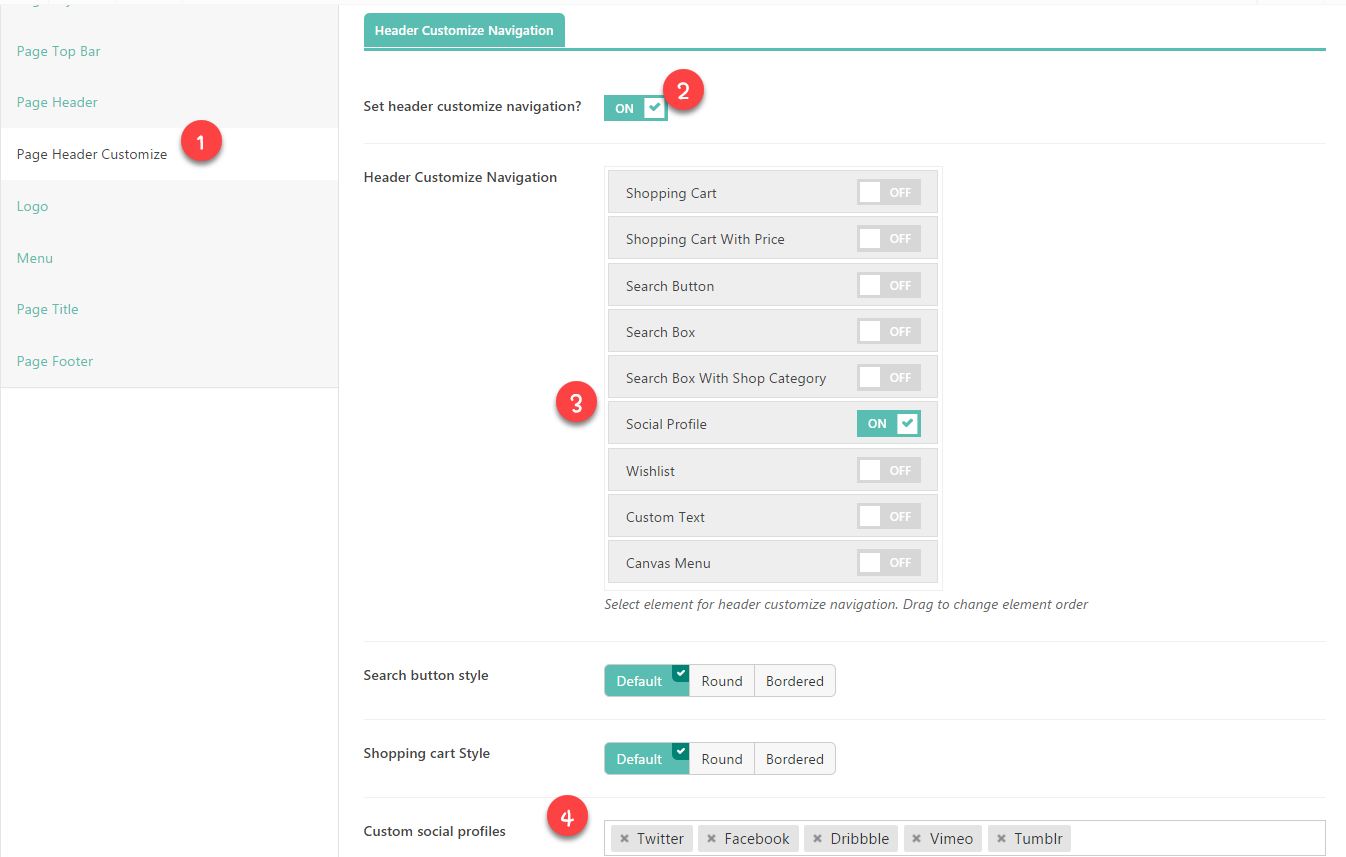
- Step 2: In Page Header Customize section > Set header customize navigation?: On > Turn on Social Profile and Custom Text.
Interior-Shop
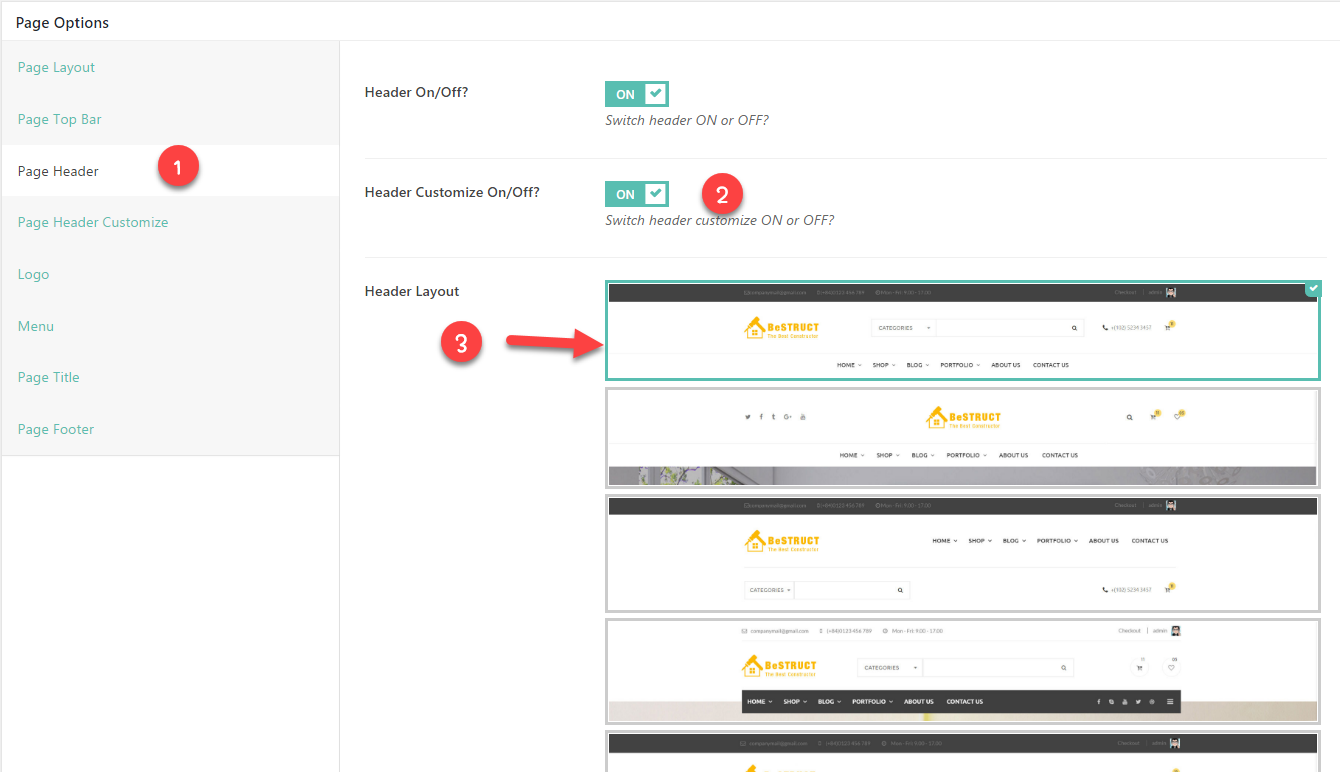
- Step 1: Navigate to Page > Create a new page > Scroll dow you will see Page Options > Page Header > Choose page header style as this image:
- Scroll and setup the color for background, the text as this image

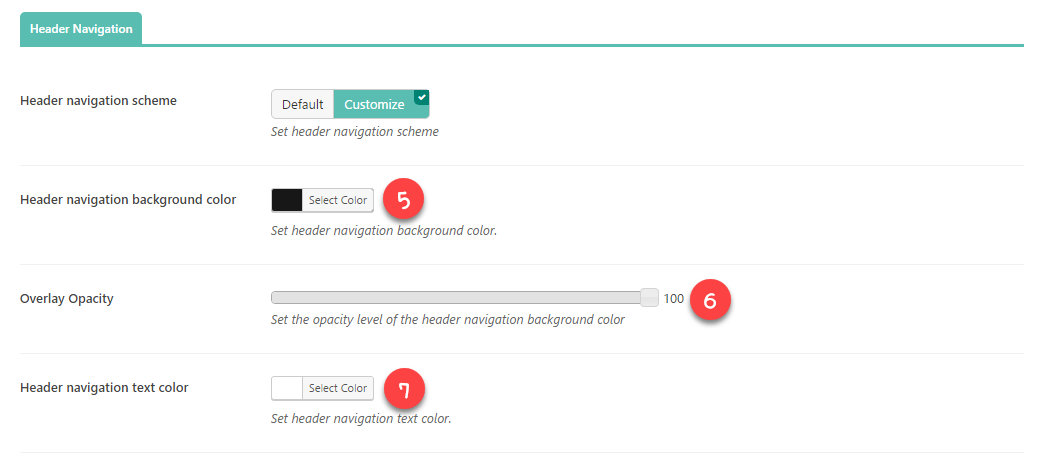
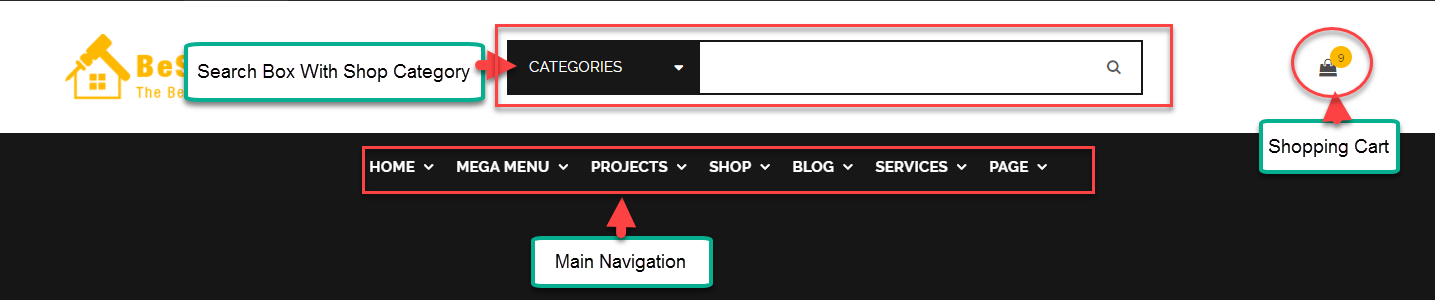
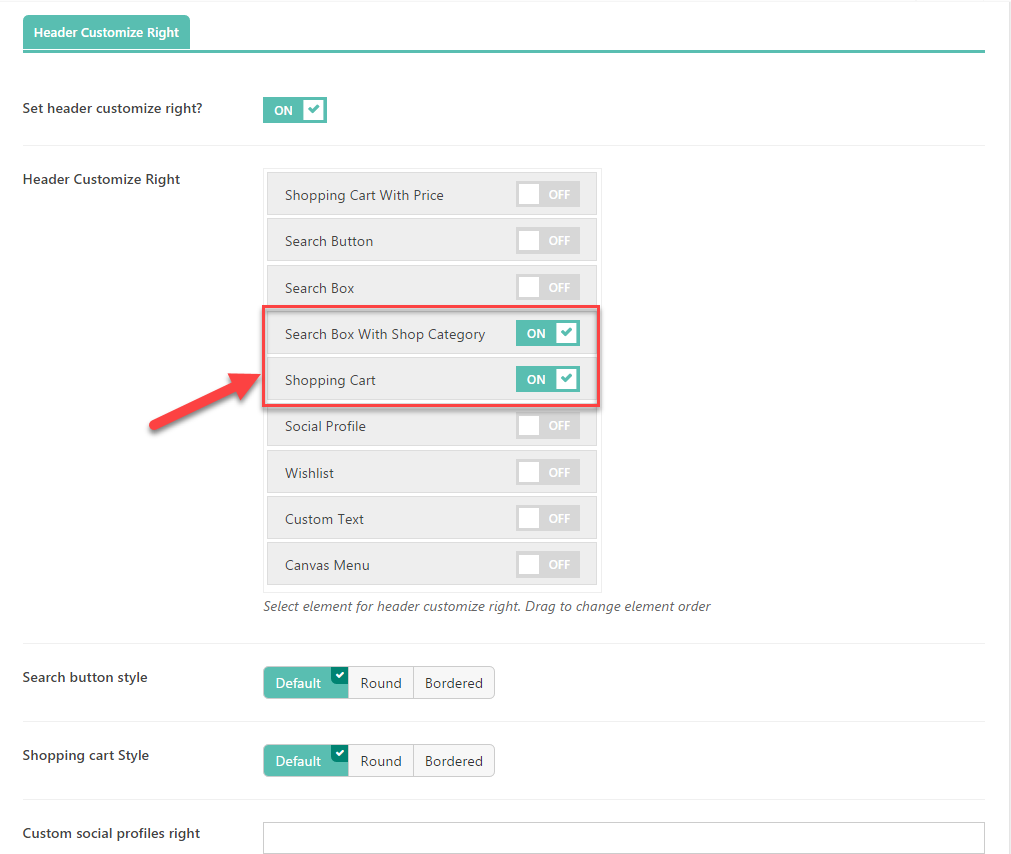
- Step 2: In Page Header Customize section > Header Custom Right > Set header customize Right?: On > Turn on Search Box With Shop Category and Shopping Cart.
Follow this video tutorial learn more about how to configure Header Style layout of Organisk
MENU
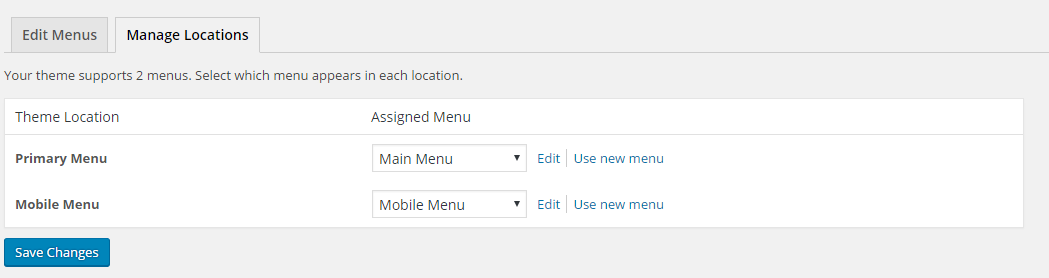
Menu Location
Organisk supports 2 menu location:
- Primary Menu: This is main navigation located in the header.
- Mobile Menu: This is main navigation displayed on mobile device.
Create A New Menu
This theme has built-in multi-column menu system. Menus are created by using the core WordPress menu manager. Follow the guide below to learn how to create a new menu on Organisk theme.
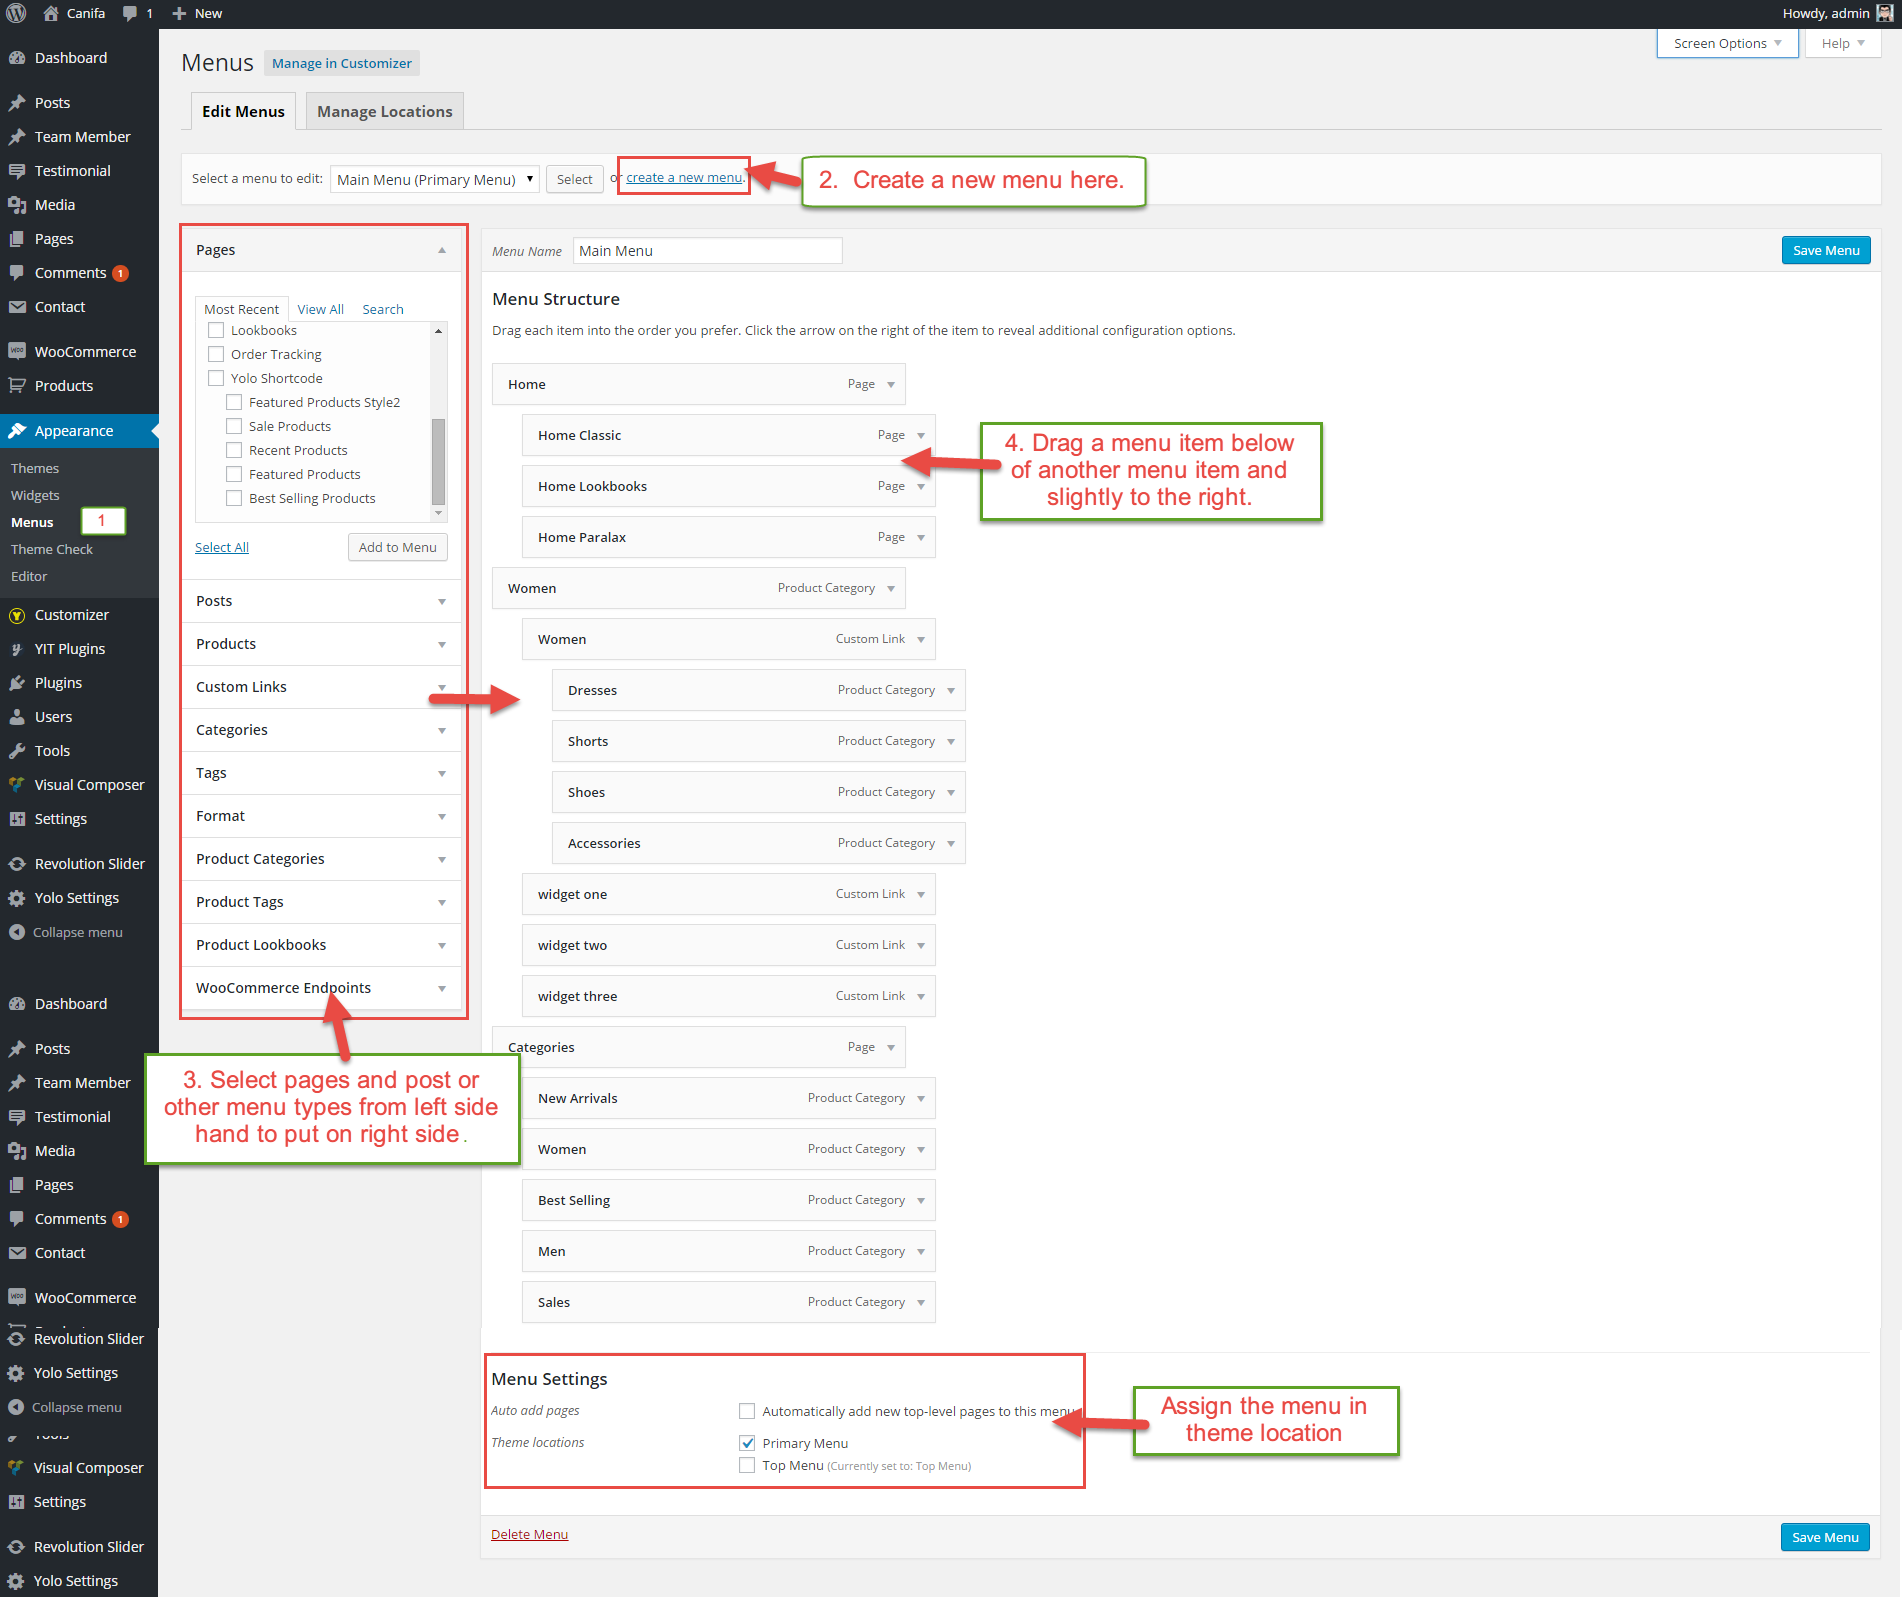
- Step 1: Navigate to Appearance > Menus from Admin panel.
- Step 2: Click the Create A New Menu link to make a new menu. Enter the name, then click Create Menu button.
- Step 3: To add menu item, select pages and posts on the left-hand side and click Add to Menu button. You also can add custom links or post categories into the menu.
- Step 4: To create a dropdown menu, simply drag a menu item below of another menu item and slide to the right, and it will lock into place and create a dropdown section.
- Step 6: After your menu is set up, scroll down to the bottom of the page to assign the menu on the Theme Location box.
- Step 7: Once it’s all are done, make sure you click the Save Menu button.
Megamenu
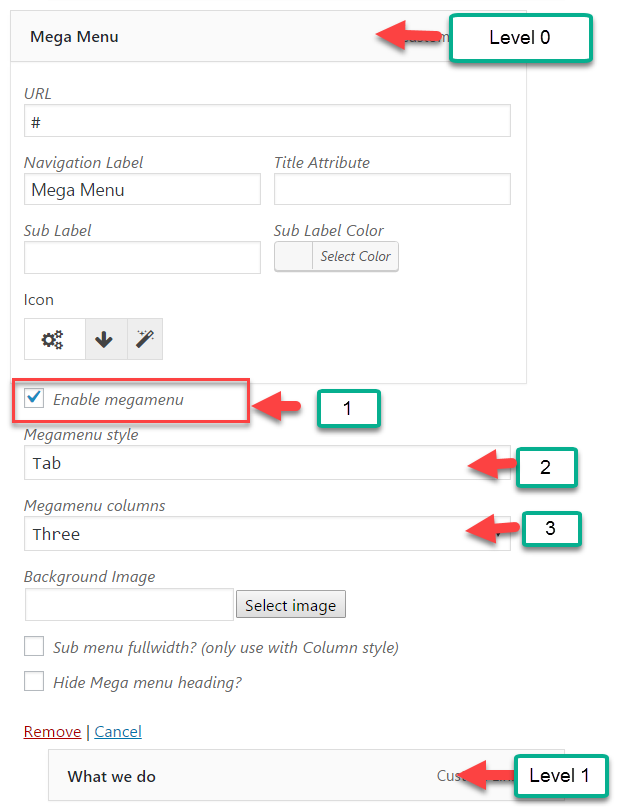
Organisk supports creating Megamenu for your website. Megamenu contains 2 sub-menu styles: Column and Tab. To easily enable megamenu, you only open Menu Item level 0 > Check Enable megamenu to activate mengamenu.
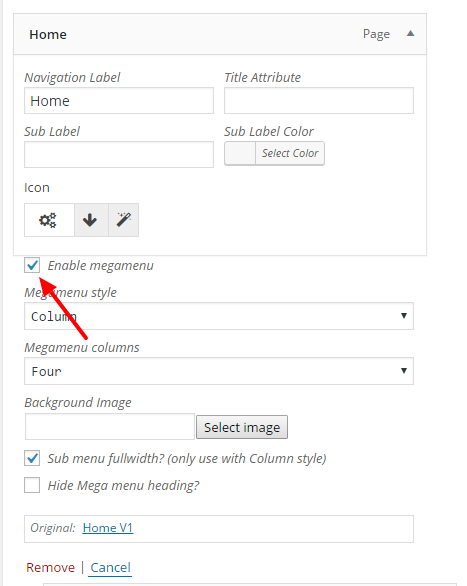
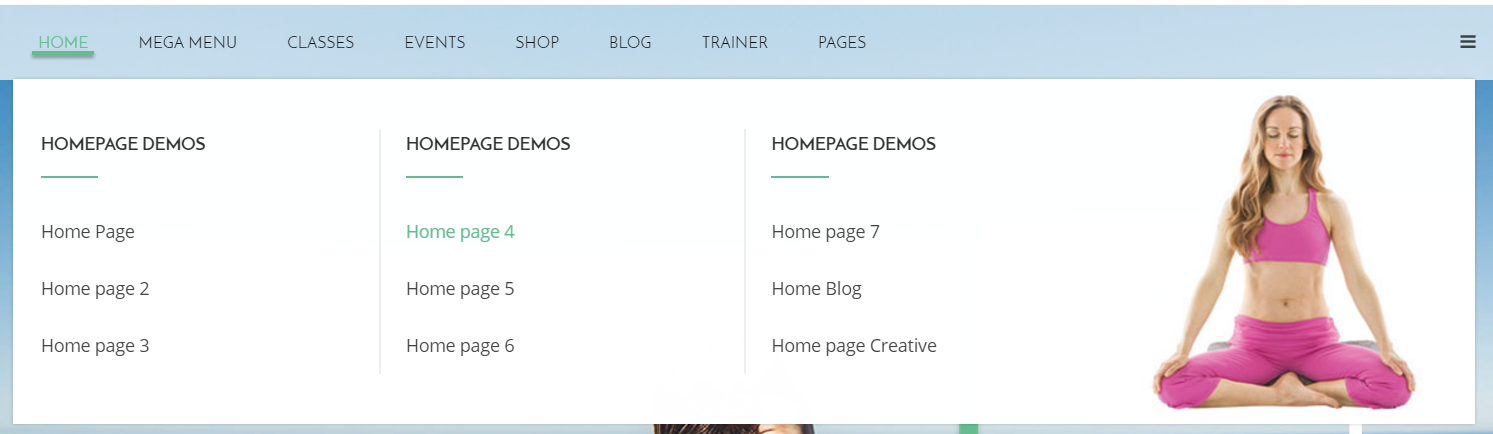
Column Style
Column Style is a multi-column style menu to display menu items (such as posts, pages, categories, shop).
- Column Style requires your menu which must have Level 0, Level 1 and Level 2 menu item.
- Click a Level 0 menu item and select Megamenu style: Column and select Megamenu columns for your website.
- In addition, you can select Background Image for your menu or check Sub menu fullwidth to turn on sub menu fullwidth. Check Hide Mega menu heading to hide megamenu heading

Tab Style
Tab Style allows adding many different content types on your menu.
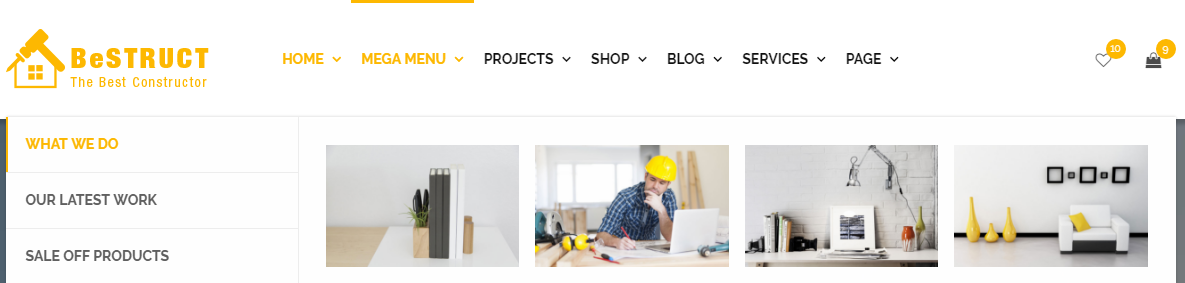
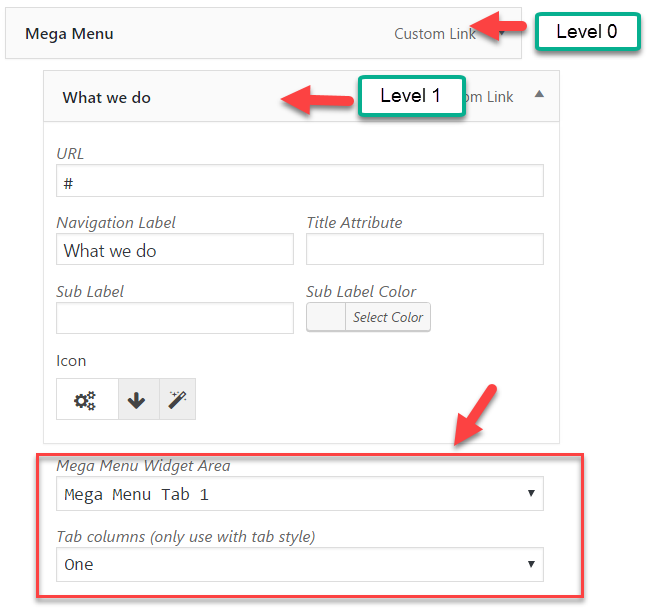
- On Tab Style, menu only has 2 levels (Level 0, Level 1). On menu level 0, select Megamenu style: Tab and select Megamenu Columns for your menu.
- On menu level 1, you need to select Mega Menu widget area (Mega Menu widget area will be defined on Appearance > Widgets). In addition, remember to select Tab Columns from drop down list columns.
- In addition, you can select Background Image for your menu, check on Hide Mega menu heading to hide megamenu heading
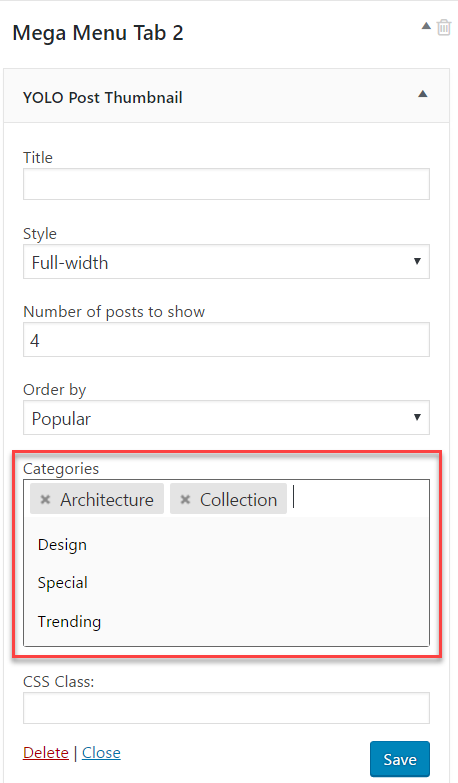
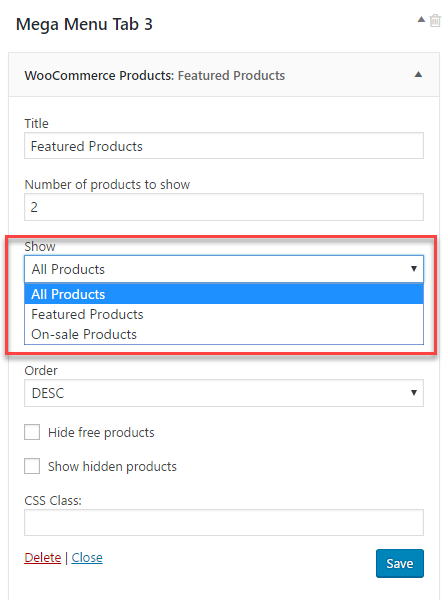
Organisk supports 3 sidebar positions to add widgets of Mega Menu: Tabs menu. That includes Mega Menu Tab 1, Mega Menu Tab 2 and Mega Menu Tab 3.
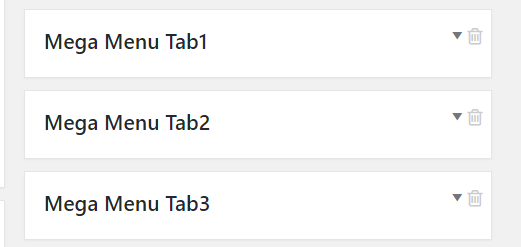
Follow these steps to add widget to each sidebar positions:
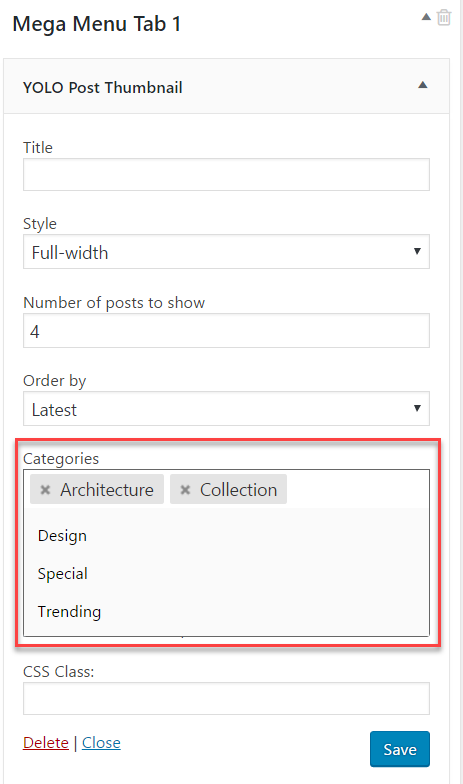
- Mega Menu Tab 1: Navigate toAppearance > Widgets > Drag and Drop Post Thumbnail widget from left sidebar to Mega Menu Tab 1 sidebar. Remeber to select Categories for each widget
- Mega Menu Tab 2: Navigate to Appearance > Widgets > Drag and Drop Class Yoga Menu widget from left sidebar to Mega Menu Tab 2 sidebar. Remeber to select Categories for each widget
- Mega Menu Tab 3: Navigate to Appearance > Widgets > Drag and Drop Upcomming Events Feature widget from left sidebar to Mega Menu Tab 3 sidebar. Remeber to select Categories for each widget
PAGE
Create New Page
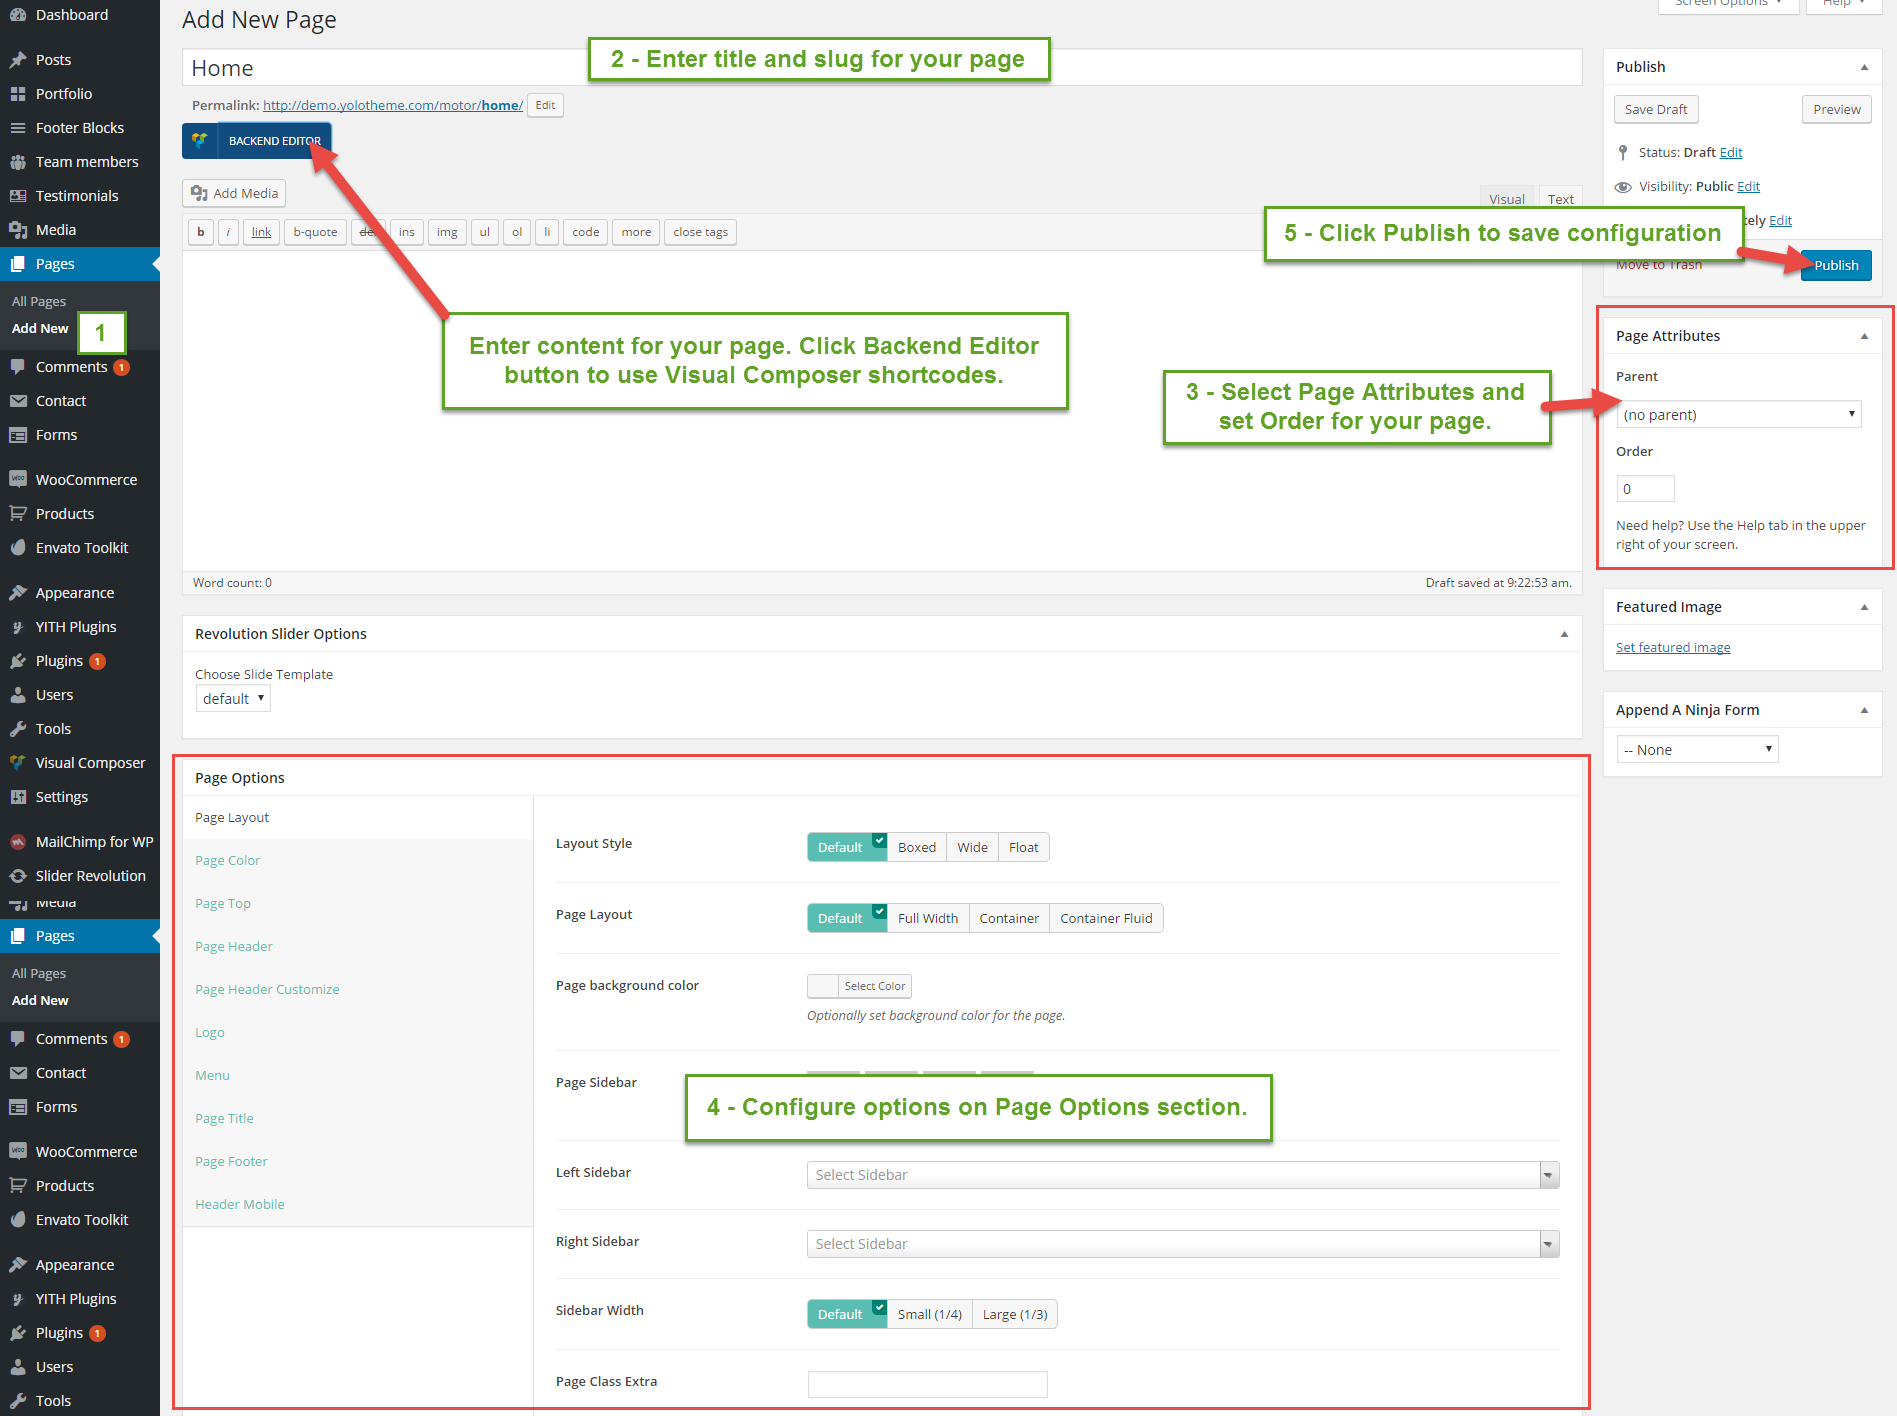
- Step 1:From Admin Panel, navigate to Pages > Add New to create a new page.
- Step 2: Enter the title, slug and content for your page.You can choose to add your content using Visual Composer shortcode or Text editor.
- Step 3: In Page Attributes box, choose Page Template in dropdown list. See the list of Page Templates below for more details.
- Step 4: After your content is added successfully, scroll down your mouse, you will see Page Options. You can configure each tab on Page Options making your page nicer and more eye-catching.
- Step 5: All are done, click Publish to save your configuration.
Page Options
We have created some specific Organisk page settings which will help you to build splendid pages for your website. Follow the list of options below to see how they work:
Page Layout
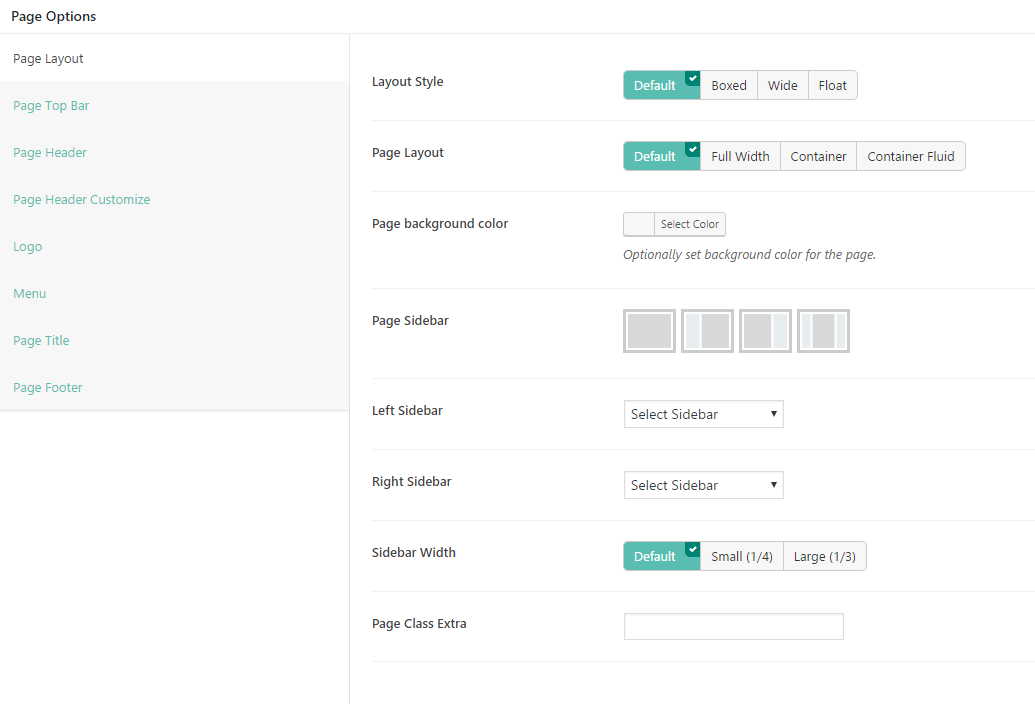
- Layout Style: Choose layout style for your page including Default, Boxed, Wide and Float. If choose Default, your page will get the configuration on Theme Options.
- Page Layout: Choose page layout (this section doesn't include header) including Default, Full Width, Container and Container Fluid.
- Page background color: Set background color for your page from color table.
- Page Sidebar: Choose sidebar position for page.
- Left Sidebar:Choose left sidebar for page. This option will appear if you select Page Sidebar: Left Sidebar or Page Sidebar: Left & Right Sidebar.
- Right Sidebar: Choose right sidebar for page. This option will appear if you select Page Sidebar: Right Sidebar or Page Sidebar: Left & Right Sidebar.
- Sidebar Width: Choose the width of sidebar.
- Page Class Extra: Enter page class here.
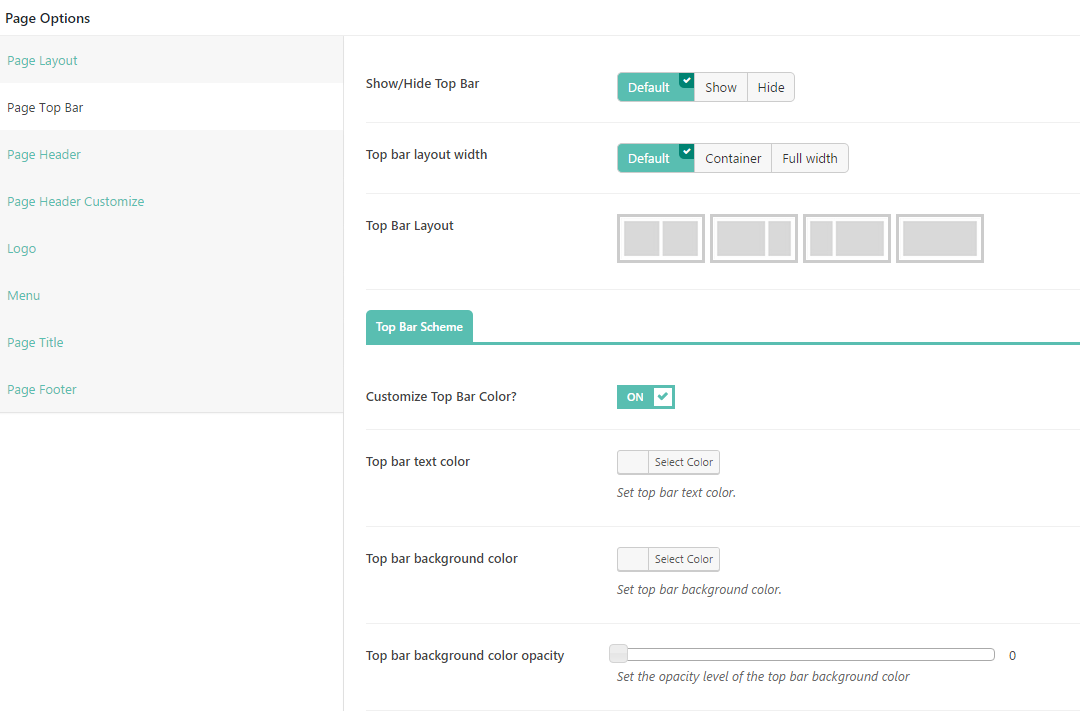
- Show/Hide Top Bar: Turn On/Off top bar for you page. If choose Default, the configuration of top bar will be inherited on Theme Options.
- Top bar layout width: Choose the width for your top bar including Default, Container and Full width. If choose Default, the configuration of top bar layout width will be inherited on Theme Options.
- Top Bar Layout: Choose top bar layout for your page.
- Top Left Sidebar: Select sidebar for Top Left Sidebar from dropdown list sidebar.
- Top Right Sidebar: Select sidebar for Top Right Sidebar from dropdown list sidebar.
Top Bar Scheme
- Top bar text color: Select color for top bar text
- Top bar background color: Select color for top bar background
- Top bar background color opacity: set the opacity level of the top bar background color
Page Header
Page Header will allows turning On/Off Header for your page. In addition, you absolutely customize Header Customize option, if Header Customize option is turned on, you can configure many options for your page such as Header Layout, Header Scheme, Header sticky, etc.
Page Header Customize

- Set Header Customize Navigation: Turn On/Off Header Customize Navigation. If this option is turned on, you can absolutely configure header customize navigation as you want.
- Header Customize Navigation: Click to turn on element for header customize navigation. There are 9 elements you can choose. Drag to change element order.
- Search Button Style:You can choose Default to inherit configuration of Theme Options or choose Round or Bordered.
- Shopping cart Style: Choose Default, Round or Bordered.
- Custom Social profiles: Add your custom social profiles on this option.
- Custom text content: Enter Custom text here
- Header customize separate: Turn On/Off this option.
- Set Header Custom Left/Right: Like setting Header Custom Navigation option, you can absolutely turn on Header Custom Left/Right to configure options which are appropriate for your page.
Logo
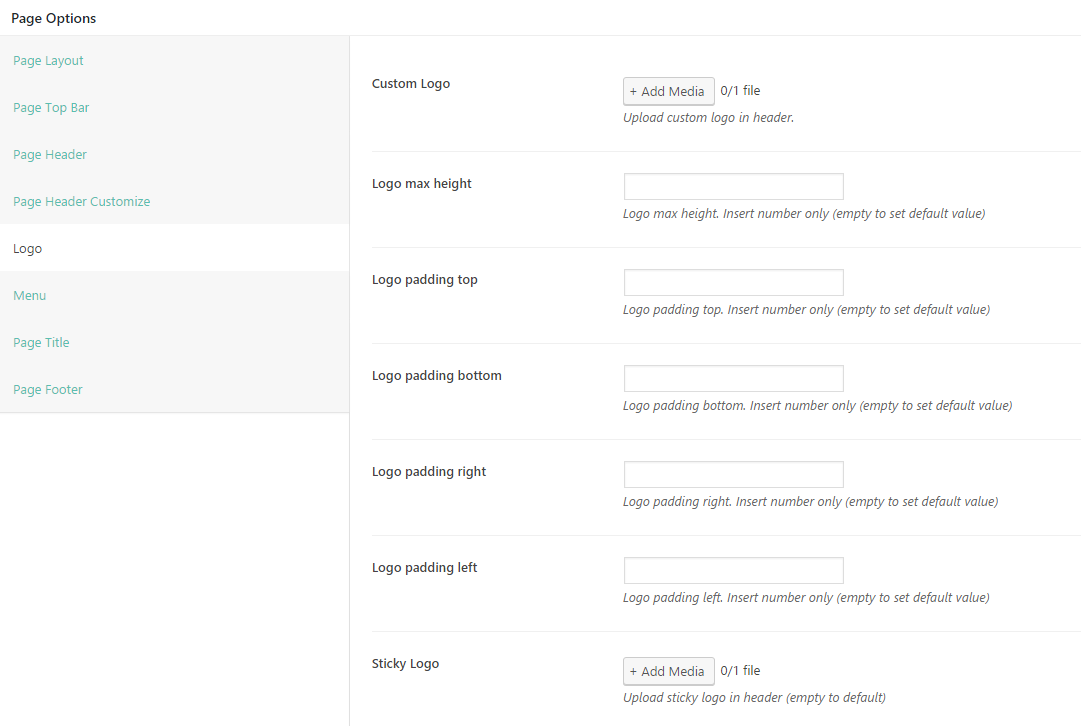
- Custom Logo: Upload your custom logo on header of your page.
- Logo Height: Enter the height of logo here.
- Logo max height: Enter the logo max height for your page.
- Logo padding top/ padding bottom:Enter the logo padding-top and padding-bottom for your logo.
- Sticky Logo: Upload an image for sticky logo.
Menu

Menu section will help you to choose separated menu for page. You can select Page Menu and Page menu mobile.
Page Title
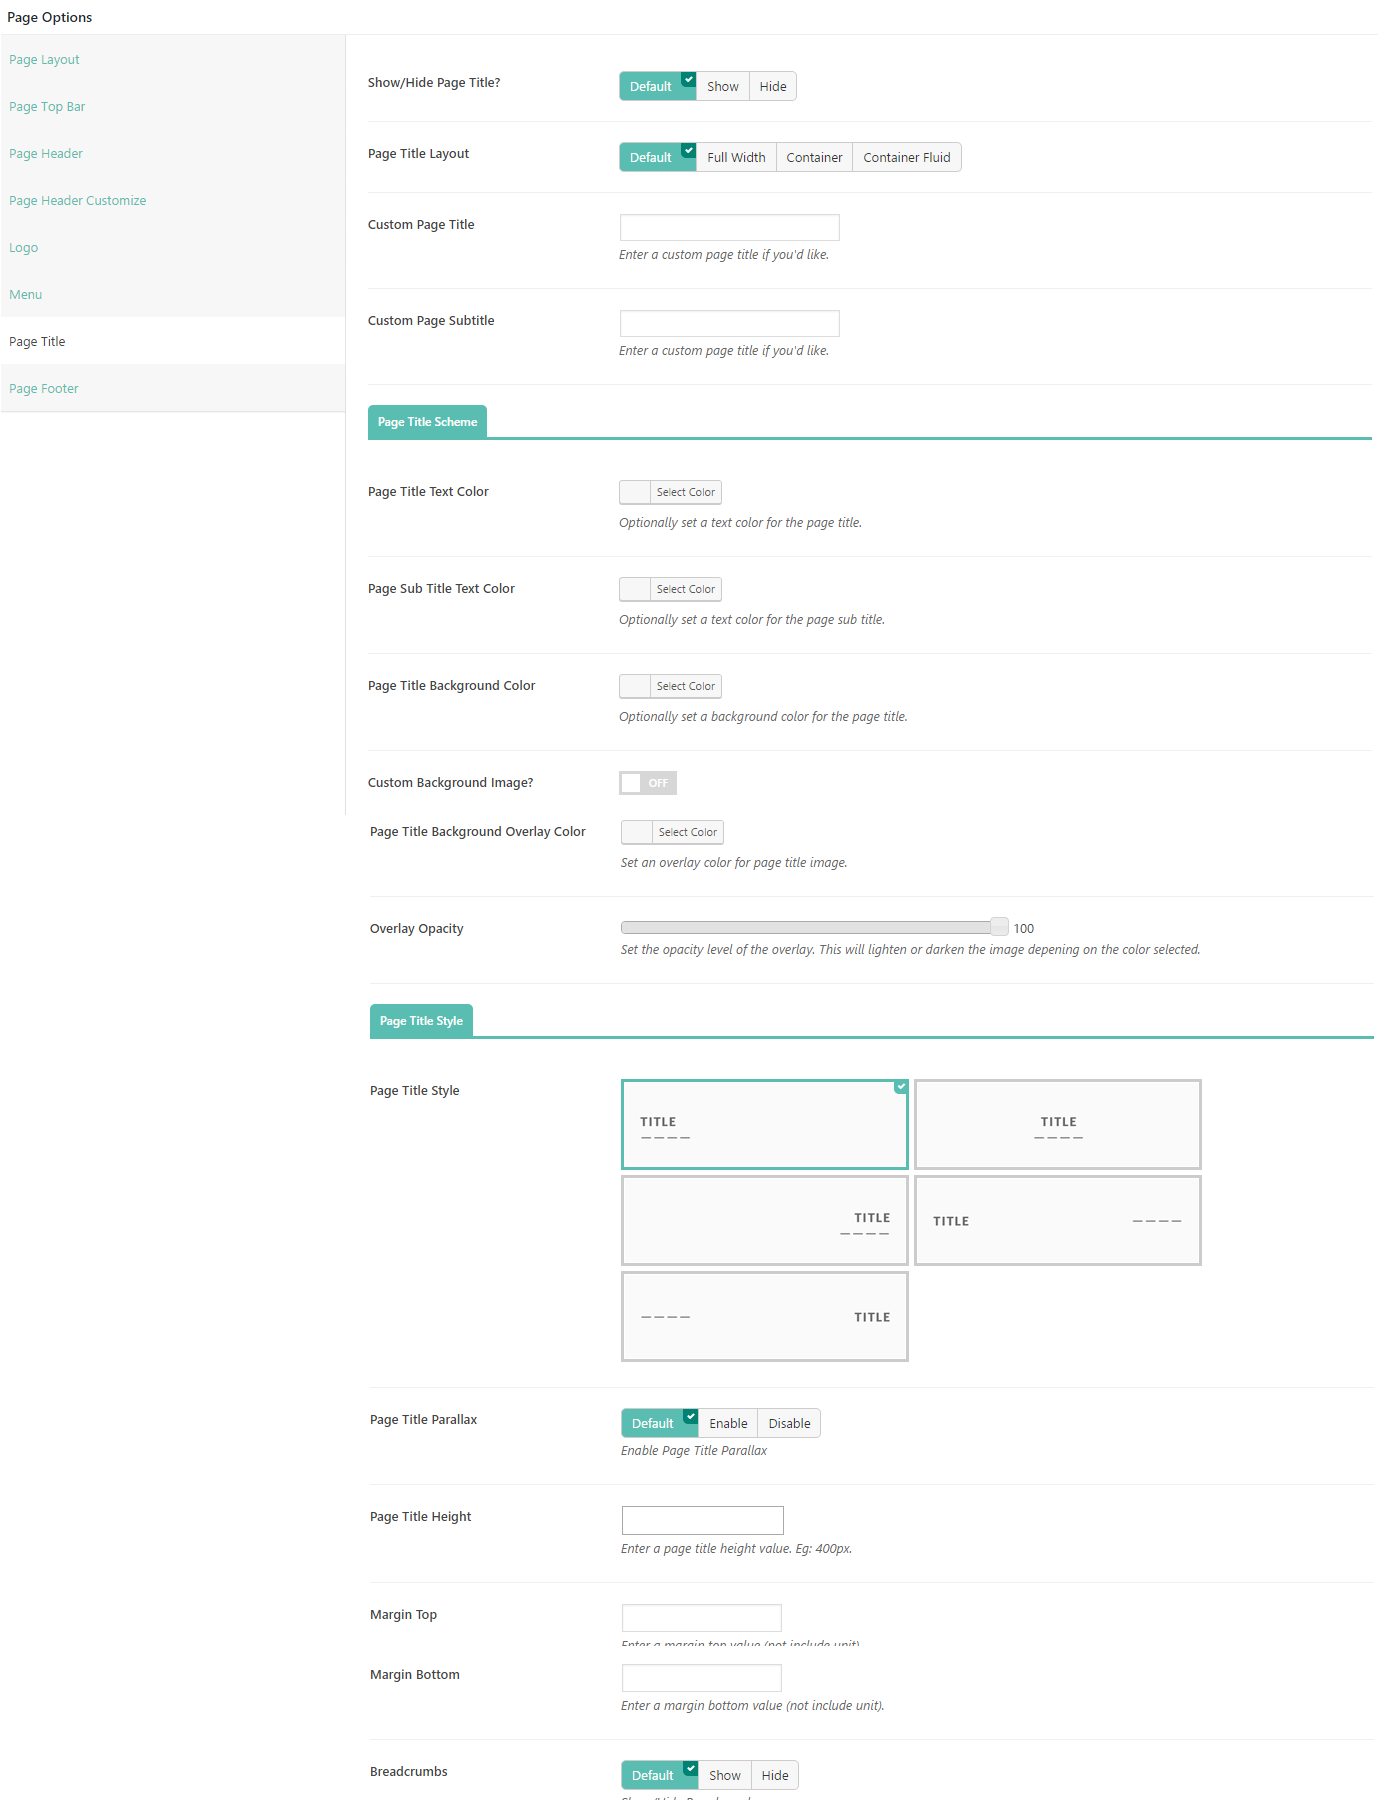
On this section, you can customize your page title with many options such as turn on/off page title, select color for page title or sub title from table color.
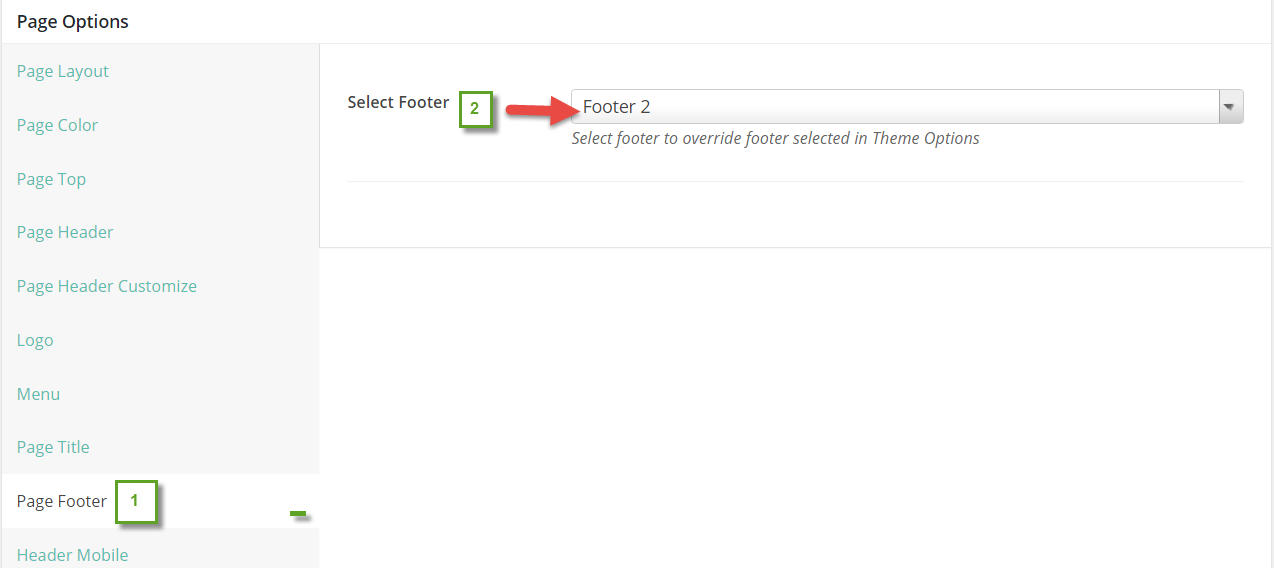
Page Footer
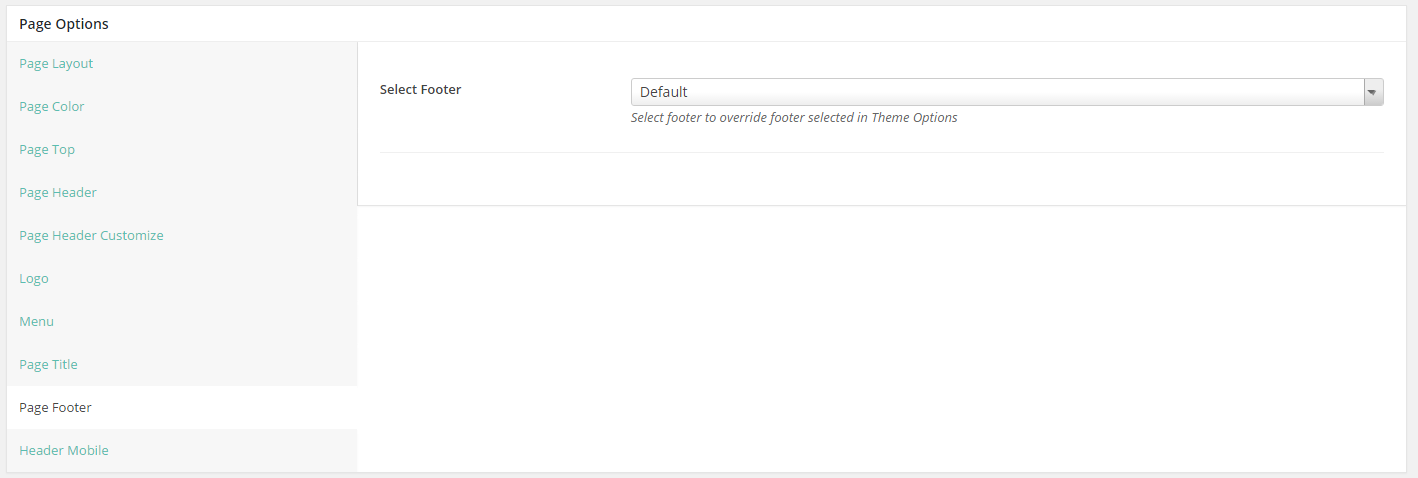
Page Footer allows you to select footer to override footer selected on Theme Options
POST
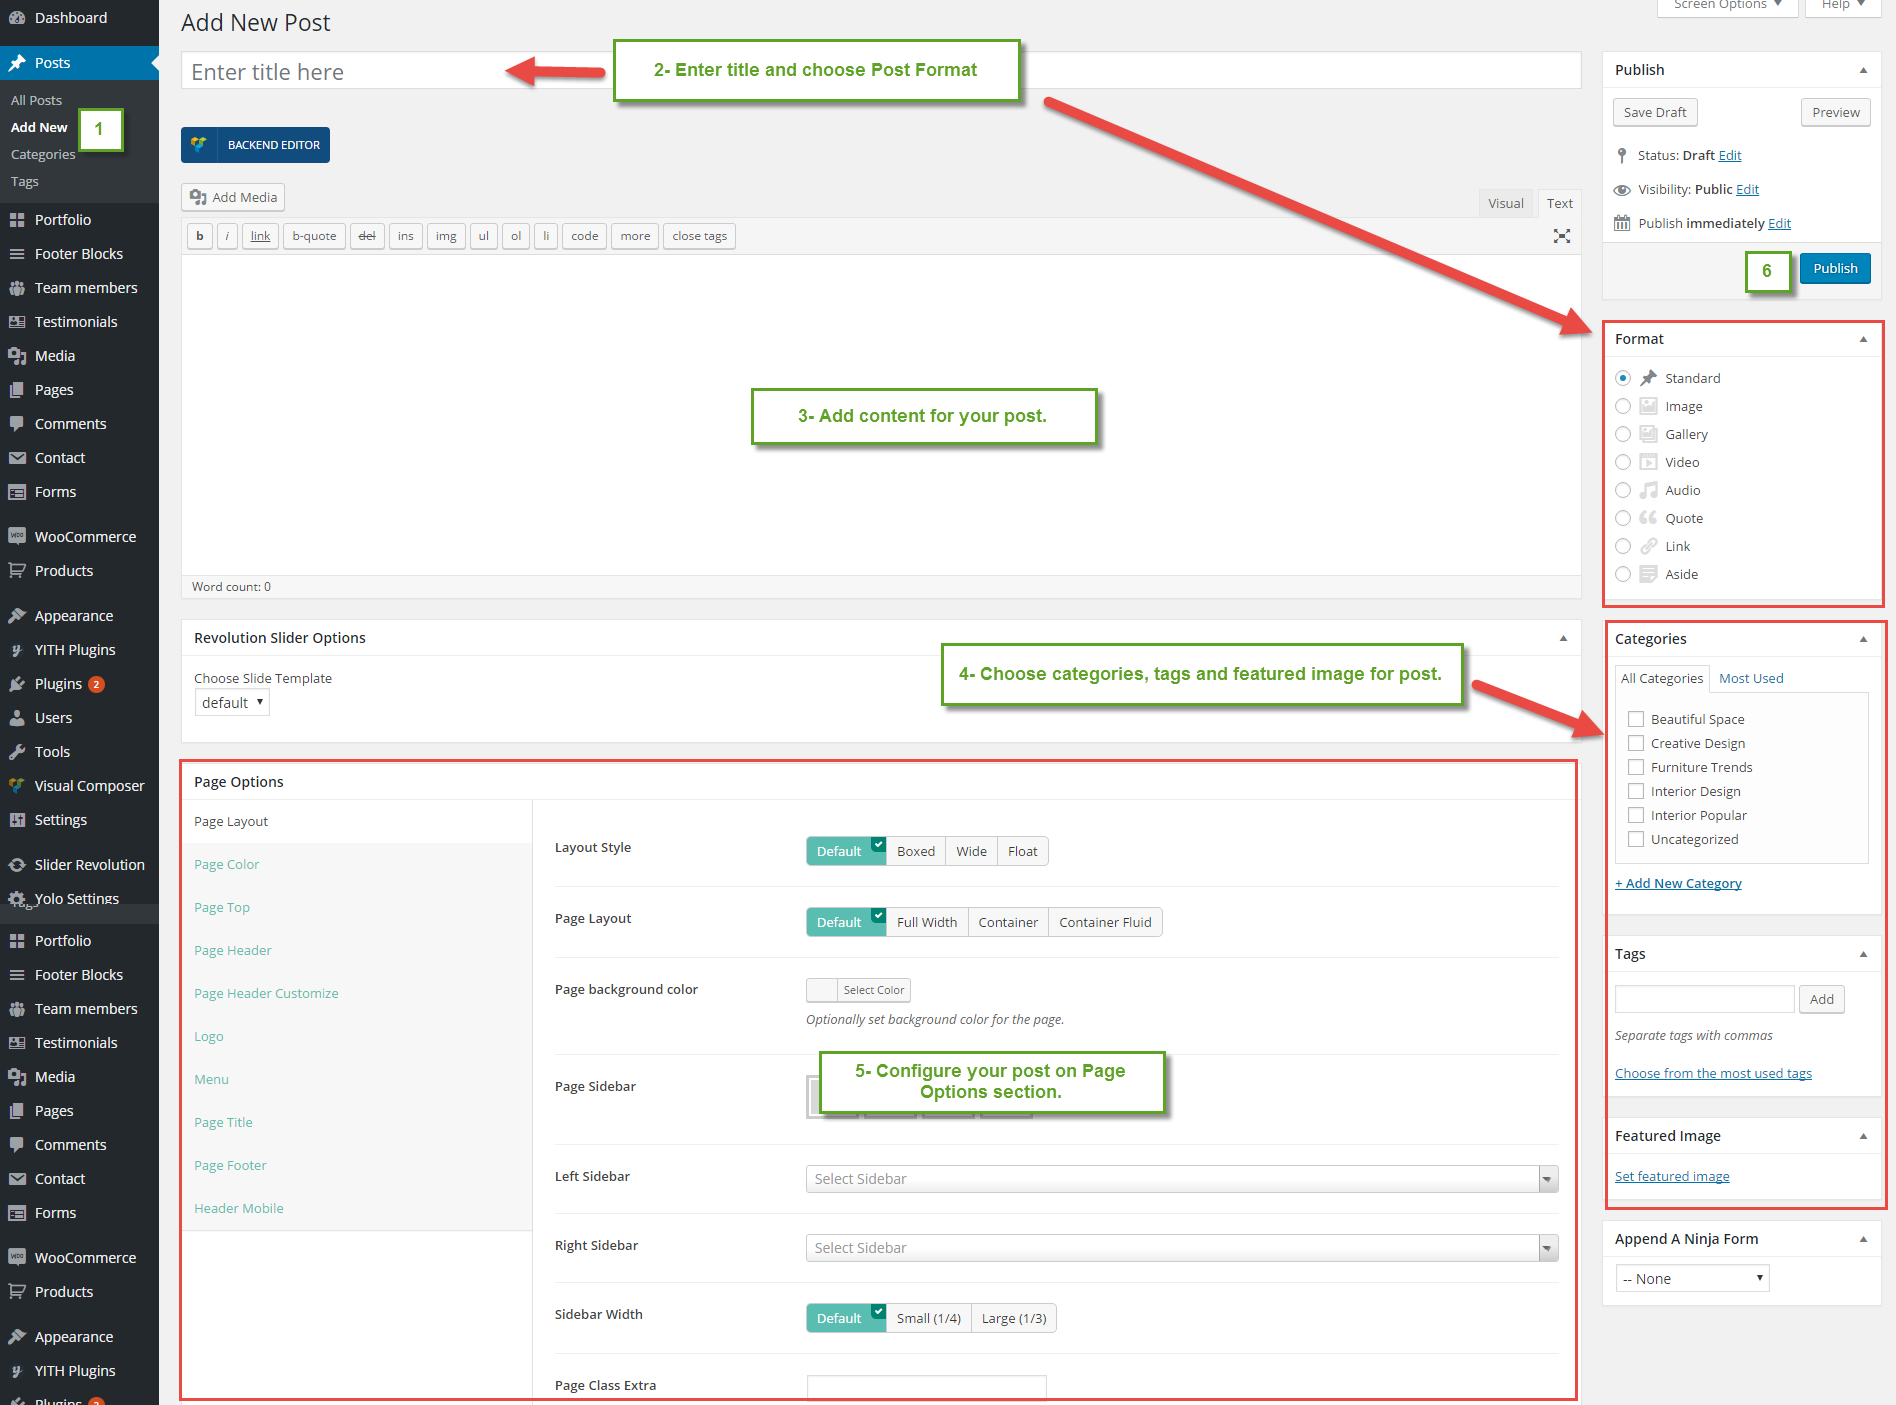
Create New Post
Follow these steps below to create blog post:- Step 1: In your Admin Panel, go to Post and navigate to Add New.
- Step 2: Enter your title and choose Post Format from Format box on the right side which shows different post format options: Standard, Image, Gallery and Video.
- Step 3: Add your post content in editing field. You can use our shortcodes to build your content where needed. .
- Step 4: Add Categories for the post from the Categories box on the right side. You can add new category or choose from existing categories. Check the box to select Categories for your post. Add relevant Tags for your post in the Tags box, set Featured image on the right side and other settings from the sections below Editing field. If you need more detailed guides about post settings in WordPress, please find in WordPress Codex.
- Step 5: After your content is added, scroll down your mouse, you will see Page Options section allowing you to have more configurations for your post.
- Step 6: All are done, click Publish to publish your post.
Post Format
Organisk supports 7 post formats. Follow these steps below to see the description of Post Formats and Global setting of Post.
- Standard Settings: This is the standard post, on this post format, you can choose Featured Image and set the content for it.
- Gallery Settings: When selecting Gallery Format, you will have Gallery Setting meta-box to add as many images as you want to your gallery and manage your preview content as Featured Image, First Image on Gallery or Image Slideshow.
- Image Settings: When you selecting Image Format for you post, you will have Image Settings a meta-box to choose a main image of the post. Set Feature Image as the main image for preview content or Choose Your Image if you want to set another image as the main image for preview content.
- Video Settings: When selecting Video Format, you will have Video Setting meta-box where you can add video URL, and embedded video code, aspect ratio, and preview content as Featured Image, Video or Featured Image as Video Thumbnail.
- Audio Settings: When selecting Audio Format, you will have Audio Setting meta-box where you can add embedded audio code, aspect ratio and preview content as Featured Image, Video or Featured Image as Video Thumbnail.
- Quote Settings: When selecting Quote Format, you will have Quote Setting meta-box where you can add the quote and citation and manage your preview content as Featured Image.
- Link Settings: When selecting Link Format, you will have Link Setting meta-box where you can add the URL, Text and manage your preview content as Featured Image.
Page Options
Like Page Options section of Page, you absolutely configure more options on Page Options of Post. To learn more about descriptions of each option, please visit Page section.
BESTRUCT CUSTOM POST TYPE
Team members
- Step 1: From Admin Panel, navigate to Team Member > Add New
- Step 2: In the right side, select Team Categories and Featured Image for team member.
- Step 3: Fill out all information of Team Member Information, Social Profiles, Specialty and Certificates for your Team Member.
- Step 4: All done, click “Publish” to save the configuration.
Team Member Settings
- Team Member Information: Enter all information of Team Member as Image, name, position, phone, email and experience.
- Social Profiles:Enter your link social here. Leave blank if you don’t show Social for your Team Member.
- Specialty:Enter the description for your Team member specialty.
- Certificates:Enter the description for your Team member certificates.
Testimonials
Create New Testimonial
- Step 1: From Admin Panel, navigate to Testimonials > Add New
- Step 2: Enter testimonial title and description.
- Step 3: Select testimonial categories and add Featured Image on the right side.
- Step 4: Scroll down, you will see Testimonial Information section. Enter testimonial information here.
- Step 5: All are done, click Publish to save your configuration.
Testimonial Settings
- Email Enter testimonial email
- Position: Enter testimonial position.
- URL:Enter testimonial URL here.
- Special: Enter testimonial special here.
- Rating: Choose rating for testimonial.
- Rating: Choose rating for testimonial.
- Background Image: Choose background image for testimonial.
Portfolio
Create New Portfolio
- Step 1: From Admin Panel, navigate to Portfolio > Add New
- Step 2: Enter portfolio title and description.
- Step 3: Select Media Type, Portfolio Categories, Portfolio Tags and Featured Image on the right side.
- Step 4: Scroll down, you will see Excerpt and Custom Field section. Enter excerpt and custom field here.
- Step 5: All are done, click Publish to save your configuration.
Portfolio Page
To set up a page as Portfolio page on our demo website to show all portfolios such as 2 columns, 3 columns, you can create a new page. Then, use Yolo Portfolio shortcode and configure option in this shortcode. This shortcode will help you to create Product list page.
Footer Blocks
Footer Blocks custom post type will help you create particular footer style by using Visual Composer shortcode. You can install our sample data learn more about this.
Create New Footer Blocks
- Step 1:From Admin Panel, navigate to Organisk > Footer Blocks > Add New
- Step 2:Adding the content by using Visual Composer shortcode.
- Step 3:All done, click Publish to save your configuration.
WOOCOMMERCE PLUGIN
When WooCommerce plugin is installed in your WordPress website successfully, you are able to create online shop or product list page. Below is the guide to create Product or shop page using WooCommerce.
Create New Product
To create a new product, please follow these steps:
- Step 1: Navigate to Products in your WordPress admin sidebar.
- Step 2: Click Add New to make a new product. Create a title, and insert your product content in the editing field. You can use any of our shortcode builder elements inside the product.
- Step 3: Add Categories from the right side. To assign it to the product, check the box next to the category name.
- Step 4: Add Tags from the right side. Type the name of the tag in the field
- Step 5: Select featured image for product by hitting button “Set featured images”. You can then select product images to add into Product Gallery
- Step 6: Scroll down your mouse, you will see Product Data option. Remember to choose Product Data: Simple product.
- Step 7: Once you have finished, click “Publish” to save your product.
Shop Page
To set up a page as Shop page to show all products, create a new page. From admin panel, navigate to Woo Commerce > Settings
In Products tab, navigate to Display sub-tab on the top, here you can find your page from dropdown list to set as Shop page.
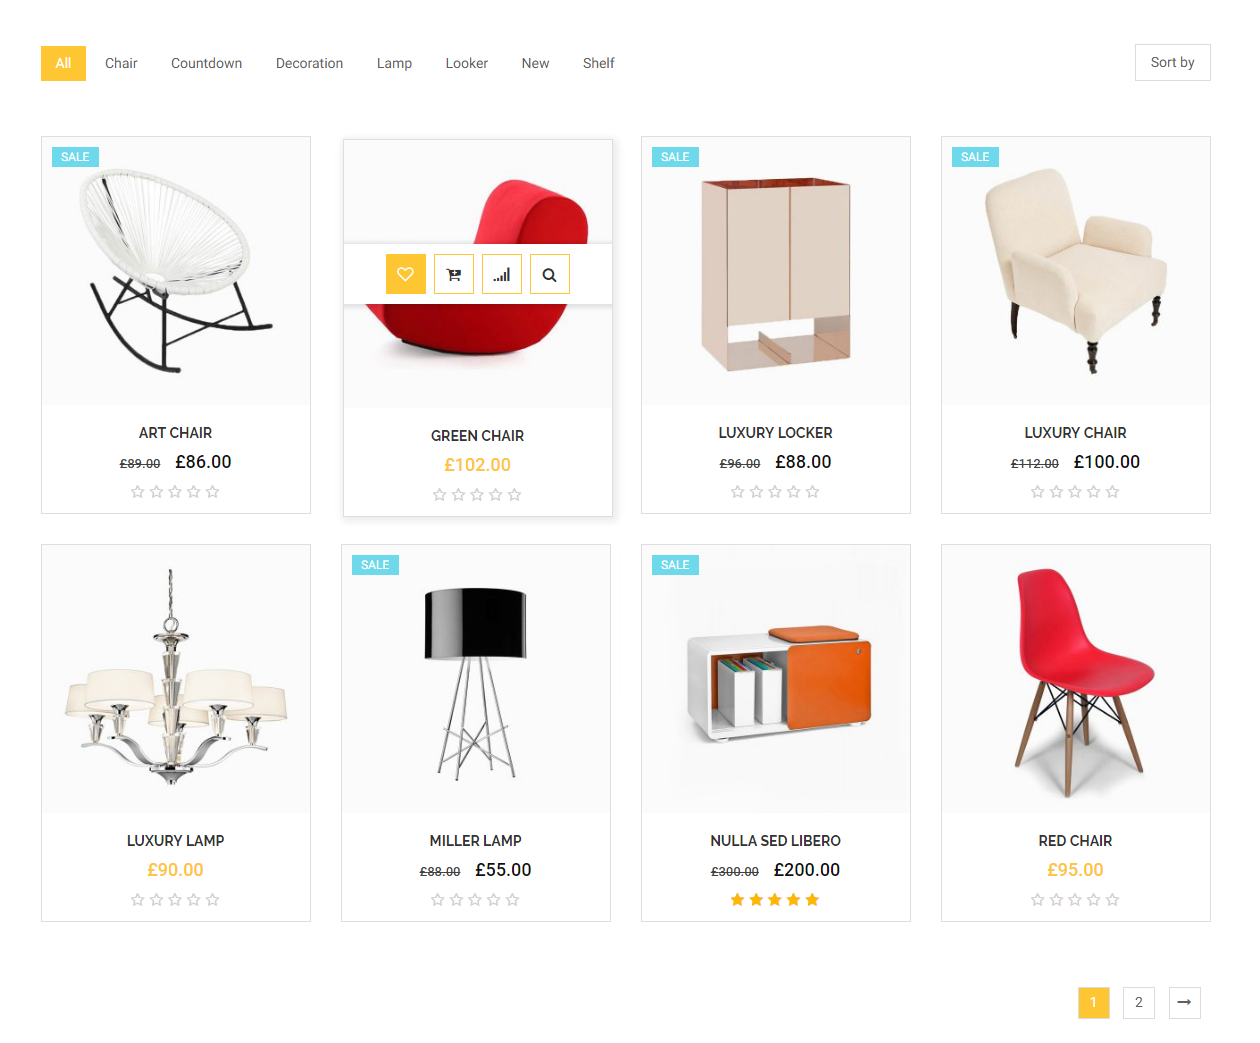
Product List Page
To set up a page as Product List page to show all products such as product list 2 columns, 3 columns, you can create a new page. Then, use Yolo Product shortcode and configure options on this shortcode. This shortcode will help you to create Product list page.
Organisk SHORTCODE
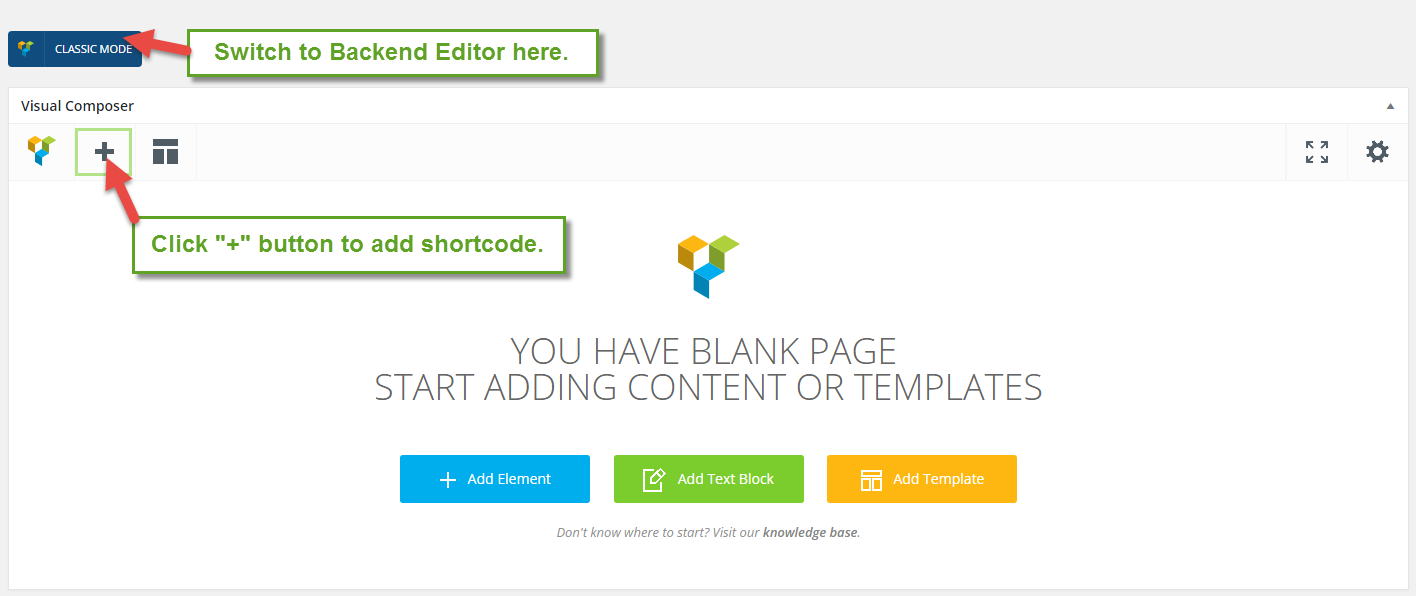
Instead of writing lines of code to build elements, we built Organisk with number of premade shortcodes that enable you to create many elements you see in our demo in fingertips.
By installing Visual Composer (the page builder plugin is integrated in the theme package), you will have the Visual Backend Editor where every shortcodes are displayed visually and easily generated with several clicks.
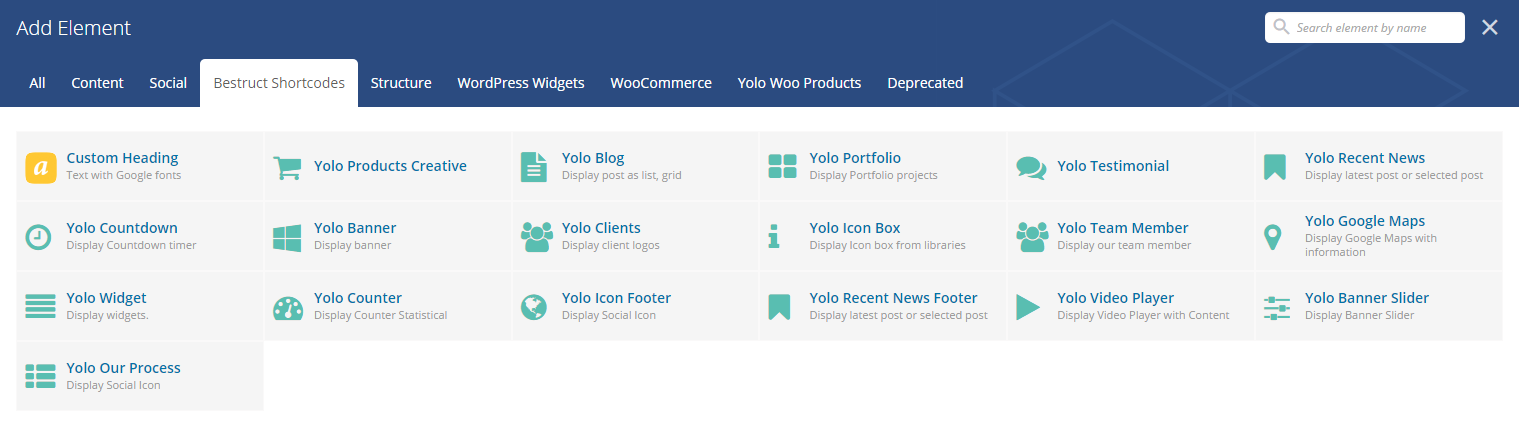
In addition to Default Visual Composer shortcodes, Organisk comes with 18 specific shortcodes. To generate these shortcodes, go to Backend Editor, click the “+” icon to add shortcode.
Navigate to Organisk Shortcodes to find a shortcode you want to use. You can add those shortcodes to any pages or posts for your own use.
Below are a list of 19 shortcodes and their artributes:
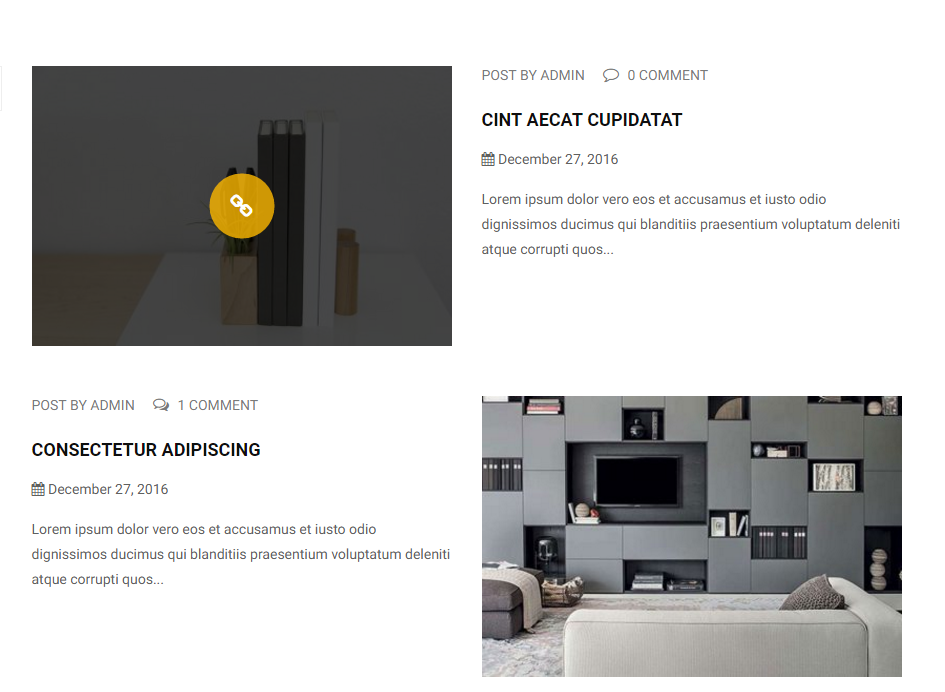
Yolo Blog
Use this shorcode will help you to build a blog paga such as Blog List, Blog Grid on our demo.
Detailed option:
- Layout Style: Select layout style from drop down list styles for blog page including: List(larger Image), List(Medium Image), Grid, Masonry.
- Narrow Category: - Select categories of post items displayed on blog page.
- Total items: Enter number of post which will be displayed on blog page.
- Display Type: Select display type from dropdown list types .
- Excerpt length: The number of characters displayed on post section.
- Extra class name: Enter class name if you want to customize this shortcode.
- Order By:- select - You can arrange your posts following to different order criteria.
- Sorting:- select - Arrange your posts in ascending or descending order regarding to order criteria you set above.
- CSS Animation:- select - Select types of animation if you want to be animated when it enters into the browsers viewport.
Yolo Portfolio
Yolo Portfolio shortcode will help you to build Portfolio page.
- Thumbnail type: Select type of thumbnail from drop down list.
- Portfolio Title: Select portfolio title style from drop down list to display portfolio title.
- Overlay Style: Select overlay style for portfolio.
- Overlay Effect: Select overlay effect for portfolio
- Hover Dir Effect: Turn On/Off hover effect for portfolio.
- Columns: Select columns to display portfolio item on portfolio page.
- Source: Choose portfolio source including Portfolio Category or Portfolio Item.
- Show Filter: Choose portfolio filter.
- Filter By: Choose filter by tags,categoy for portfolio.
- Show Paging: Choose paging.
- Number of item:The number of portfolio items will be displayed on portfolio page.
- Order Post Date By: Choose ordering.
- Padding: Select padding from drop down list.
- Extra class name: Enter class name if you want to customize this shortcode.
- CSS Animation:Select types of animation if you want to be animated when it enters into the browsers viewport.
Yolo Testimonial
Use this shortcode to build testimonial on front page.
Detail option:
-
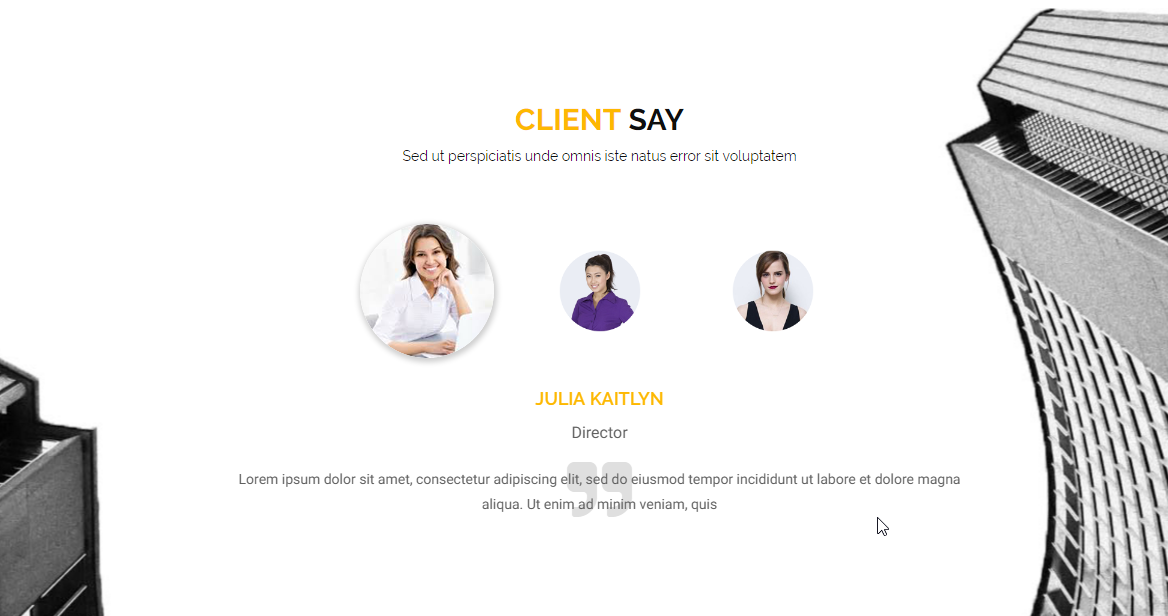
Layout Style: -select- Select layout style for testimonial including Carousel, Carousel 2, Carousel 3 and Carousel 4
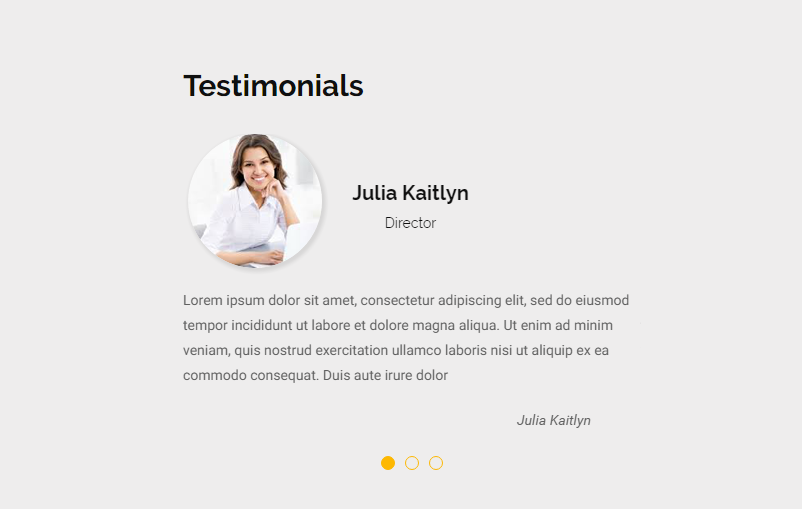
Carousel 2
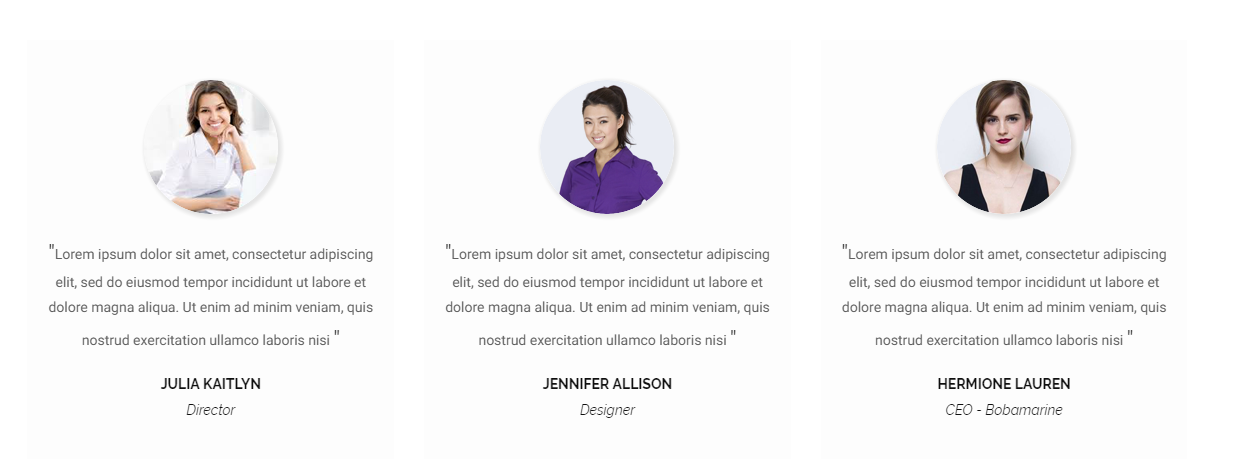
Carousel 3

Carousel 4
- Source: - select - Choose source from testimonial categories or testimonial IDs.
- Order Post Date By: - select - Choose the sorting order including Descending or Ascending.
- Excerpt Length: - number - Enter excerpt length.
- Auto Play: - Yes/No - Turn On/Off auto play testimonial.
- Slide Durations: - number - Enter slide durations.
- Extra class name: - string - Enter class name to customize this shortcode.
- CSS Animation: - Yes/No - Select types of animation if you want this element to be animated when it enters into the browsers viewport.
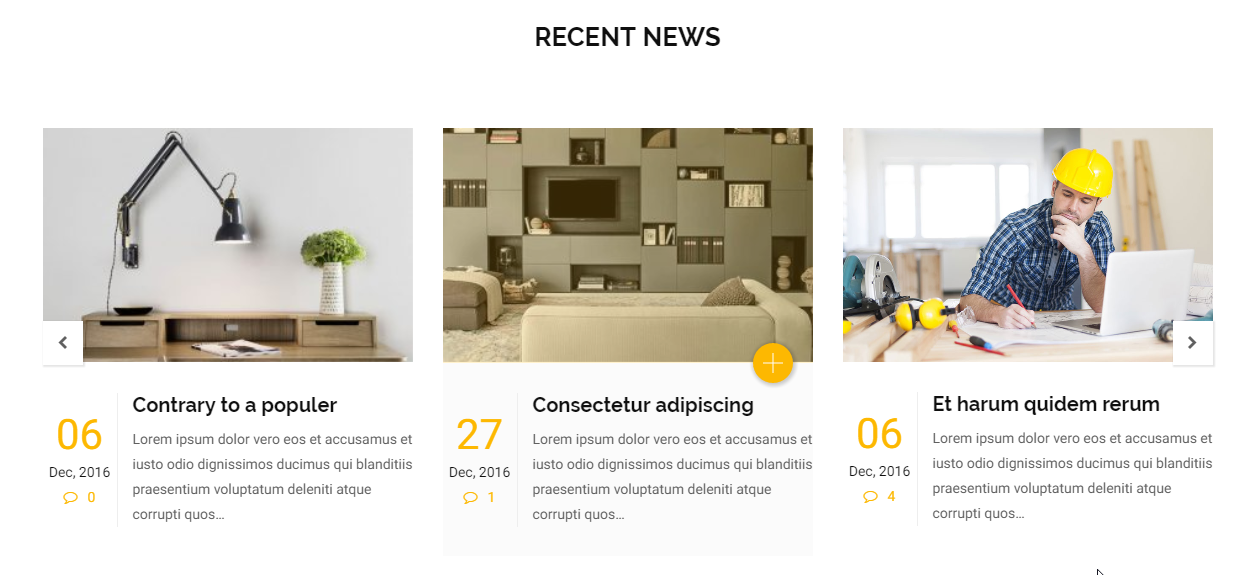
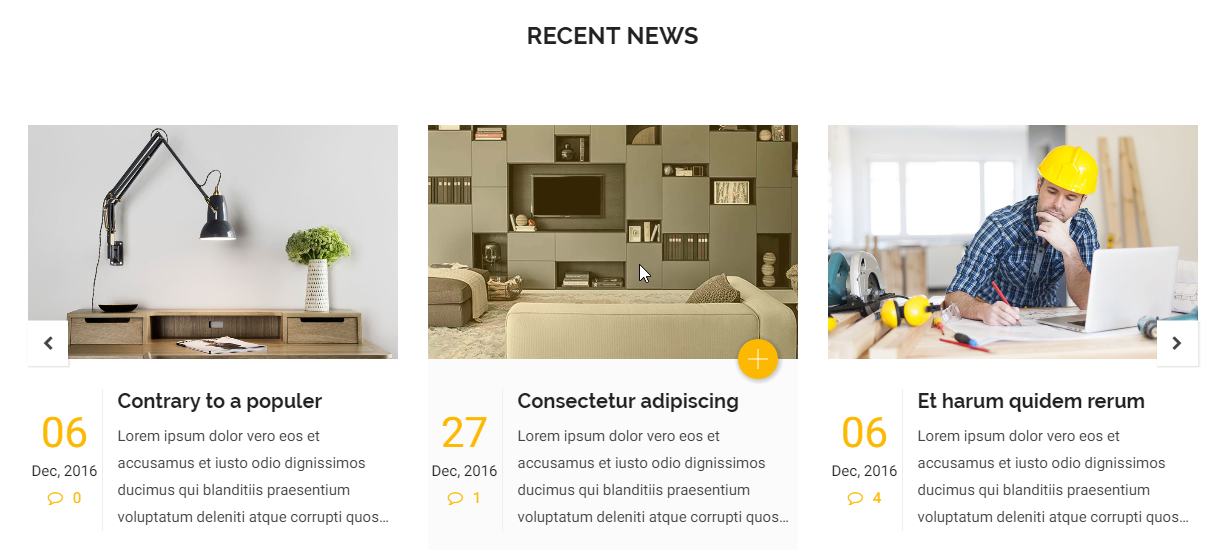
Yolo Recent News
Use this shortcode to display recent posts on your page.
Detailed option:
-
Choose Layout: - select - Select layout style for Yolo Recent News shortcode including Construction Home, Architecture-Home, Project-Home, Classic-Shop-Home, Classic-Shop-Home, Decor-Shop-Home.
Construction Home
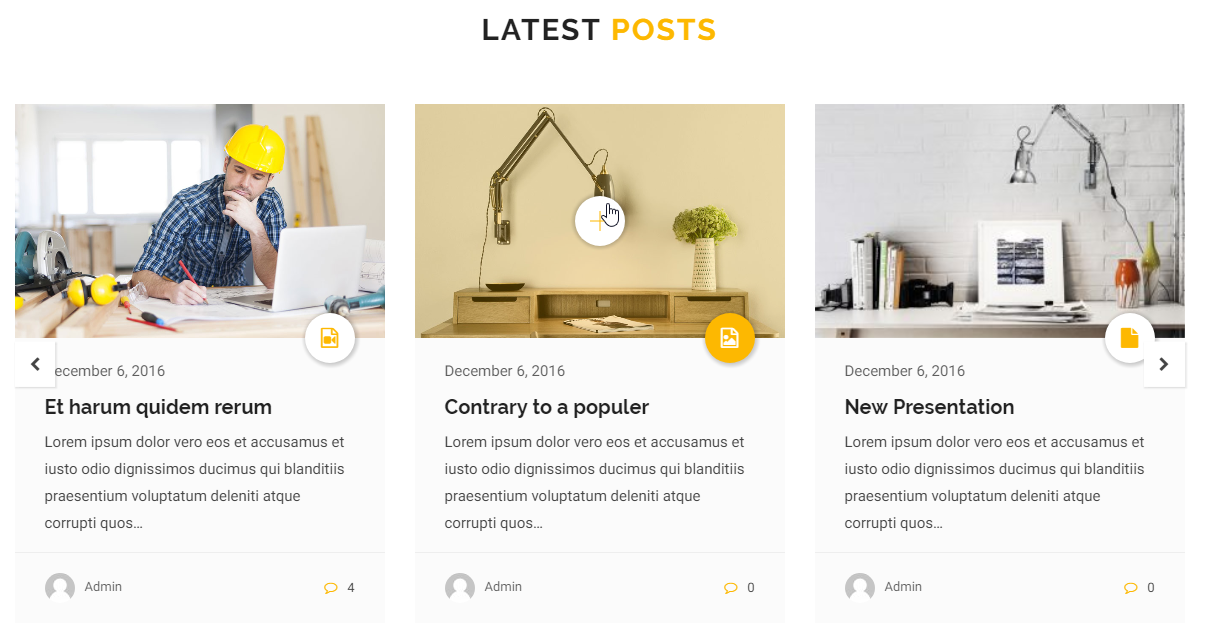
Architecture-Home

Project-Home

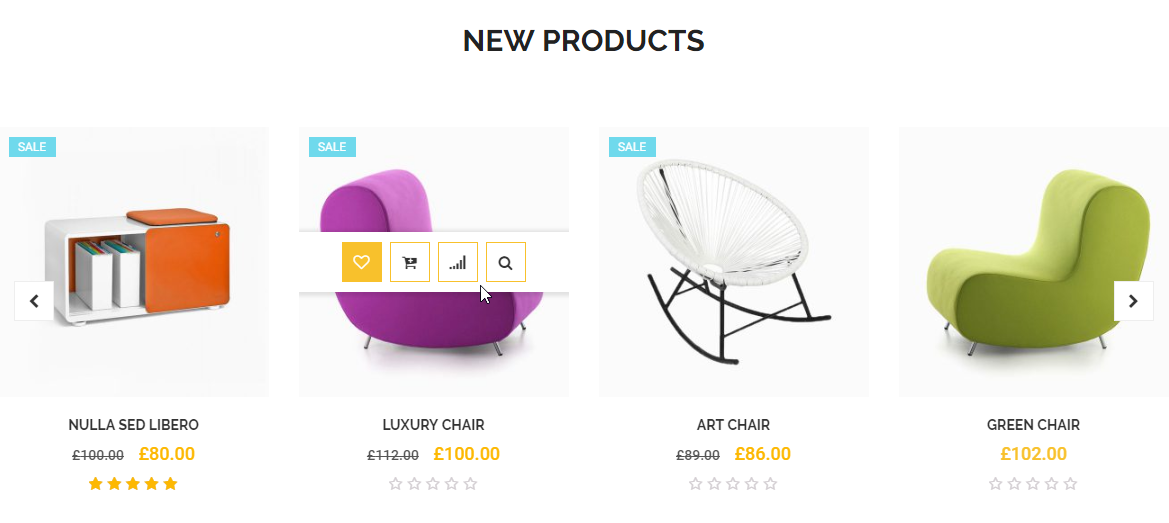
Classic-Shop-Home
Decor-Shop-Home
- Select Categories: - select - Select categories to display posts on your page.
- Number of Columns: - select - The column attribute controlling the width of columns should be displayed.
- AutoPlay: - select - Turn On/Off auto play.
- Slide Durations: - number - Enter slide durations.
- Posts Per Page: - number - Choose the number of posts that will be displayed per page.
- Excerpt Length: - number - The number of characters displayed on post description.
- Extra class name: - string - Enter extra class to customize this shortcode.
- CSS Animation: - select - Select types of animation if you want this element to be animated.
Yolo Countdown
Use this shortcode to display countdown on Original Home and Home Shop 4.
Detailed option:
-
Choose layout: - select - Select style layout for countdown shortcode.
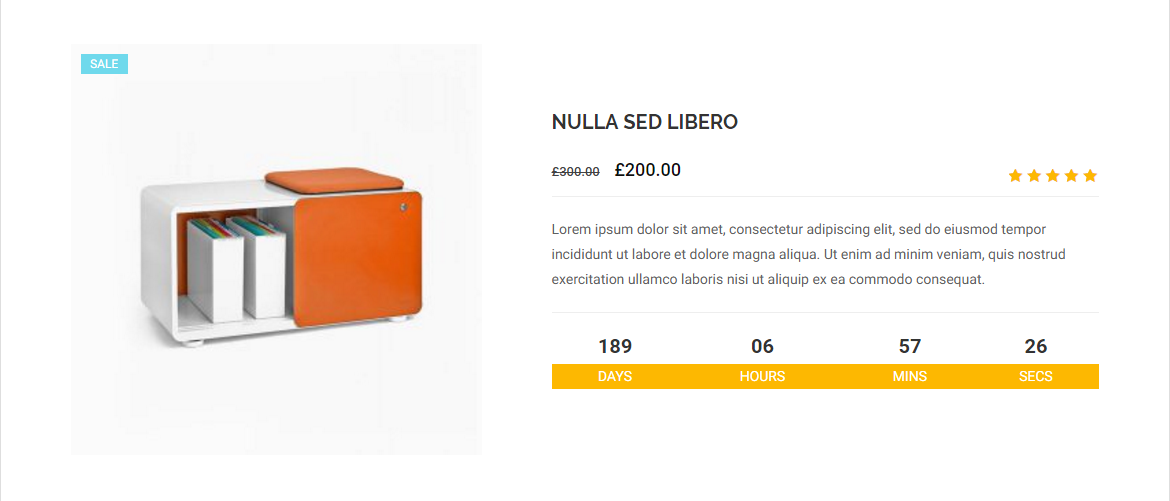
Number
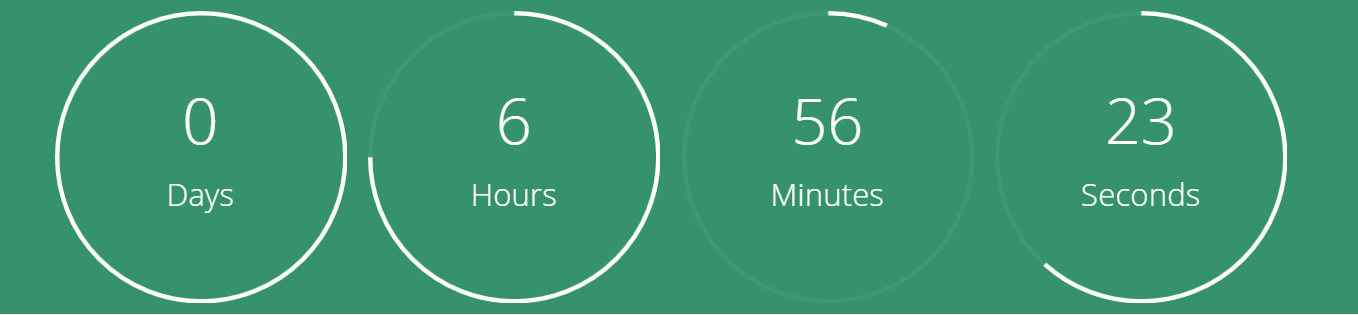
Circle
- Extra Class name: - string - Enter class name to customize this shortcode.
Yolo Banner
Use this shortcode to display banner on front page.
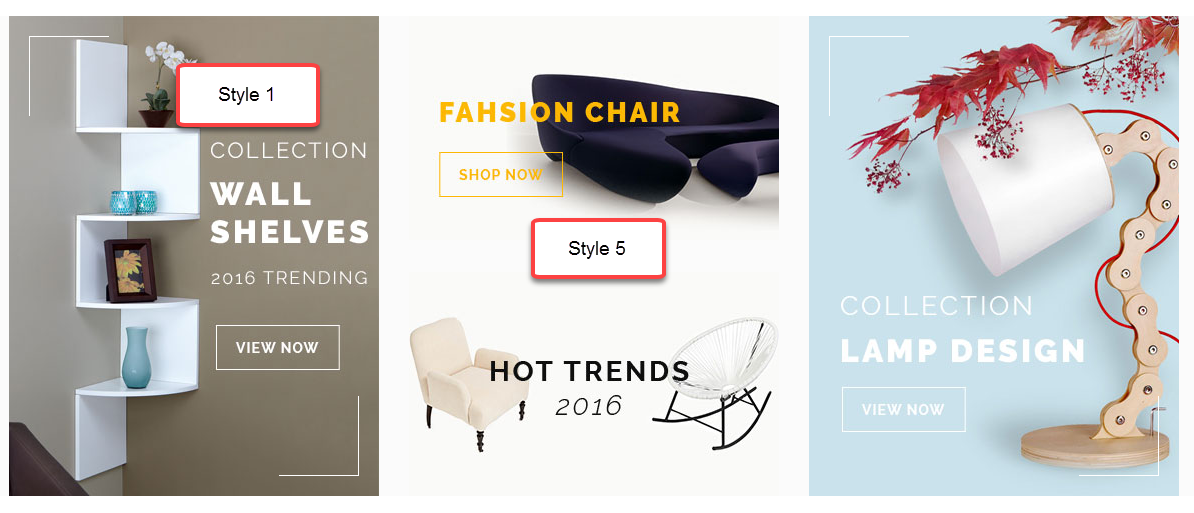
Detail option:
- Layout Style: - select - Select layout style for banner shortcode. There are 5 layout styles you can choose.
- Border Color - select - Select color for border color.
- Link: - select - URL is redirected when visitors click the banner.
- Banner's Images: - select - Select banner's image for banner shortcode.
- Extra Class Name: - string - Enter extra class to customize this shortcode.
- CSS Animation: - select - Select types of animation for this shortcode.
Yolo Icon Box
This shortcode will help you to show icon box on front page.
Detailed option:
- Layout Style - select - Select layout style for Yolo Icon Box from drop down list.
- Icon Library: - select - Choose icon library from Font Awesome, Open Iconic, Typicons, Entypo, Linecons and custom image
- Icon: - select - Choose the icon from drop down list icons.
- Title: - string - Enter title here.
- Link: - URL - Choose URL when visitors click icon.
- Description: - string - Enter description here.
- Extra Class Name: - string - Enter extra class to customize this shortcode.
- CSS Animation: - select - Select type of animation if you want this element to be animated when it enters into the browsers viewport.
Yolo Team Member
Use this shortcode to display Team Member on front page.

Detailed option:
- Source: - choose - Choose from category or From member IDs.
- Select Teammember: - select - Select members that will display.
- Layout Style - select- Select layout style for Team Member include Style 1, Style 2, Style 3.
- Choose Style: - choose - Choose the Slider or the Grid style.
- Members per slide: - number - Choose the number of Members that will be displayed per page.
- Order Post Date By:- choose- Choose order post date by Descending or Ascending
- Background Image: - choose- Choose white or Gray
- AutoPlay: - choose- Turn On/Off auto play..
- Slide Duration(ms):-number- Enter slide durations.
- Extra class name: - string - Enter extra class to customize this shortcode.
- CSS Animation: - select - Select types of animation if you want this element to be animated.
Yolo Google Maps
Use this shortcode to display google maps on front page.

Detailed option:
- Choose style layout: - select - Select style layout for map.
- Choose style map: - select - Select map style for map.
- Infor window title: - string - Enter the information in this option.
- Map height: - number - Enter the height of map.
- Latitude: - number - Get latitude from here: https://www.google.com/maps
- Longitude: -number- Get longtitude from here: https://www.google.com/maps
- Zoom: - number - Enter zoom here..
- Image to replace marker: - image - Select the image to replace the original map marker (optional)..
- Extra class name: - select - Select font family.
- CSS Animation: - select - Select types of animation if you want this element to be animated when it enters into the browsers viewport.
Yolo Widget
Use this shortcode that get your widget for footer page.
Detailed option:
- Sidebar: - select - Select widget area to display.
- Extra class name: - select - Select font family.
- CSS Animation: - select - Select type of animation if you want this element to be animated when it enters into the browsers viewport.
- Style: Select style for display statistical.
- Icon Image: - select - Select icon image.
- Title: - string - Enter text for counter title.
- Number: - number - Enter number of statistical. Example 1466.
- Extra Class name: - string - Enter the class name to custom this shortcode.
- Choose layout: - select - Select layout style for shortcode including Style 1, Style 2, Style 3 and Style 4.
- Icon color: - select - Select color for icon.
- Icon size: - number - Enter icon size ( Example:18px).
- Title color: - select - Select color for the title.
- Icon Footer: - create - Please create Icons that will display on your site.
- Extra class name: - string - Enter the class name to custom this shortcode.
- Choose layout: - choose- Choose layout Footer V1 or Footer V2.
- Background layout: - choose- Choose background layout for this shortcode including White or Dark.
- Select Category: - select - Select categories that will display on your site.
- Show Author(Date, Comment, Excerpt): - On/Off - Tick the box some informations that will show/hide them on the post.
- Posts per page: - number - Choose the number of posts that will be displayed per page..
- Extra Class Name: - string - Enter class name if you want to custom this shortcode.
- Style: - select - Select the style for shortcode including Style 1, Style 2 and Style 3.
- Heading: - text - Enter text for heading line.
- Heading Color: - select - Select the color forthe heading.
- Subheading: - text - Enter text for subheading line.
- Subheading Color: - select- Select color for subheading
- Extra Class Name: - string - Enter class name if you want to custom this shortcode.
- Choose layout: - choose- Choose layout for the banner silde including Style 1 or style 2.
- Banner Slider: - create - Please create some banner( ex: enter the name, sub-title, image, the link ...) that will display on your site.
- AutoPlay: - choose -Turn On/Off auto play...
- Slider Duration (ms): -number- Enter slide durations.
- Extra class name:- string - Enter class name if you want to custom this shortcode.
- Choose layout: - select - Select layout for Our Process including Style 1, Style 2, Style 3 and Style 4.
- Select number step: -select- Select number step.
- Our Process: - Create - Create the step for Our Process..
- Extra class name: the step for Our Process.
Yolo Counter
Use this shortcode to show counter on your page.

Detailed option:
Yolo Icon Footer
This shortcode displays on your site.
Detailed option:
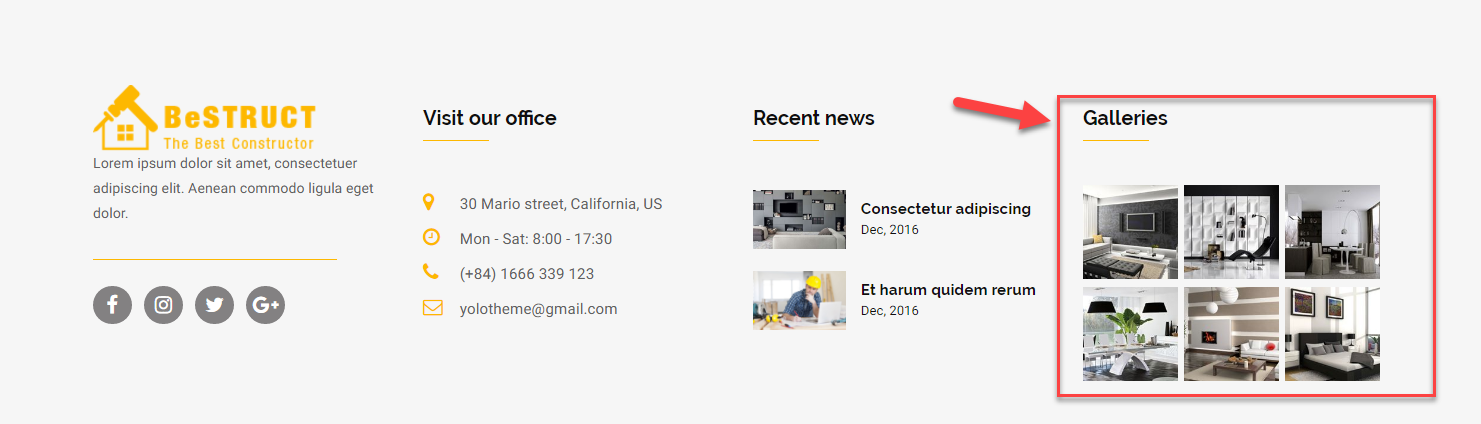
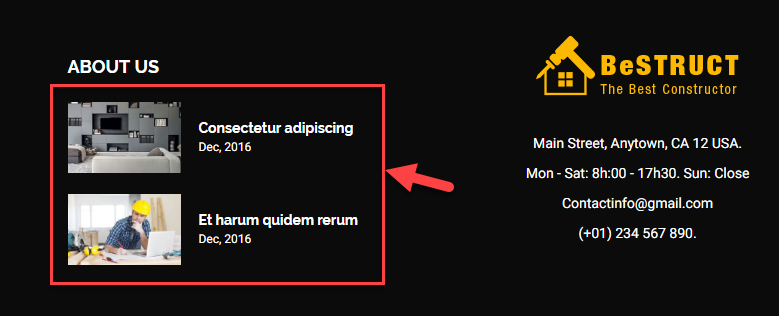
Yolo Recent News Footer
Use this shortcode to show recent product on front-page.
Detailed option:
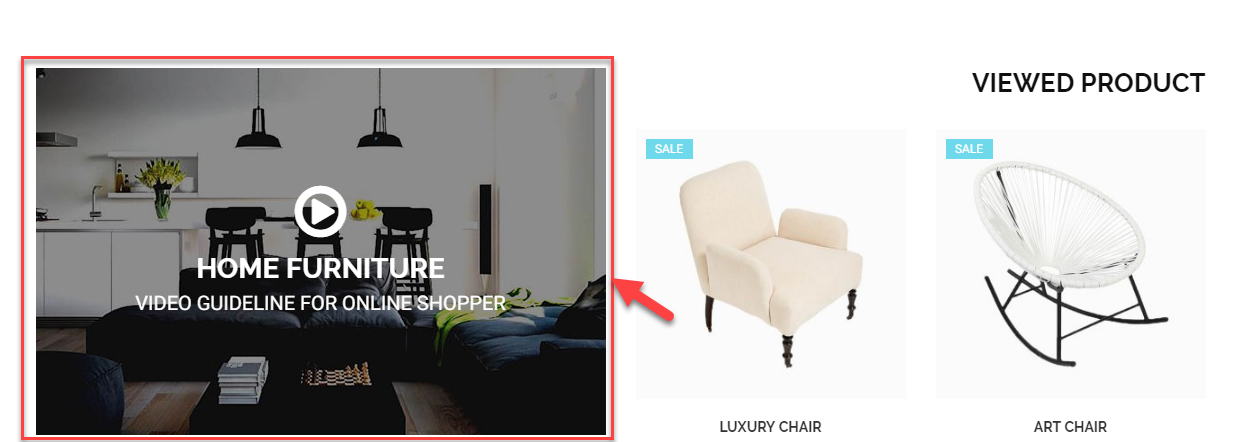
Yolo Video Player
Detailed option:
Yolo Banner Slider
Use this shortcode to display banner slider on front page

Detailed option:
Yolo Our Process

Detailed option:
SIDEBAR & WIDGETS
Organisk allows you to create an unlimited number of sidebars. Each page or post can come with an unique sidebar. It is really easy to choose a sidebar for page/ post, you can go to Page Options section > Page Layout > Left Sidebar/ Right Sidebar to select a Sidebar from dropdown list on sidebar. You may need to create some separate sidebars to use for different pages and posts. Follow these steps to generate a sidebar and add widgets to it.
Create A Sidebar
Follow these steps to create a sidebar
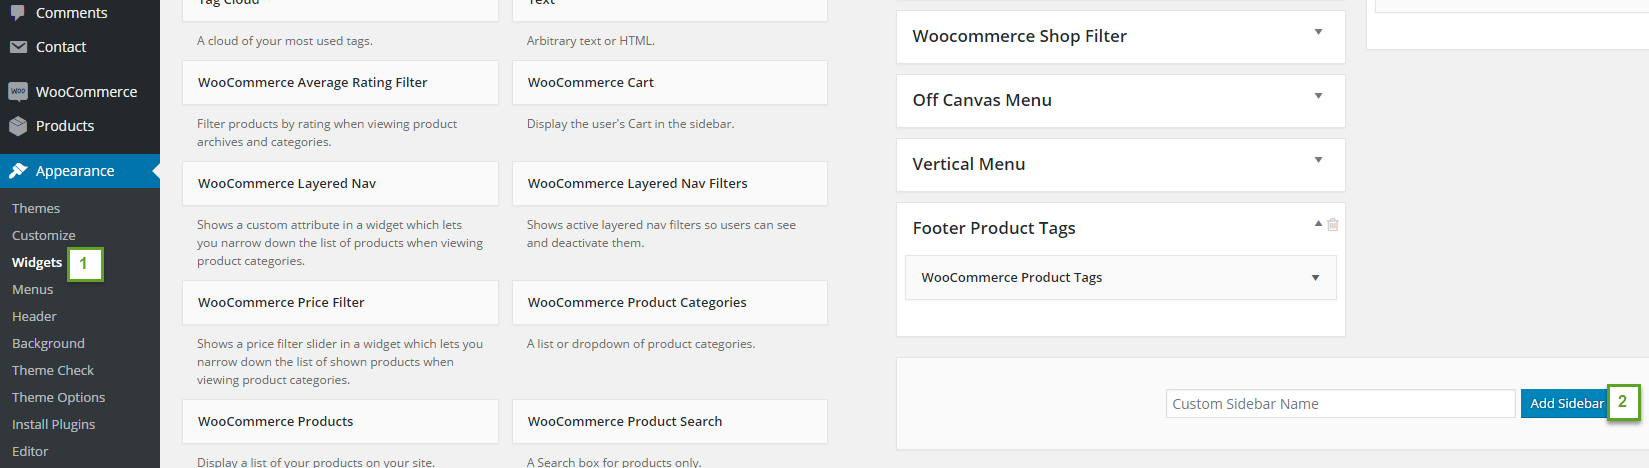
- Step 1: Navigate to Appearance > Widgets > Give a sidebar name, then click Add Sidebar button in the right side.
- Step 2: All are done, you will have a sidebar position in the right side. Now, you can add widgets for your sidebar.
Add Widgets to Sidebar
You can add any widgets and any number of widgets to your sidebar. All widgets are accessible from Appearance> Widgets and easily dragged and dropped to your sidebar.
- Step 1: Navigate to Appearance > Widgets to get access to the list of widgets and widget section that they can be added. All widgets you can use will be displayed in the left hand side. All different sections you can add widgets to will be displayed in the right hand side.
- Step 2: Simply drag and drop the widget you want into the widget sections in the right hand side.
- Step 3: Do not forget to click save changes after you customize any widgets in sidebar.
Yolo Widgets
Besides default widgets of WordPress, Organisk created a lot of widgets which will help you to easily customize your page. Follow these descriptions to learn more about each widget.
Yolo Social Profile
Use this widget to display social profile on Footer Social position.

Upcoming Events
Use this widget to display events on Single Event sidebar.
Class Yoga Widget
Use this widget to display classes on Class List sidebar..
NEWSLETTER
Create Newsletter Form
Please make sure that you have installed Contact Form 7 before, then follow these steps to create newsletter page.
- Step 1: Go to Contact > Add New to create a contact form with fields having these names:
- your-email
- submit
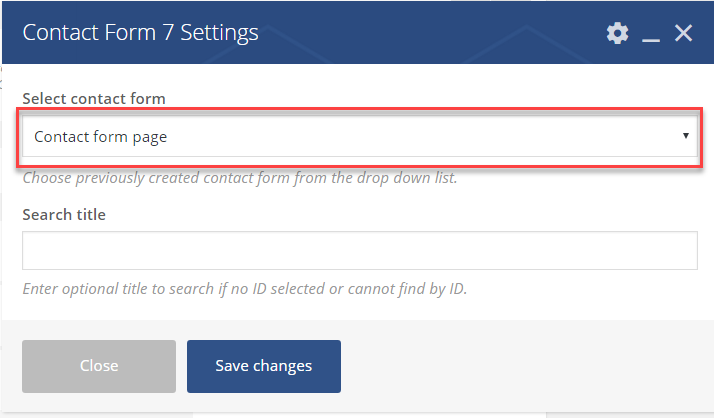
- Step 2: Go to Pages > Add New > Add Contact Form shortcode to your page > Select contact form option. You can choose previously created contact form from the drop down list.
- Step 3: Publish page and you will have the Newsletter form as below:
Here is an example of Newsletter Form:
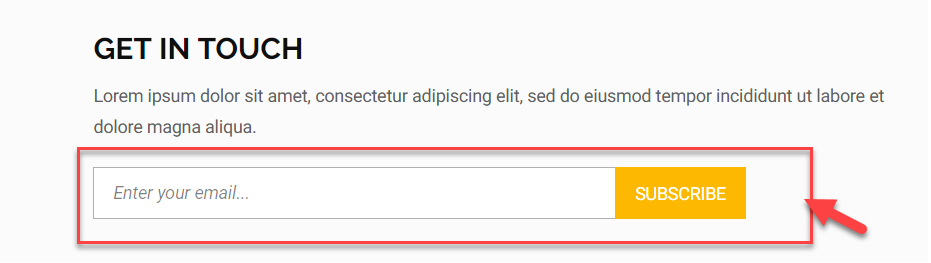
Newsletter Form Style
Organisk supports 4 Newsletter Form Styles for your website. With each Newsletter Form Style, we declare a class. Each class has separate CSS style, you can easily to use one of classes to your website.
Follow lists below learn more about Newsletter Form Styles:
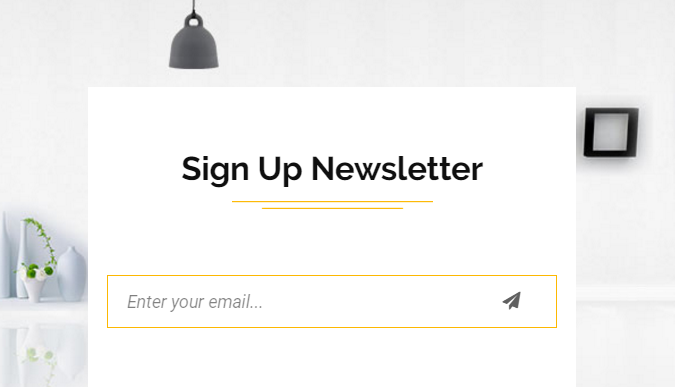
- Home-1: class="home-1"- This form will be displayed on Home 1
- Home-2: class="home-2". This form will be displayed on Home 2
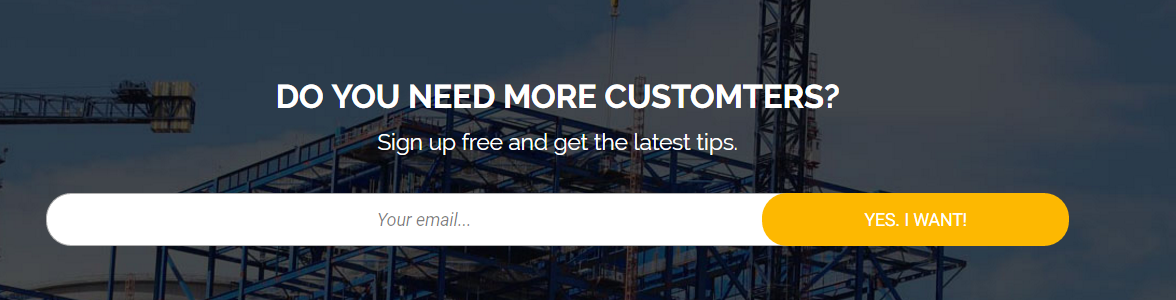
- Home-5: class="home-5". This form will be display on Home Business 1.
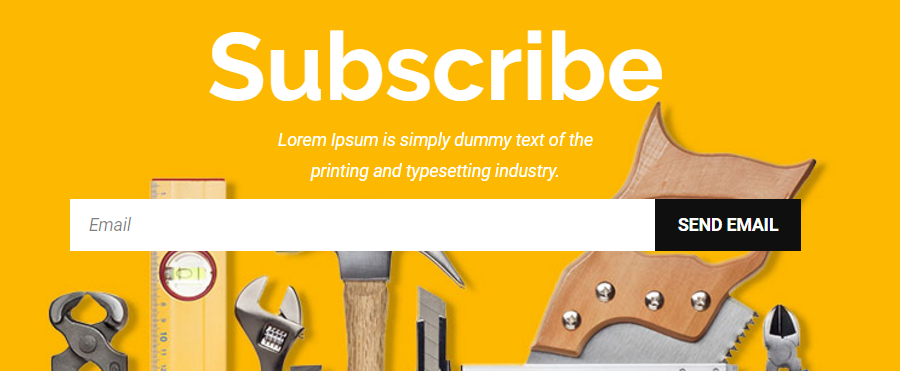
- Home-6: class="home-6". This form will be display on Home Business 2.
Form:
Front Page:
Form:
Front Page:
Form:
Front Page:
Form:
Front Page:
FOOTER
How to add a footer block to page
Please follow these steps to how to add a footer block to page
- Step 1: From Admin Panel, navigate to Footer Blocks > Add New to create a new footer block.
- Step 2: Add content to footer block. You can use shortcodes of Visual Composer to add your content as you want.
- Step 3: Click Publish to save configuration.
- Step 4: Assign Footer Block to page.
- There are 2 ways which you can use to assign a footer block to your page:
- 1 - If you want all pages of your website will be received a footer block only: Please go to Theme Options > Footer> Select Footer Block > Choose a footer block from drop down list.
- 2 - If you want each page of your website will be received a different footer block: Please open your page > Scroll down you will see Page Option section > Page Footer > Select Footer > Choose a footer block from drop down list. If you choose Default style, footer will be overridden on Theme Option.

Edit Footer Block
If you have imported our sample demo data, a lot of Footer blocks are available, you can go to Footer Blocks to see all Footer Blocks or edit them.
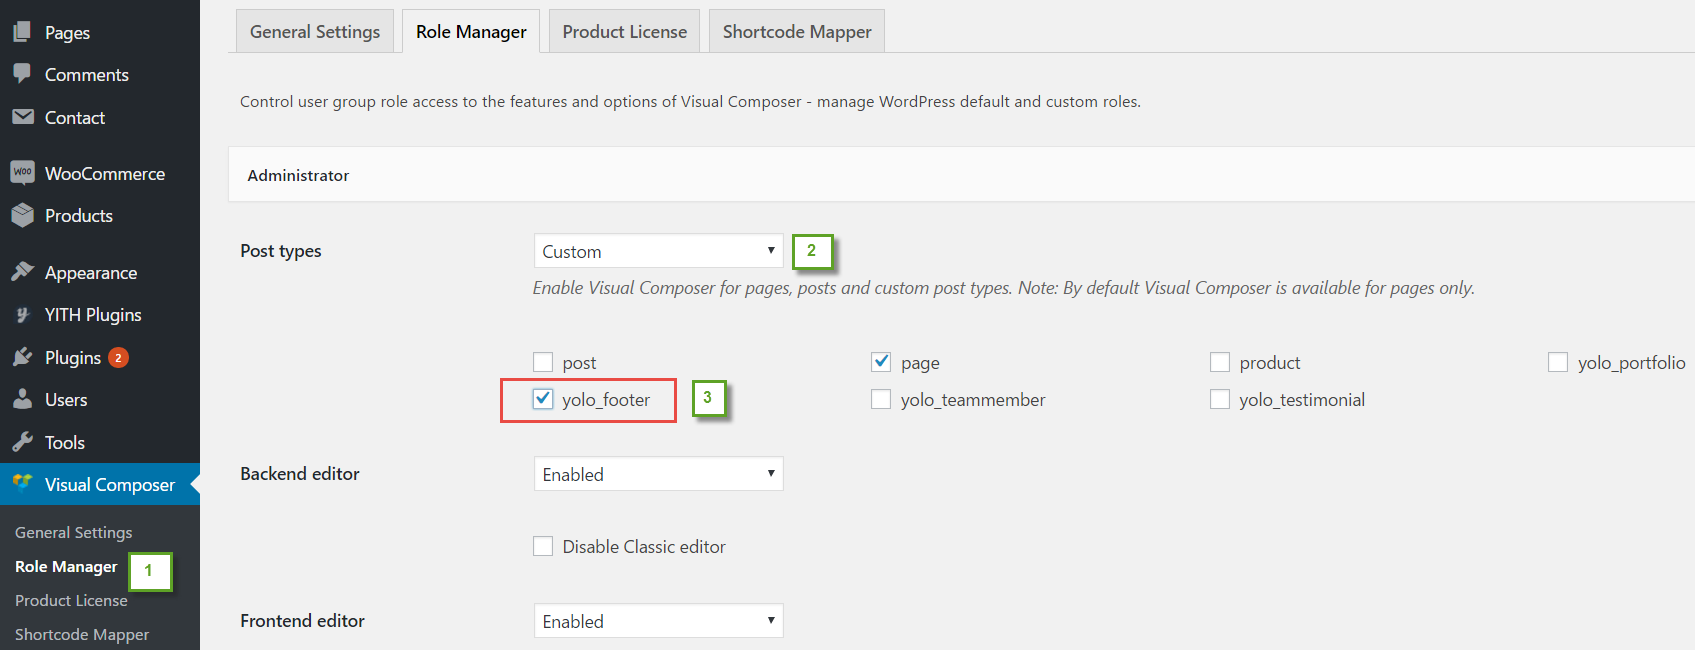
In addition, we used Visual Composer shortcodes to build Footer Blocks. To turn on Visual Composer shortcodes on Footer Blocks, navigate to Visual Composer > Role Manager > Posts type : Custom > Check yolo_footer checkbox.
TRANSLATION
Organisk is a WMPL – compatible and multi- language ready theme. To translate this theme, follow these steps below
- Step 1: Download and install PoEdit tool.
- Step 2: Open PoEdit and open the .po file of your preferred language in PoEdit and search your line you want to change. To do this, select the Edit button > Find option.
- Step 3: In the Search Window, type the text string you are looking for. Once it is selected, replace the text in the Translation text area in the lower part of the window with your preferred translation.
- Step 4: If you’d like to edit another text string, just repeat Steps 1 to 2.
- Step 5: Click “Save” to save configuration. The .mo file will be auto created.
- Step 6: Finally, you need to rename of .mo file with Code Name of your language. Please see the language code list HERE
- Step 7: Navigate to Settings > General > Site Language to select your language.
For example de_DE.mo for German – Deutsche
SUPPORT
When you come to this section, we hope that you found all the information provided in this documentation helpful and you have finished installing and polishing your site as what you have imagined of. After reading carefully this guide, if you still need any helps, don’t hesitate to contact us at Yolo Support Center. You will be asked to create an account if you are new to us and enter purchase code to post a topic for support. To get your purchase code, please login to your ThemeForest account, navigate to “Downloads”, click the “Download” button on the left side of our theme, choose “License Certificate” to download the license file where you can find the purchase code.
Please be noted to post a topic with your issues be clearly clarified. It is recommended you send us together with link of your site and your admin account. These will help to save time for both of us. Finally, please be patient. It will take us some time to check all the topics and we will solve topics from older to newest.
Hopefully, you will enjoy using Organisk! Thank you for choosing our theme.